The RC Geek Blog
By: Chris Wolfe
Phreewing's "Rhino," TRCG Target Drone Edition...
Well, in full disclosure, this article started close to two years ago now after purchasing the Freewing F-4 Phantom in the second batch of releases. So why did take so long?...well, it's a myriad of things really. First of all, I'm a glutton for punishment. I liked the airplane so much and being unable to leave well enough alone (not to mention with some kind ribbing from my friends) I just had to do a full refinish on the airplane. Well, shortly after filling all of the panel lines, we sold our house and moved into a new one which put a halt to most modeling for a few months. After the move, I actually almost sold the airplane because after all that, I had a tough time just getting back to it. Well, not to be defeated, I decided it was necessary to finish up the project and I have since acquired a bunch of flights on the airplane with both 6s and 8s power. And so, here we are!
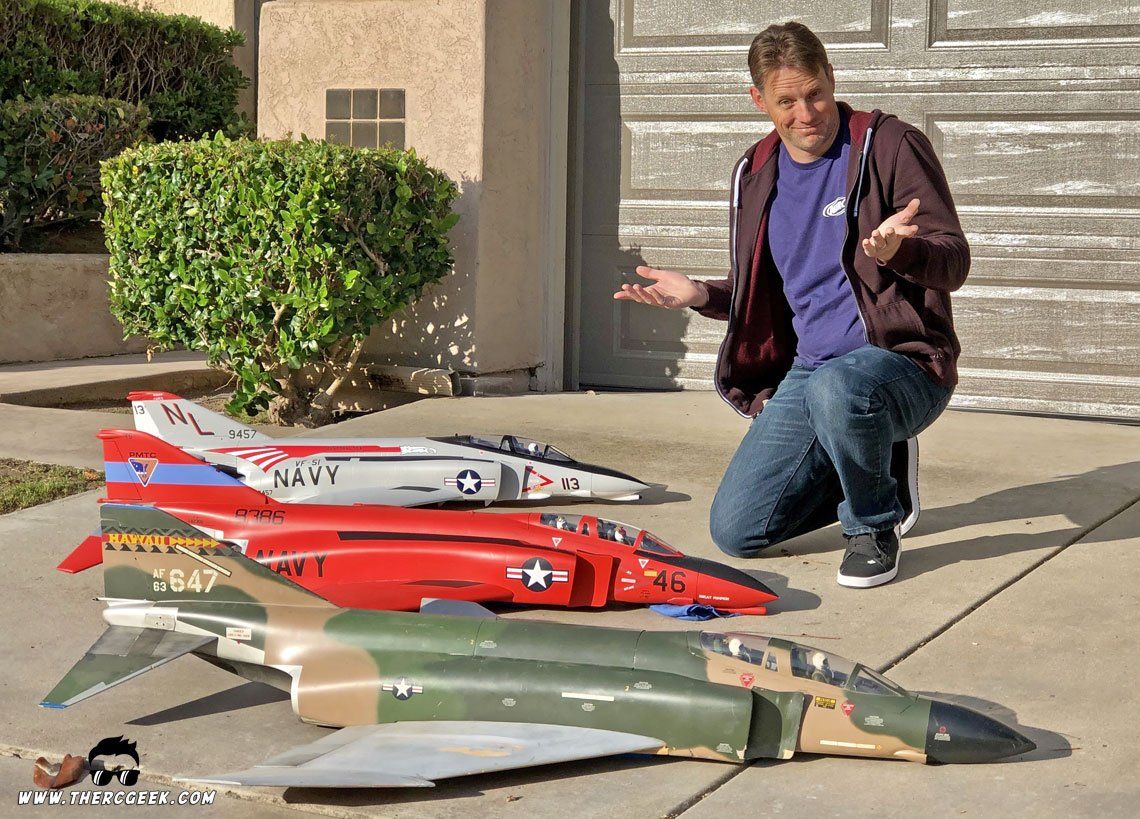
The funny thing is, since finishing the project (after almost selling it), I've been kind of on an F-4 Phantom kick having reviewed the E-flite F-4 and then also acquiring a mostly built Jet Hangar Hobbies 1/10 scale F-4 to accompany my other half built JHH F-4 Phantom sitting in my storage racks…what can I say, a collector never stops collecting! ;)
AIRCRAFT ASSEMBLY NOTES
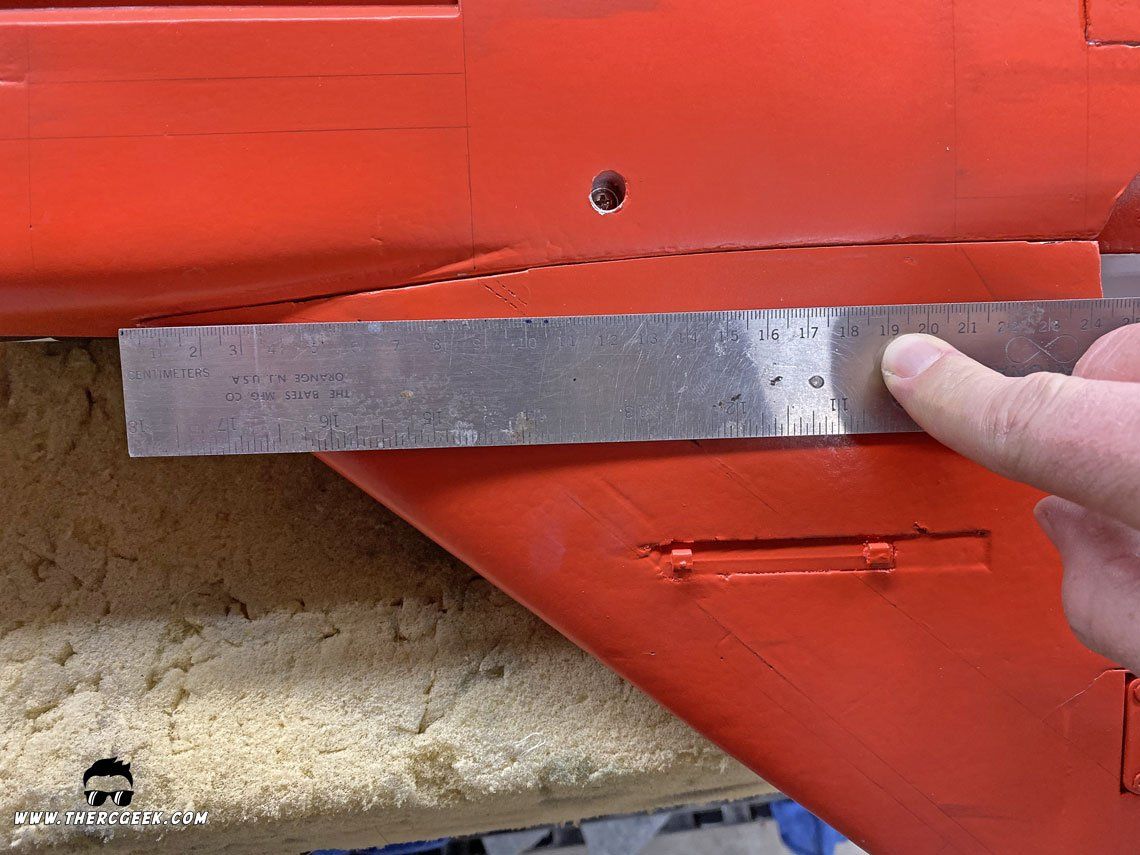
The assembly of the Freewing F-4 Phantom II was quite straight forward as a whole. No major issues were noted and the fit of everything was good. The fuselage comes in two pieces, so the first step is to glue the back end onto the airplane and frrom there the tails and wings are installed. The anhedral tails slide onto knurled shafts and are held in place with a screw on each tail. So, it is recommended to ensure that the tails are aligned the same left to right before fully tightening them down. Sighting at the trailing edges from the back of the airplane can help ensure the alignment is symmetrical.


On the bench, the airplane looks very good, especially in the Southeast Asia camouflage. The colors look generally right and Freewing has done a good job on the shape as it most certainly looks the part very well. It's not 100% accurate, but they are things that only the scale purist (like myself…) would notice. I do wish that the struts were a little more scale as all of the landing gear are trailing link for grass operations. I understand the reason, but unfortunately this results in short shooter main doors that aren't quite shaped right either. So on the ground, the airplane is wearing high water Poindexter pants. ;) Just needs a pocket protector to complete the look. :p


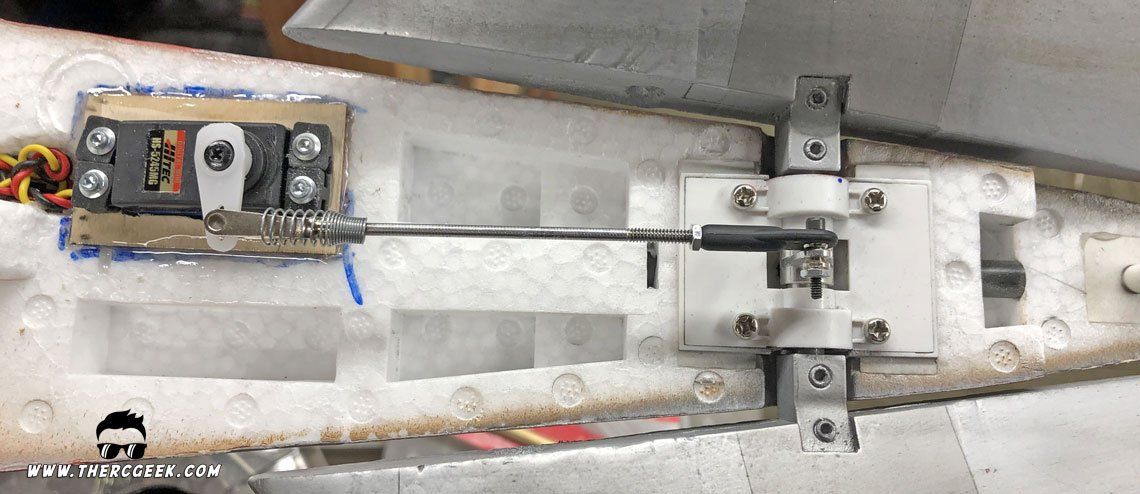
I have found that the general quality of the components has been quite good. However, I wasn't happy with the elevator servo performance from the get go. Though it worked, it had more slop than I liked and I didn't have great confidence in the torque it provided. So, to remedy that, I replaced the servo with a Hitec HS 5245MG servo along with a Du-Bro 4-40 push rod. That most certainly put to rest any concerns. The stab pivot frame is plastic, so a periodic check on that is not a bad idea.
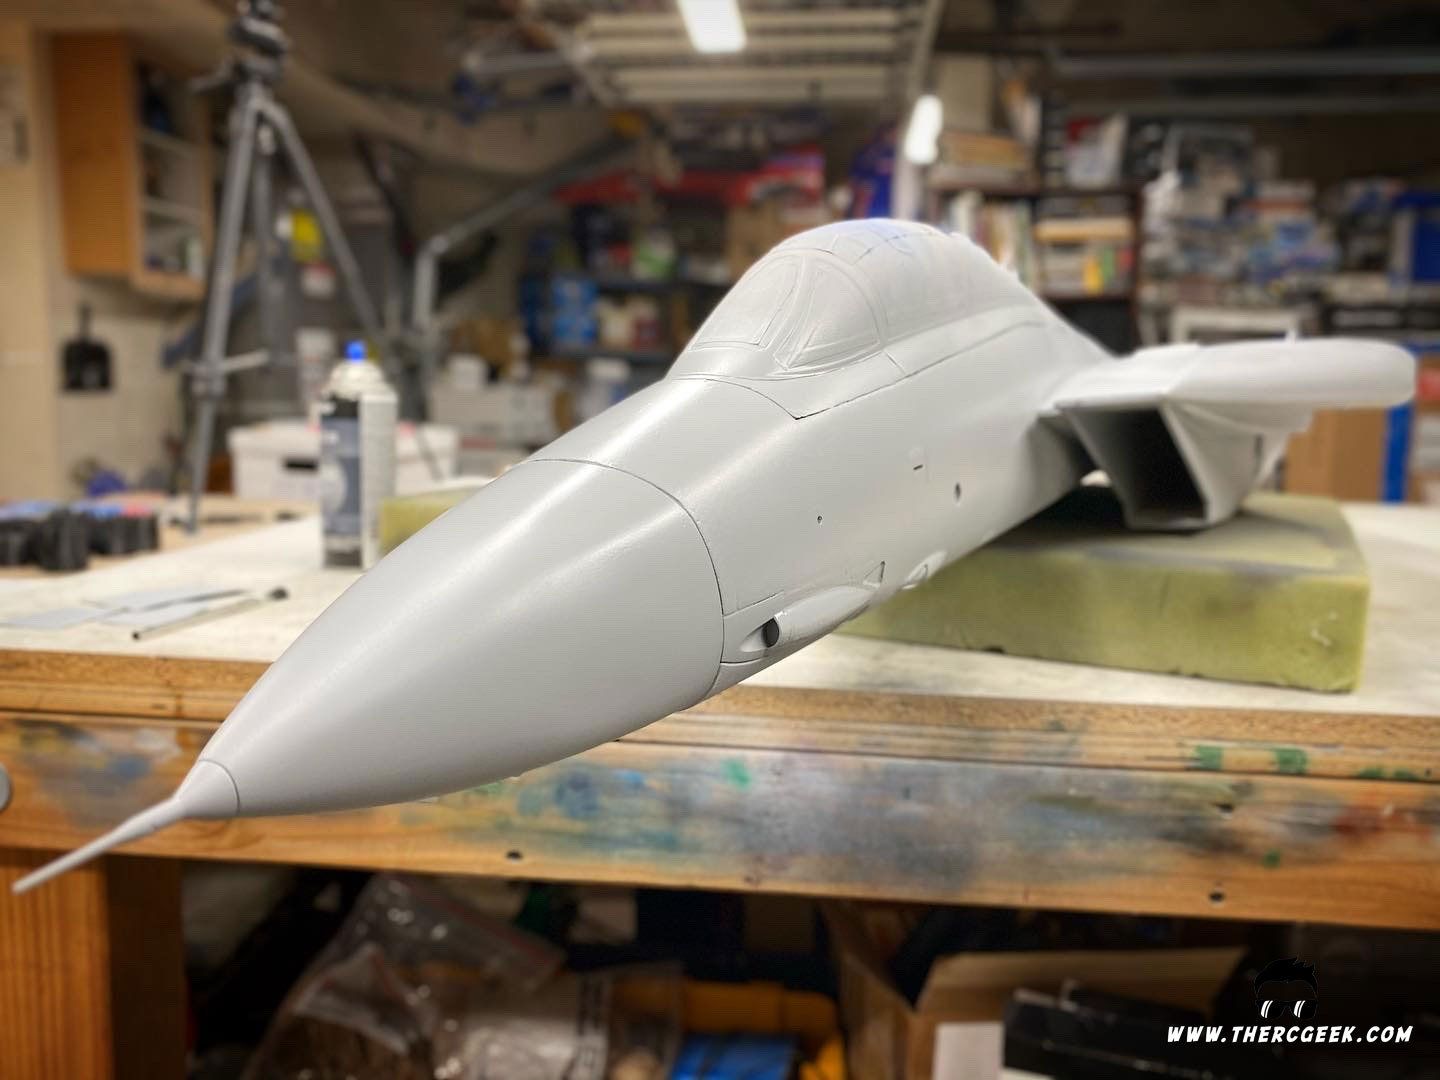
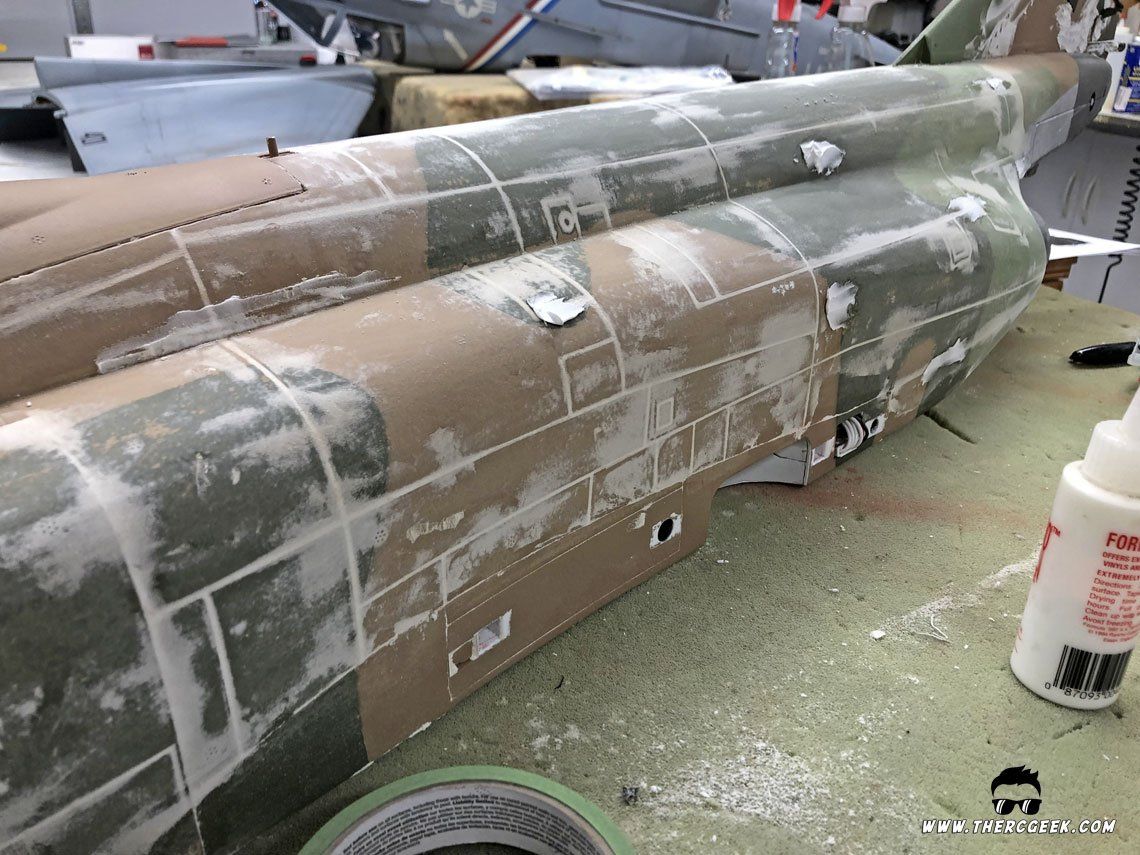
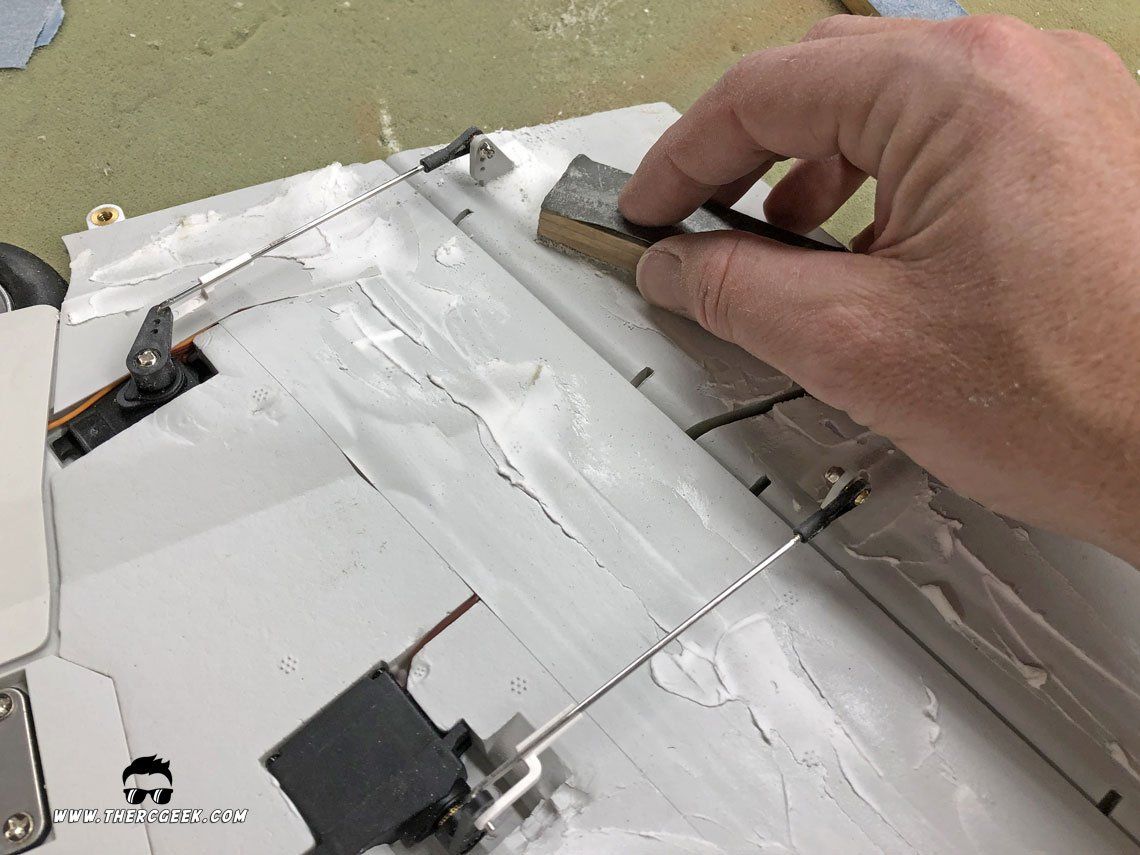
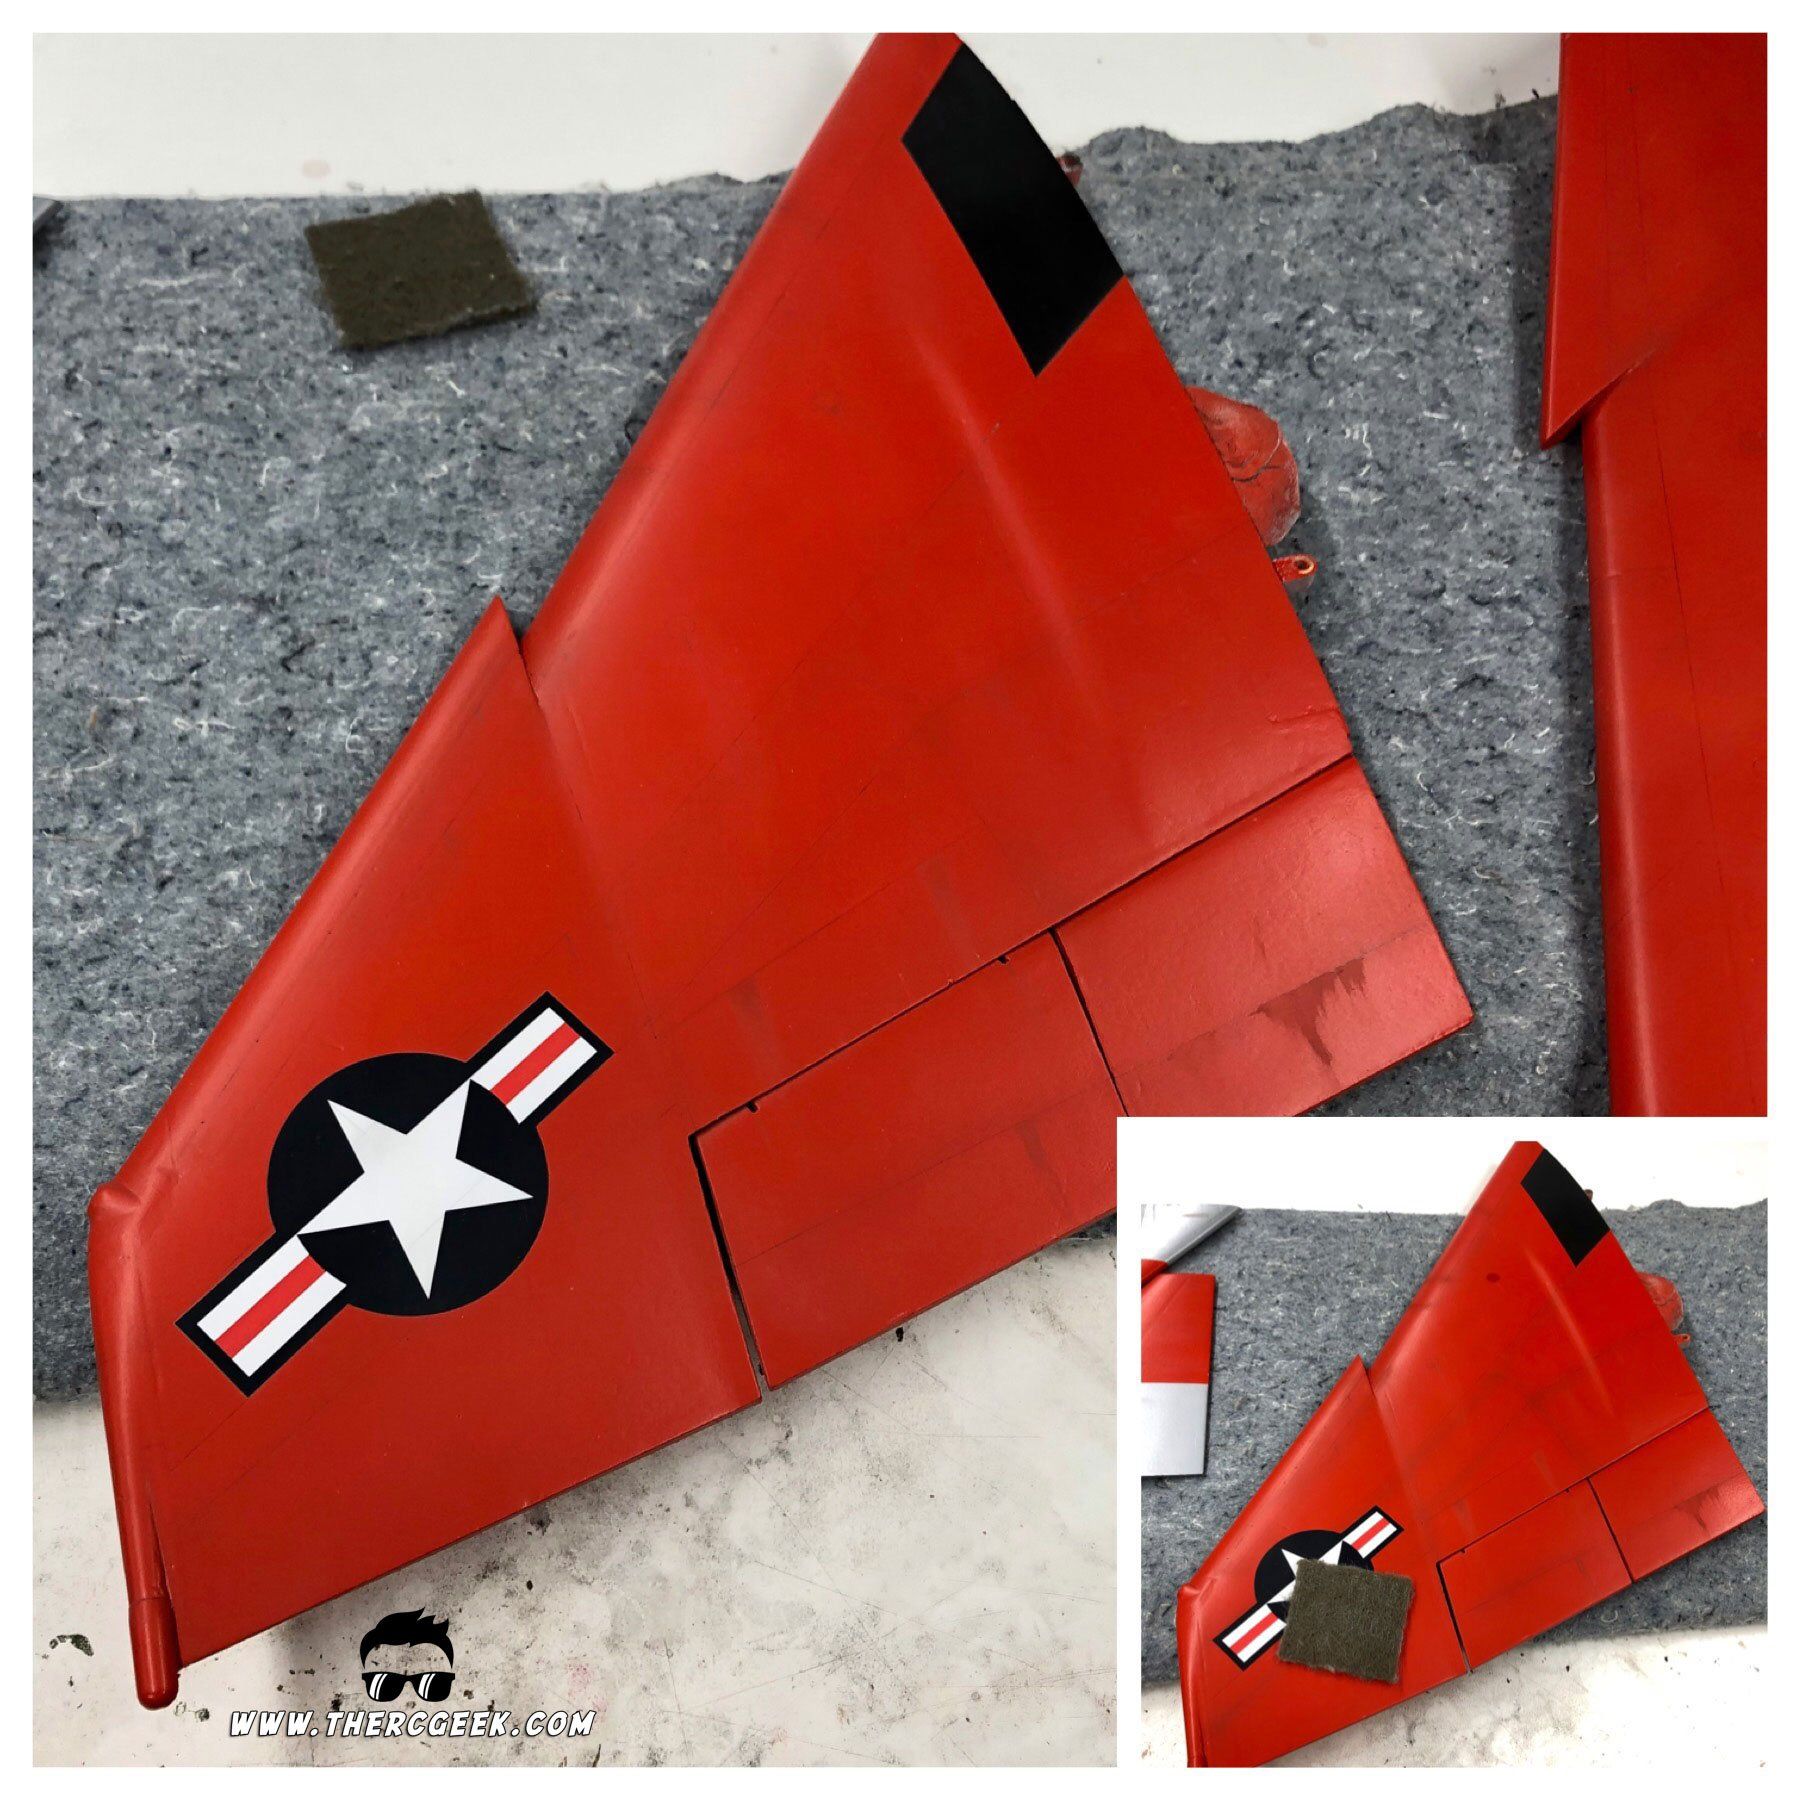
A "QUICK" PANEL LINE FILL AND REPAINT
This airplane was screaming for a refinish as the looks and flight characteristics were so good. Interestingly enough though, my desire to refinish the airplane almost was the end of the project, haha! Thankfully, perseverance prevailed! ;)
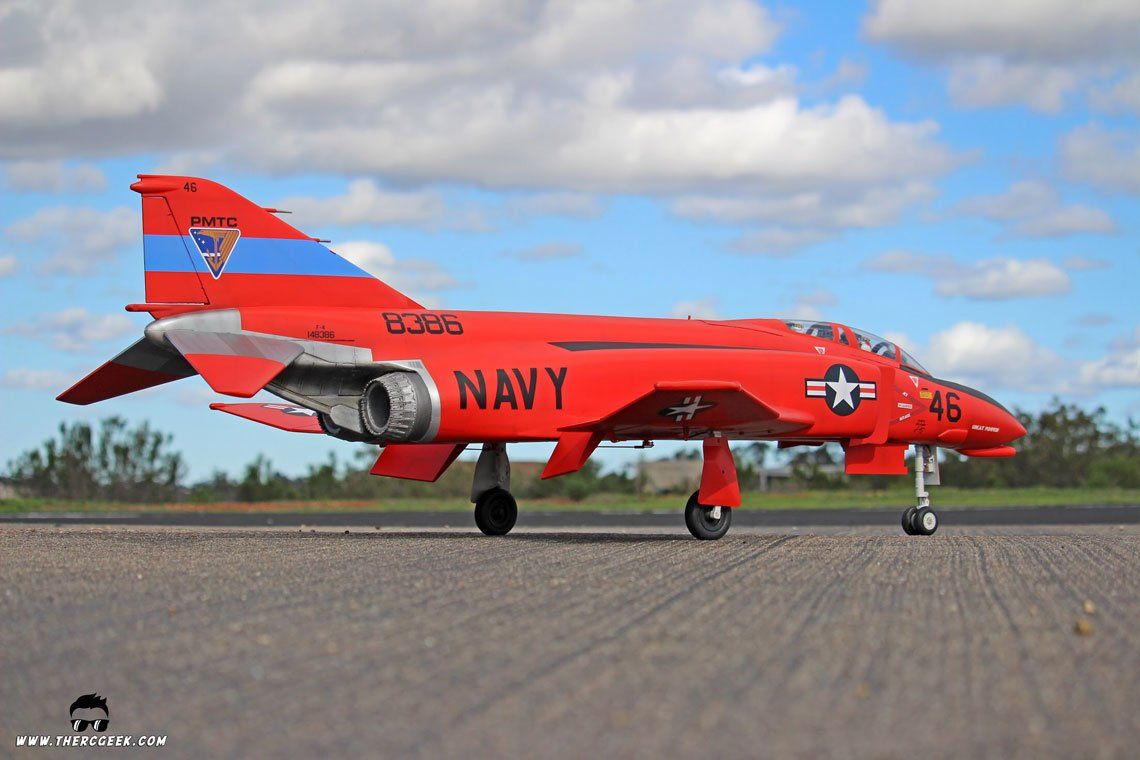
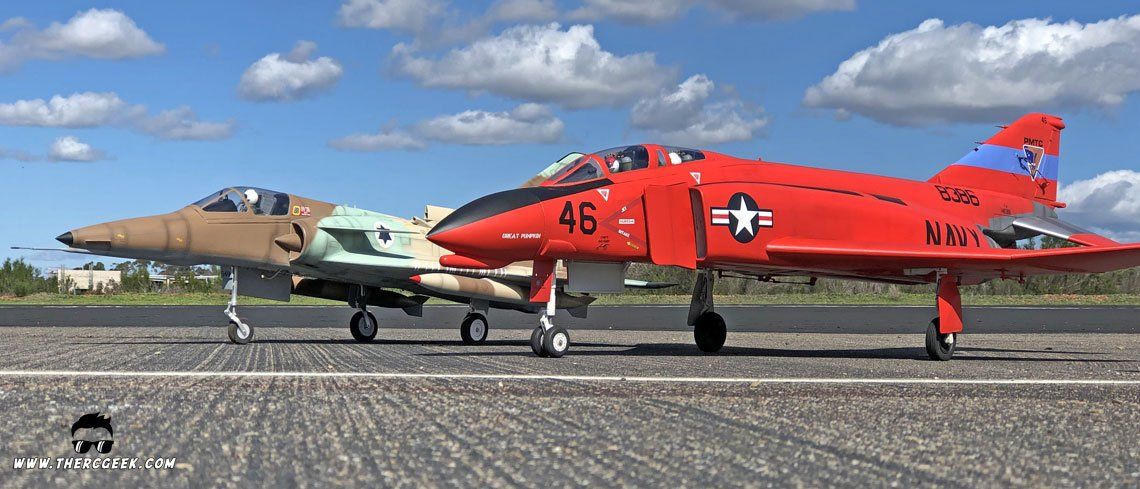
At the start of the refinish, my friend Corsair Nut and I had the intention of modeling similar paint schemes/squadrons so that we could fly formation at some events. He has always liked the Orange/Red QF-4s which I've never really considered much and so that is what we decided on going forward (single color, spray can paint job FTW!). During the painting process, I absolutely fell in love with the paint scheme as it looks so good on the airplane! Unfortunately, my refinish took so long that he flew and sold his airplane before mine was even in primer…
In terms of the refinish itself, I ended up not doing a full video on that unfortunately. I wish I had but given the circumstances of everything it did simplify things in getting the project done. I will say that I do have a couple refinish projects coming that I will do full dedicated discussions on when the time comes. That being said, the process I used is the same as we've talked about here many times (thercgeek.com/kitbashing). The primary difference was that I didn't strip the paint off the airplane first but rather just simply filled in the panel lines over the paint and did all of the surface prep over that. Additionally, I used the spray polycrylic instead of the brush on material. I will say that the brush on material is better as it creates a harder, more protective surface.


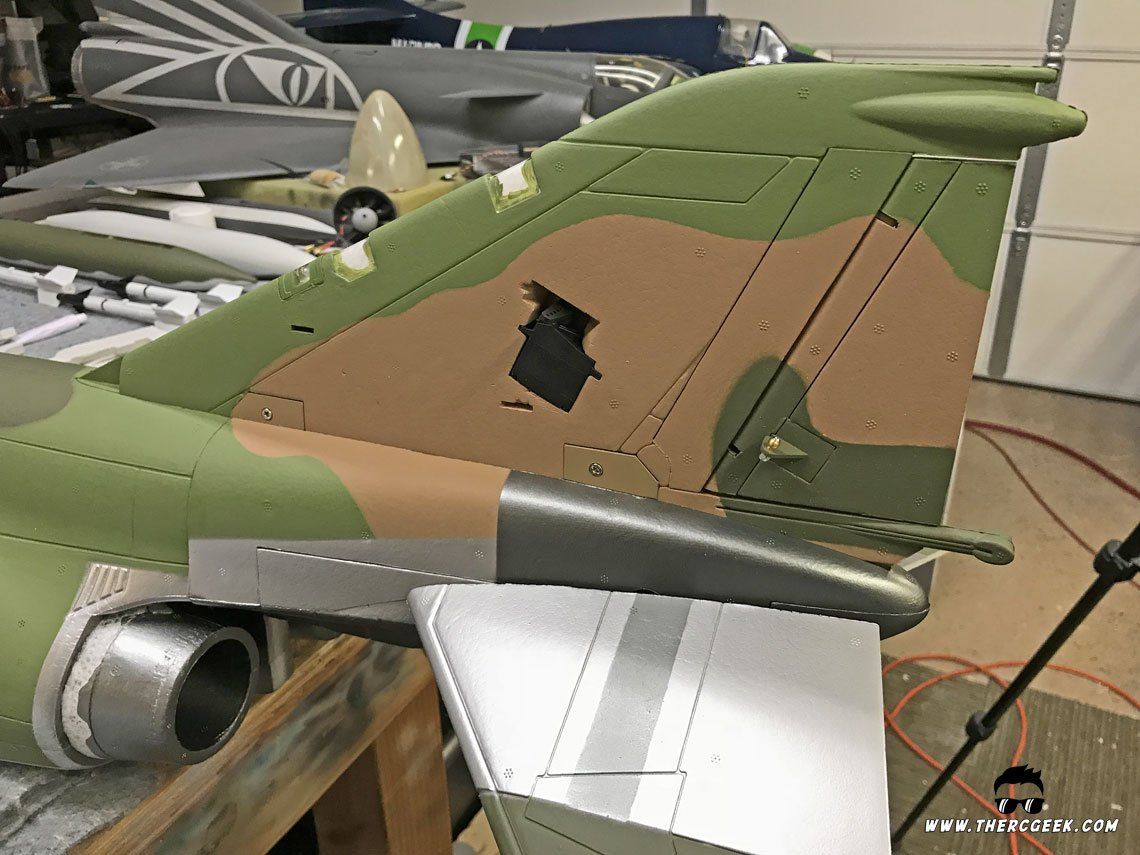
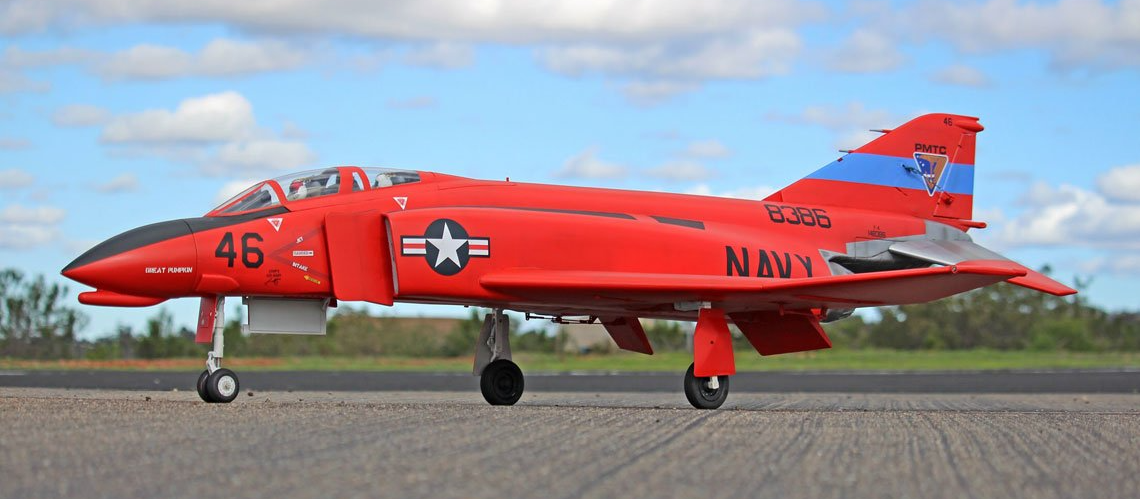
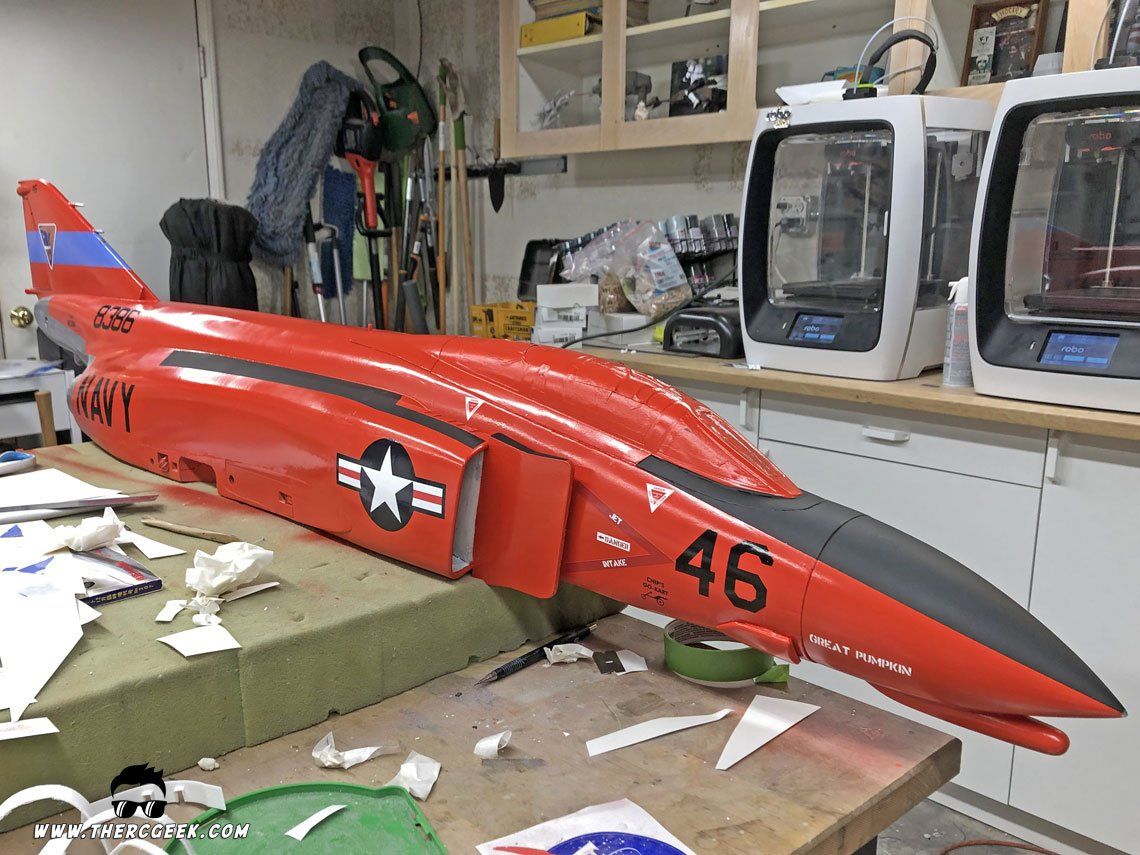
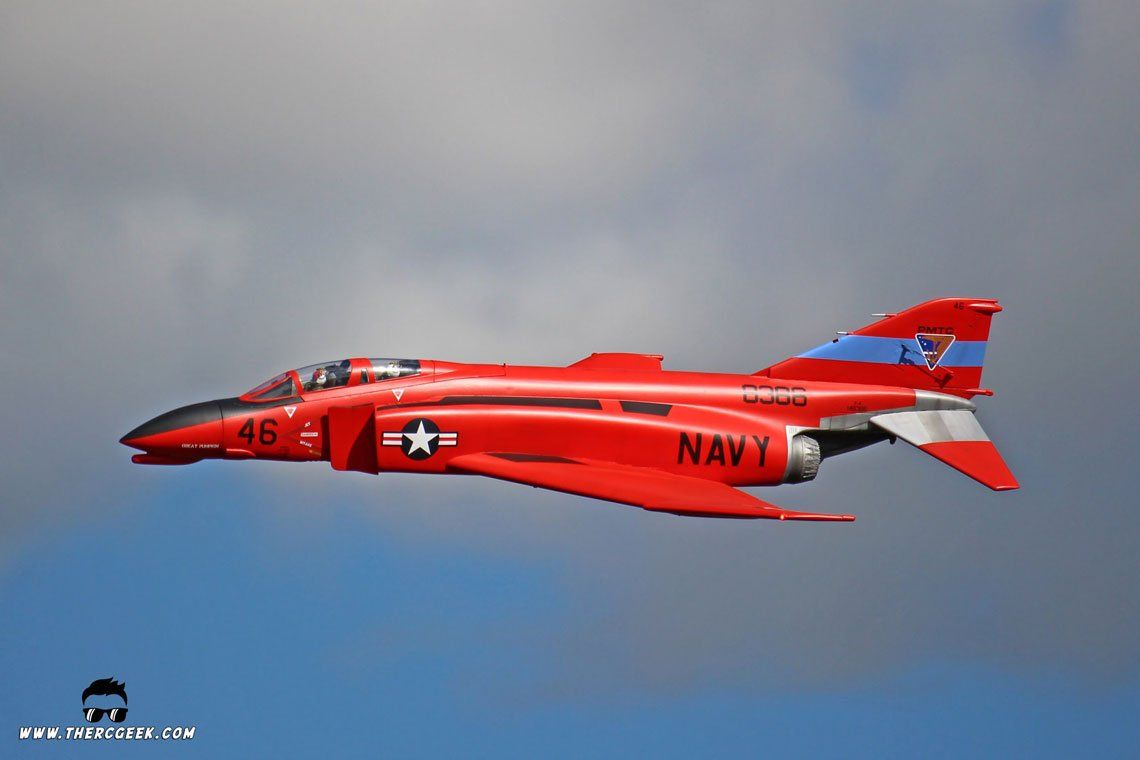
Following all of the prep and primer work, the airplane was painted in Rust-Oleum 2x white primer to provide a base coat for the characteristic QF-4 drone red. From there, the airplane was sprayed using VHT SP119 "Chevy Orange Red" spray paint which is actually an engine block enamel automotive paint. It sprayed extremely nicely and provided the perfect color for the QF-4 drone red/orange. All of the black trim was masked using frog tape and sprayed using an airbrush and model masters flat black. Once painted, the markings were applied which came from Callie-Graphics.


To finish it all up, pencil panel lines were lightly applied with a mechanical pencil and washes (oil stains/streaks) were made using Folkart "Raw Umber" acrylic paint and tamiya acrylic thinner. This was all done in the manner shown in my kfir weathering video below:


At the start of the refinish, I really wasn't sure about the paint scheme truthfully. However, seeing it on the airplane and in the air, I have absolutely fallen in love with it! I opted for a QF-4B Phantom from the Pacific Missile Test Center (PMTC) at NAS Pt Mugu that carried the moniker of "Great Pumpkin" on the nose which seemed very fitting for the paint scheme. It also carried on the nickname of "Chip's Go-Kart" on the lower fuselage side below the canopy. These two unique things were what really drew me to this particular scheme. Interestingly enough, in researching the red QF-4's, many of them carried the stars and bars on the wings in a non-standard size and location. Unfortunately, it was difficult to find much history on the airplane itself as generally speaking they didn't seem to last all that long. They were target drones afterall! Anyhow, here are a few pics of the refinished airframe. Again, be sure to check out my whole series of refinish videos at thercgeek.com/kitbashing for more information. As mentioned too, I have a couple other projects in the works that I will do videos on in the future.


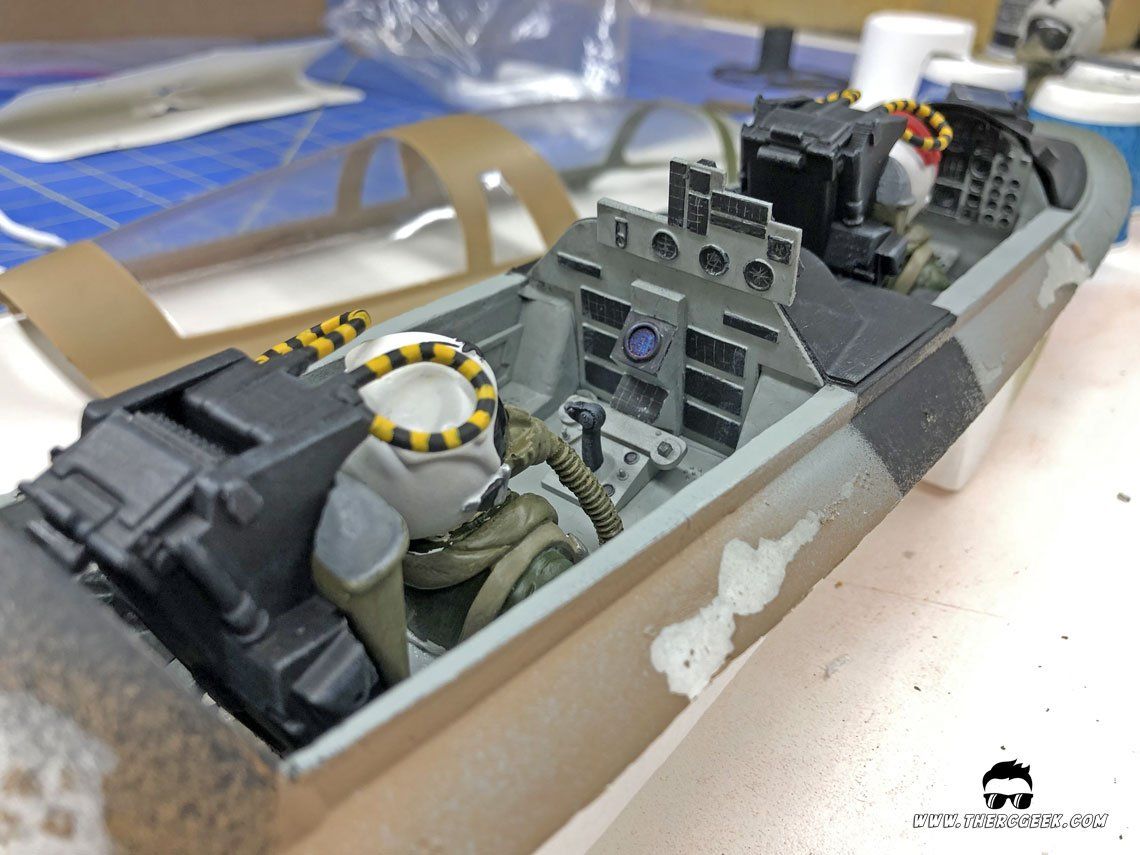
One other thing to touch base on before we talk setup and flying is that in the process of the refinish I did a complete redo of the cockpit. Motion RC offers the 3D Printed cockpit set which is highly recommended if you're looking for a fun upgrade for your Phantom. Also, the pilots I used are the 1/12 scale "Castle 5" from my folks at jethangar.com. It's great that Motion RC has been offering these upgrades as well as the files for folks who want to print their own. I hope that they keep them coming on future releases!


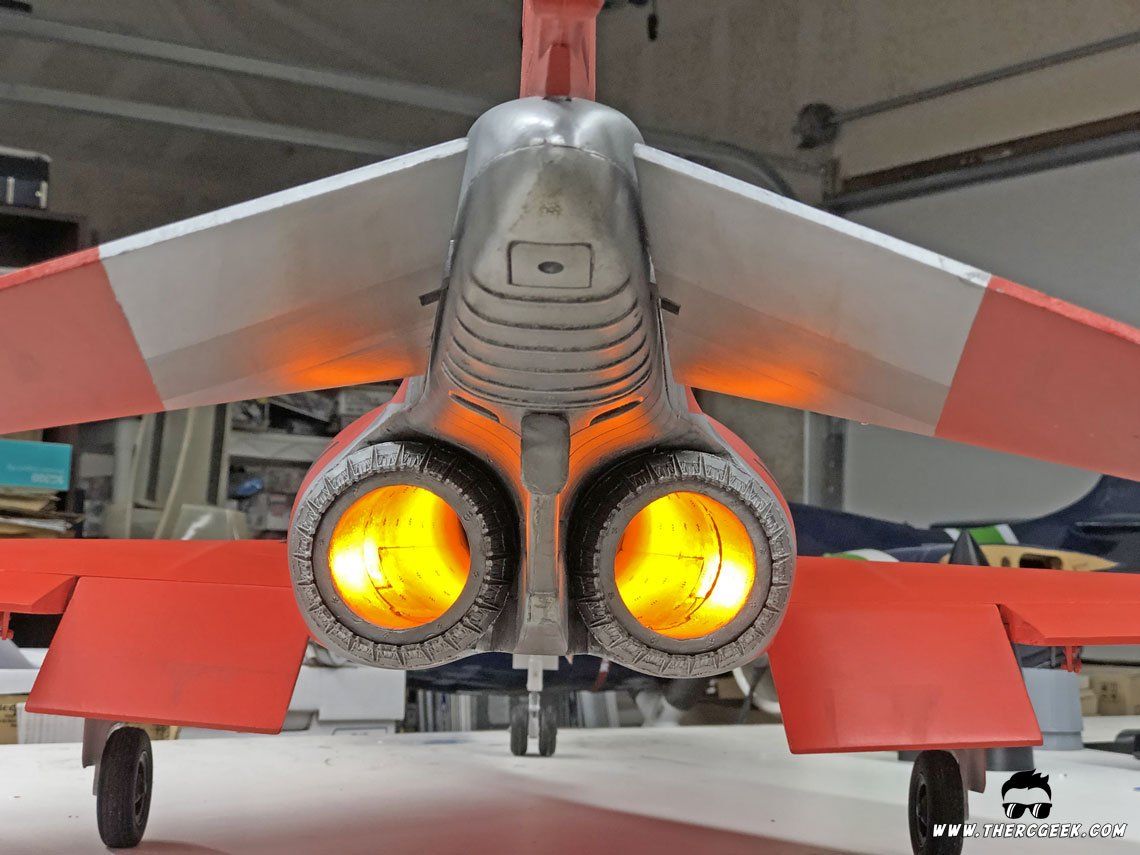
Lastly, an F-4 Phantom has to have afterburner, so I of course added a MultiBurner into the airplane. That goes for both the 6s (90mm outrunner) and the 8s (90mm inrunner) power systems.
AIRCRAFT SETUP & CG
The one benefit to having this airplane so long now is that I've flown it on both 6s and 8s power. Between the two, nothing changed about the control throws or the CG between the two. In both cases, the airplane did want to zoom climb at full throttle. So, one unique thing that was added was an 3.5% throttle/elevator mix which provides a slight amount of down elevator at full throttle (~1mm). This removed the zoom climb tendency and removed any trim change with airspeed. In terms of the control throws, here's what I'm flying the airplane with:
- Elevator - 20mm up and down with 15% Expo
- Aileron - 21mm up and down with 12% Expo
- Rudder - 45mm left and right with 10% Expo
- Flaps - 20mm half flap with 1mm up elevator mix, 55mm full flap with a 7mm up elevator mix
For the CG, the manual recommends 190mm as measured from the wing root leading edge aft which I found was quite good and is where I've basically stayed with the airplane. This actually equates to the location of the wing pylon the rear attachment. Picking up the airplane at that location with my finger tips, the airplane is mostly level with 6cells and is slightly nose down on 8s.
IN TERMS OF BATTERIES…

For the 6s setup, I used a 35c Roaring Top 6250mah pack. It worked great, but I did find the flight times generally lacking, even at that capacity. Truth be told, that was a big motivator for going to 8s. If I were run 6s again I'd look at running a 6s Spektrum 7000 mah pack as I've been running in the Freewing Me262. It would certainly help and there's no issue with the airplane not handing the weight.
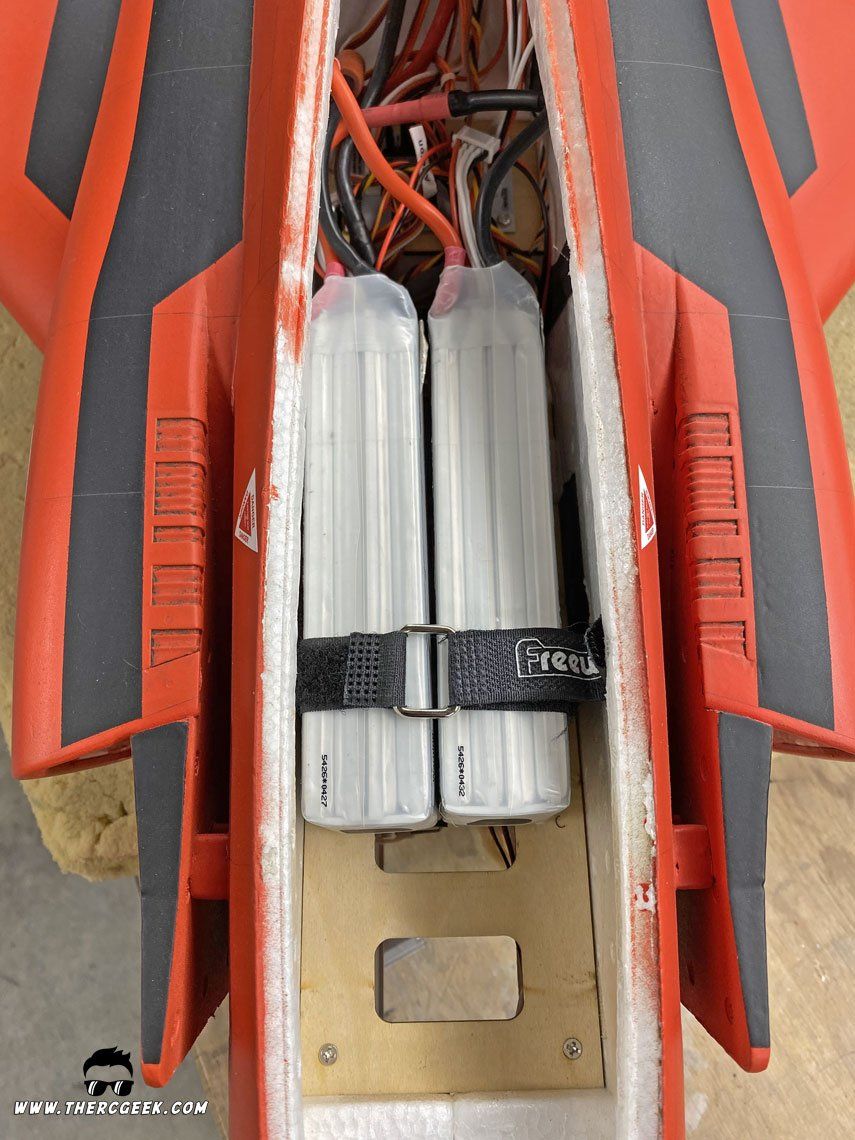
For the 8s setup, I'm running two 35c Roaring Top 4s 5800 mah packs. The fan is a JetFan90 with Neu 1415/1.5y motor and Castle Creations Edge130 ESC from my folks at jethangar.com. The primary goal was to increase the flight time and by switching I was able to get roughly an additional minute of flight on less capacity. Score! The performance also perked up a bit too, mostly in the vertical. Double score!
FLYING THE FREEWING F-4 PHANTOM II
As noted, I've flown this airplane with both 6s and 8s power and in all cases it flies "phantastically!" The response, the power, everything just feels good. This has been one of the truer flying foam jets that I have flown to date in fact. Interestingly enough, I found the airplane to actually fly a little better following the refinish. In spite of the additional weight, it seemed more slippery which makes sense given the smooth finish. Also, I should note that the E-flite F-4 Phantom and this one fly very similarly exhibiting many of the same characteristics. The primary difference is that the Freewing is larger and so feels bigger in the air. In terms of performance, I liken the overall performance of the E-flite F-4 Phantom similar to the 8s performance of the Freewing.


On Flying with 6s
All of the initial flights both before and after the refinish were performed on the stock Freewing 6s outrunner setup. As a whole, I was very pleased and impressed with the performance from this power system. The airplane was quick and had good vertical, even after the additional weight of the refinish. My primary complaint with this setup was the flight time. Running a 6250mah pack, my timer was set at 3.5 minutes and that was the best I could do. More capacity would have helped and the airplane would have handled the weight fine, but it was definitely a good excuse to give 8s a go in the airplane. That said, had I pursued a larger pack for a longer flight time, I probably would have just stayed with this system in the airplane it flew the airplane that well. Plus, there's certainly something simple about a single battery setup to deal with!
On Flying with 8s
As noted, to get more flight time from the airplane, I ended up installing an 8s JetFan90 with Neu 1415/1.5y motor from my folks (jethangar.com). The goal was efficiency and flight time over speed/power and the result was an additional minute of flight time plus a performance boost. The aircraft speed didn't change hugely increasing only slightly, but the vertical up lines did get noticeably larger which I was definitely happy with. Interestingly enough, I've found that the airplane actually lands better with 8s having a little more weight and being less floaty on the approach. The airplane locks into a nice attitude and controlling the descent with throttle, it really lands beautifully. So, good landing characteristics, big verticals, and good speed, what more could you ask for?!
FINAL THOUGHTS
Well, at last, there we have my Freewing F-4 Phantom review. It only took about 1.5 years, but man what a crazy 1.5 years it's been! This airplane really looks good out of the box (even better refinished ;) ), flies awesome on both 6s and 8s and is a definitely a fun addition to have in the hangar. She is a worthy beast for refinishing no doubt so don't be afraid to give that a go (thercgeek.com/kitbashing). :) I have to say, after all this, I'm so glad that I stuck through with the project as I really enjoy the airplane immensely and love the looks in the QF-4B paint scheme. Great Pumpkin for the win! ;)
The RC Geek Blog is your place to learn about all aspects of the RC hobby. Learn to build, design, drive or fly that RC project you’ve always wanted to build, but have been intimidated to try. This blog is here to help you on your journey and provide tips and tricks as you go! My hope is to inspire builders both experienced and new! So, welcome, please look around, it’s an exciting beginning! I’m currently documenting my latest competition scale RC jet build, a Mark Frankel F4D Skyray, along with some other fun tips and videos. If you can’t find what you’re looking for on this front page, click on any of the categories to the right and it will show just posts related to those categories. Please feel free to add comments and/or contact me directly if you have questions, I’m here to help! And don’t forget to check out my YouTube Channel, I post new videos every week!
Subscribe To Our Blog Now