The RC Geek Blog
By: Chris Wolfe
Refinish a Foam Jet Ep 4 – Freewing F-14 Tomcat Low-Viz Navy Weathering
How low can you go?…a little low-viz Tomcat weathering.
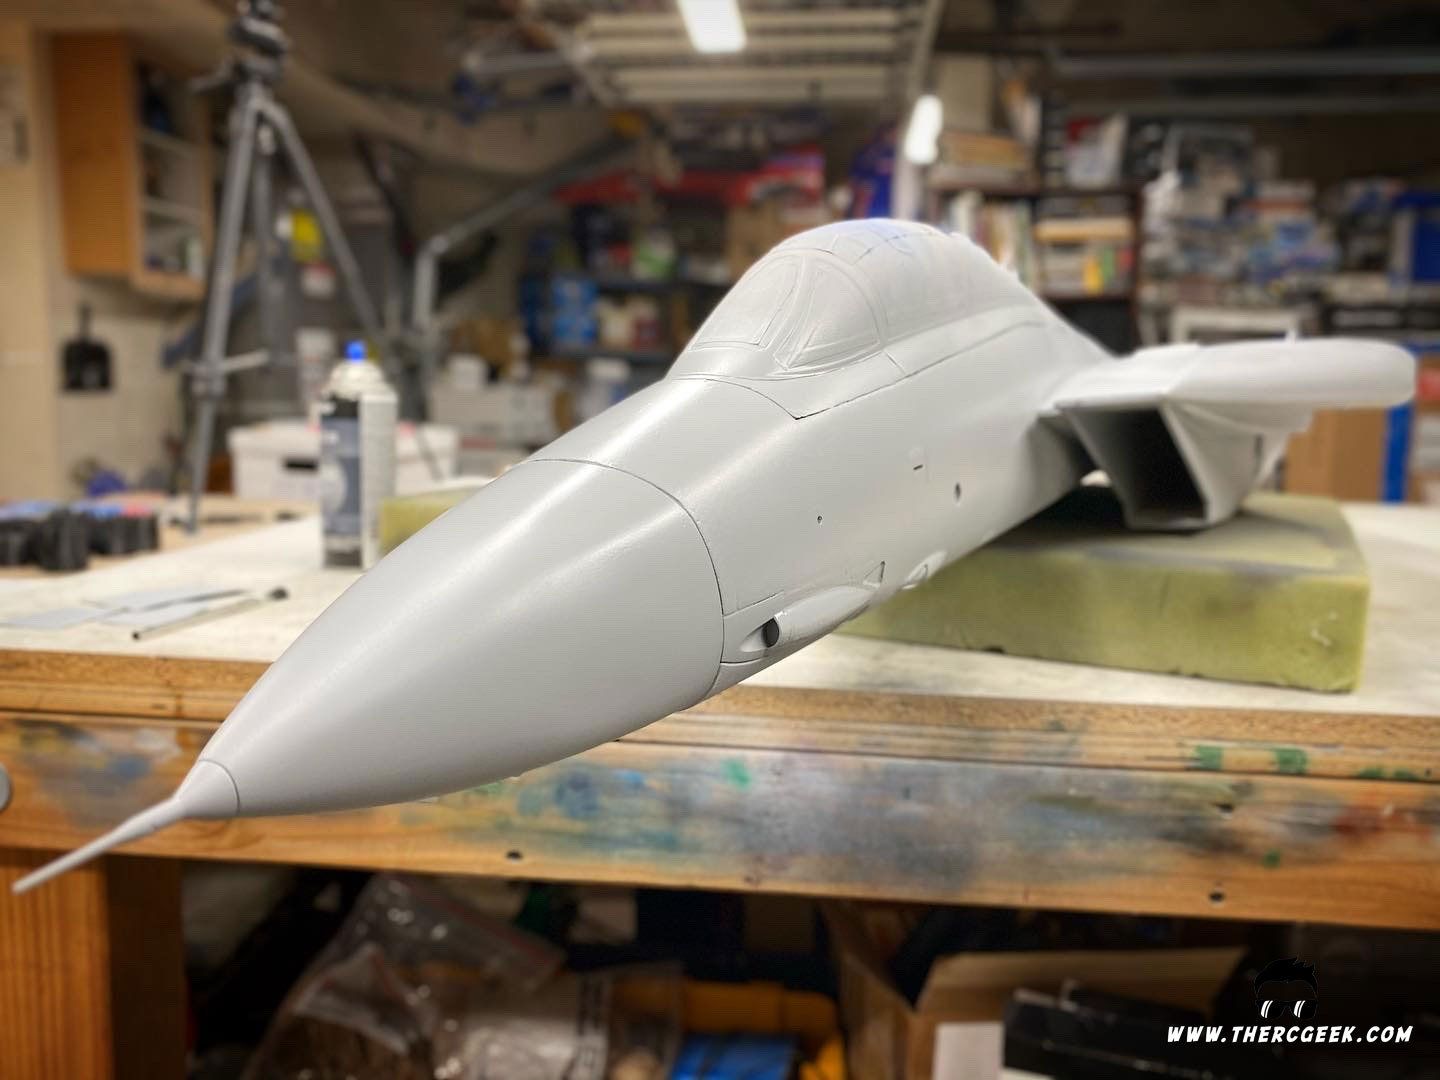
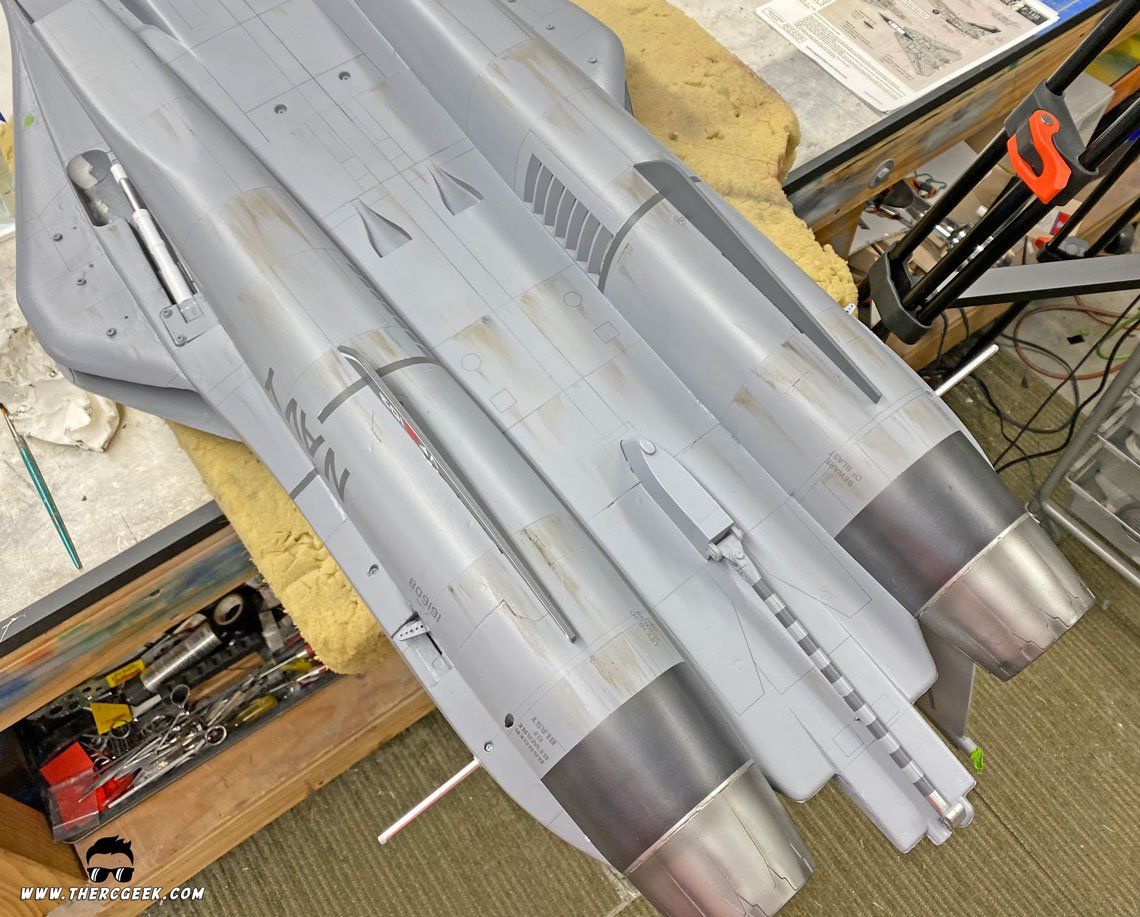
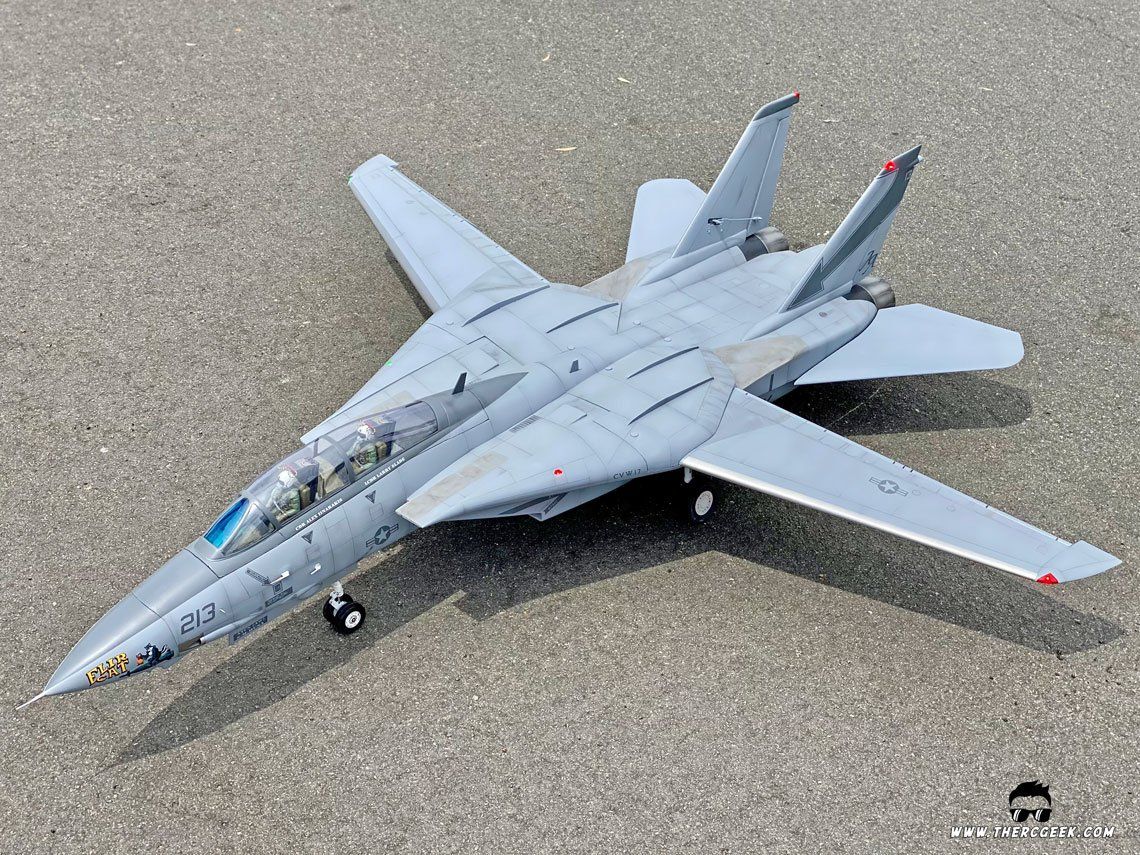
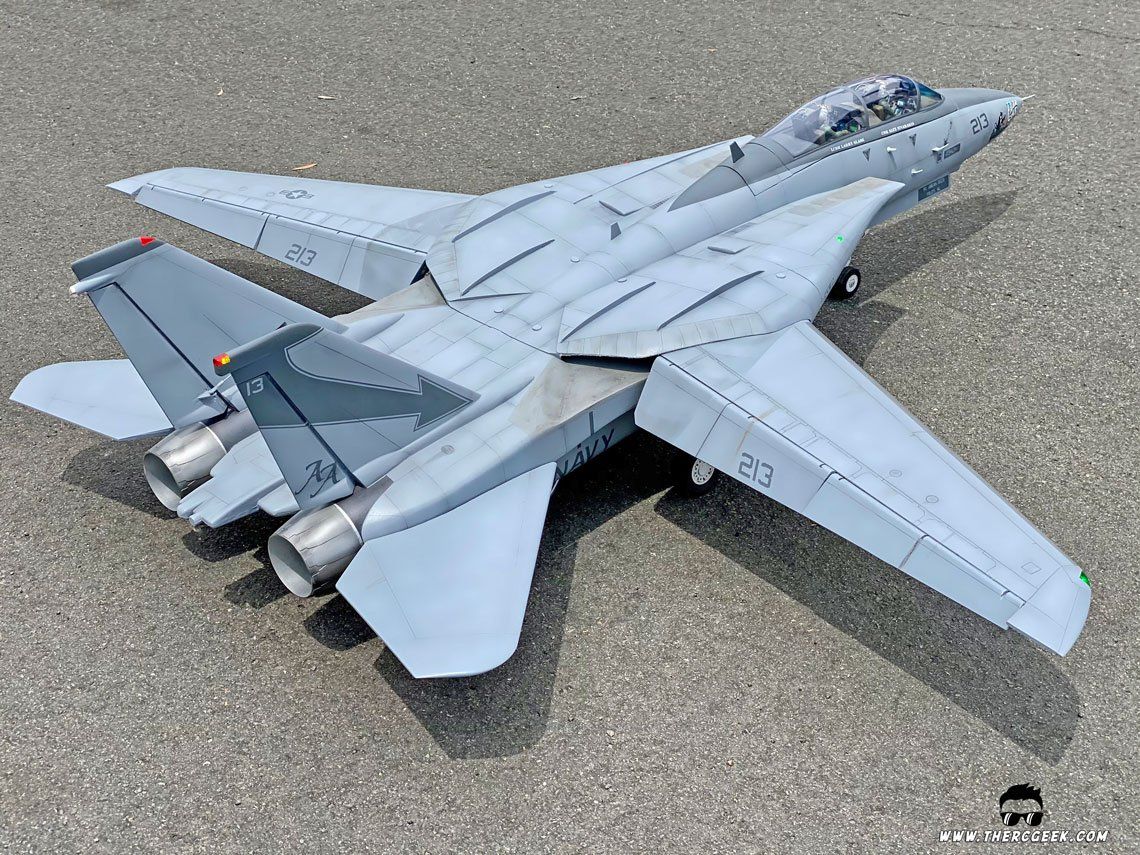
Finishing up the refinish work on the Freewing F-14 Tomcat, it’s time to apply some characteristic low-viz Navy weathering. The Flir Cat paint scheme is from the mid 90’s at a time when the Tomcats in service were painted primarily in Dark Ghost Grey (FS36320) with variations thereof. They were high maintenance workhorses at this time and the aircraft got extremely dirty during operation. This opens up lots of opportunities to apply different weathering techniques on the airplane to simulate those years of service on the carrier.
While I have done a few videos on weathering, it’s such an important step in the completion of a scale model in what ultimately gives it that realism you otherwise wouldn’t get. That being said, there is always a balance because too much weathering and the model will look toy-ish just the same without it. So, my MO for weathering is “less is more.” To understand how aircraft dirty up in operation, it’s best to look at pictures of the full size and see where the dirt and grime accumulates most. In the case of the late operation F-14 Tomcats, they were quite a mess. They faded dramatically and had regular touchups on the ship. So, as a result you ended up with mottled paint in addition to a significant amount of dirt, oil, and grime that collected everywhere. This actually quite difficult to simulate effectively, and while I don’t plan to go excessive with it, we can still get something that looks right and not overdone.
TOOLS OF THE TRADE
As we approach weathering, my goal is to “simulate, not replicate.” That’s the best we can do since we’re not going to operate our models in the salty sea air for years on end. Ultimately, the best weathering process is the one that provides you with the results you’re looking for and there’s no one way to simulate weathering. It’s a process of employing different techniques and tools and there can be different ways to accomplish the same result even. For me, I like to use a selection of acrylic pigments along with Tamiya Acrylic thinner for washes and oil streaks (you could conceivably use tamiya acrylic paint too) and a Grex airbrush for fading and shading, and a fine Scotch-Brite pad for blending it all together.
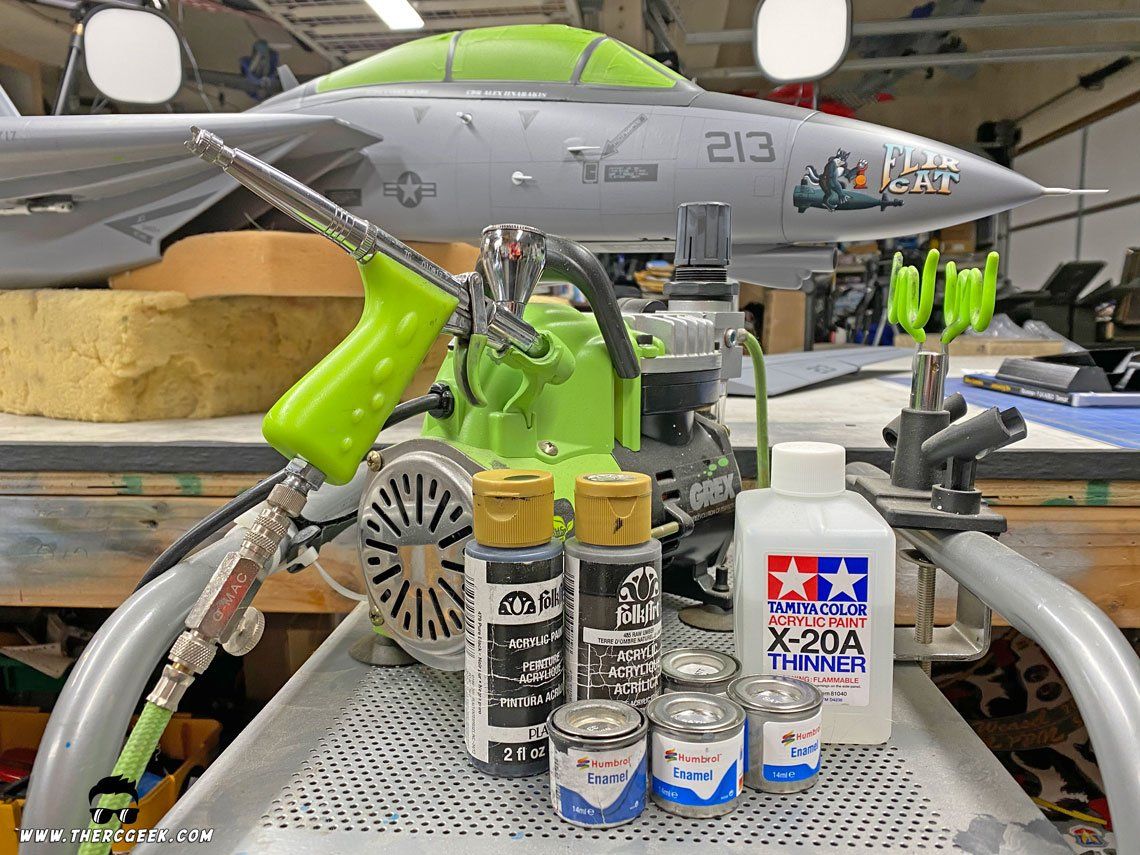
I regularly leverage plastic model paints and the like in this process as well, but it’s important first to have a good solid paint foundation for the application of the weathering. This is why I like to use a lacquer clear coat generally as most any type of paint will go over it in the weathering process and protect the underlying paint job underneath.
STEP 1: WASHES AND OIL STAINS
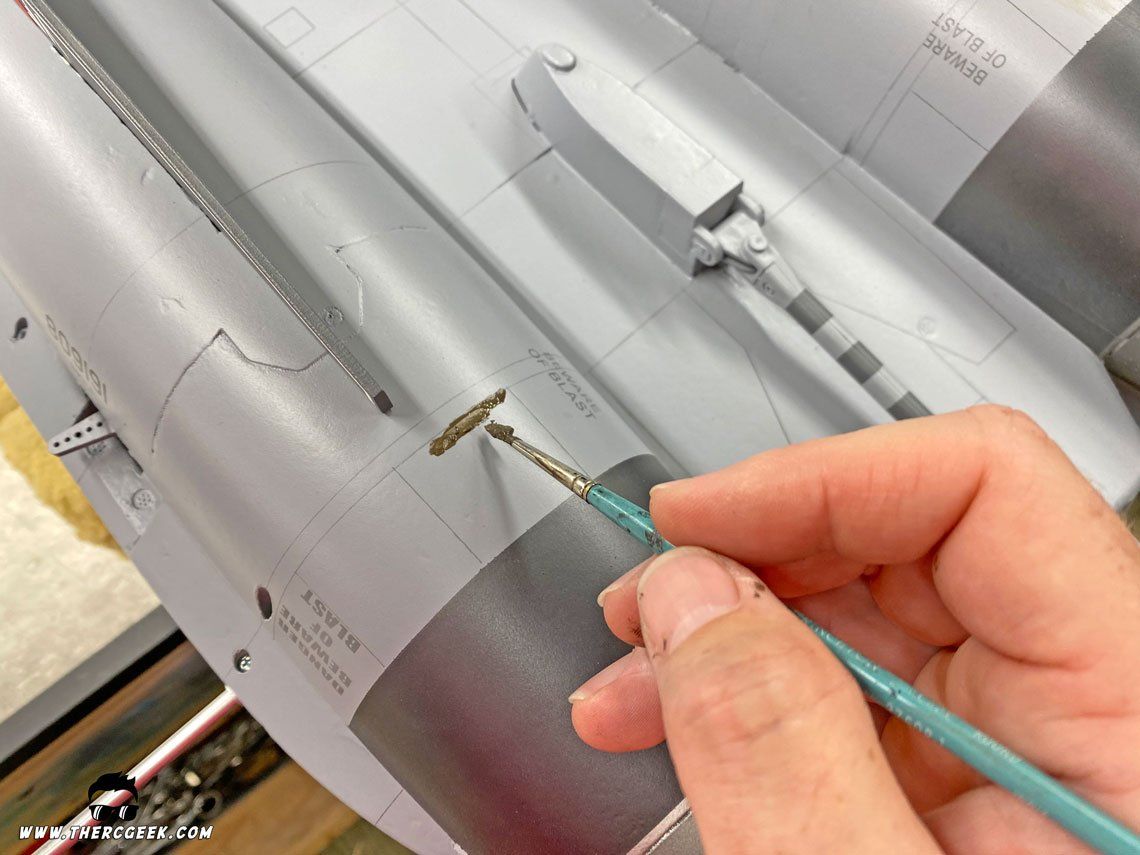
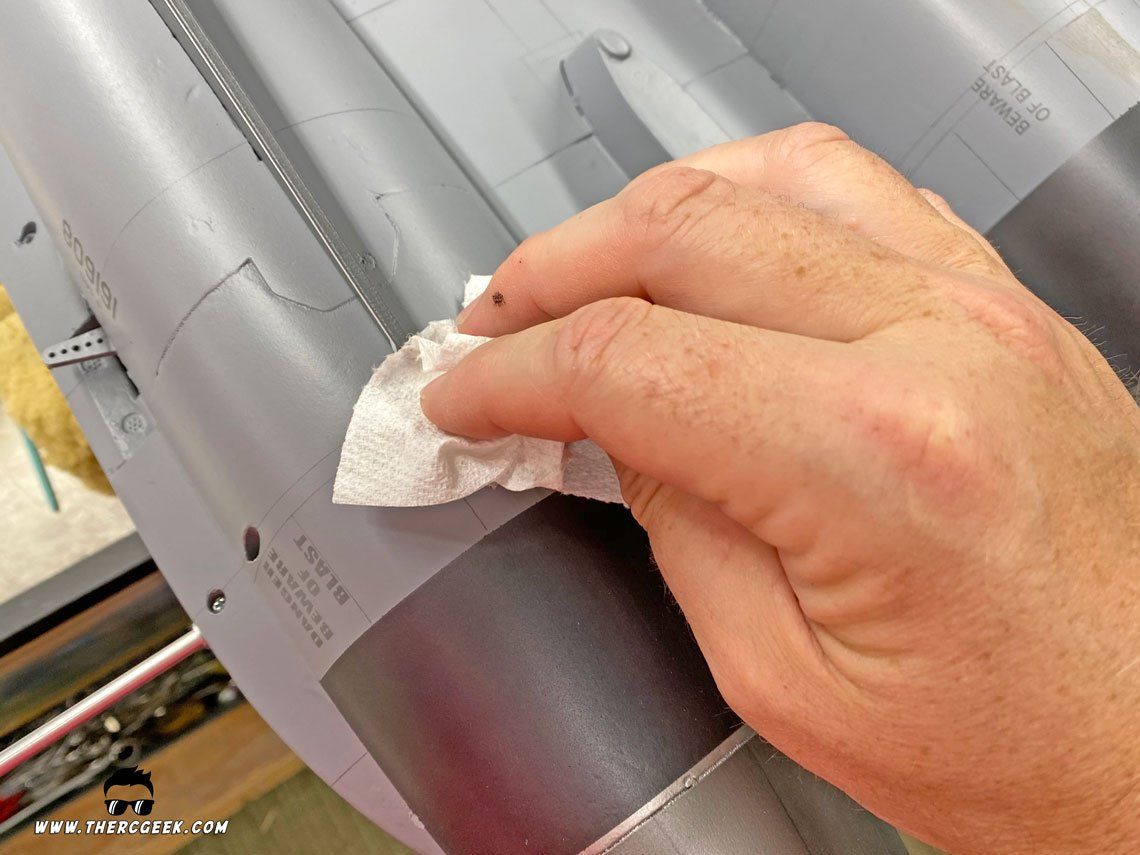
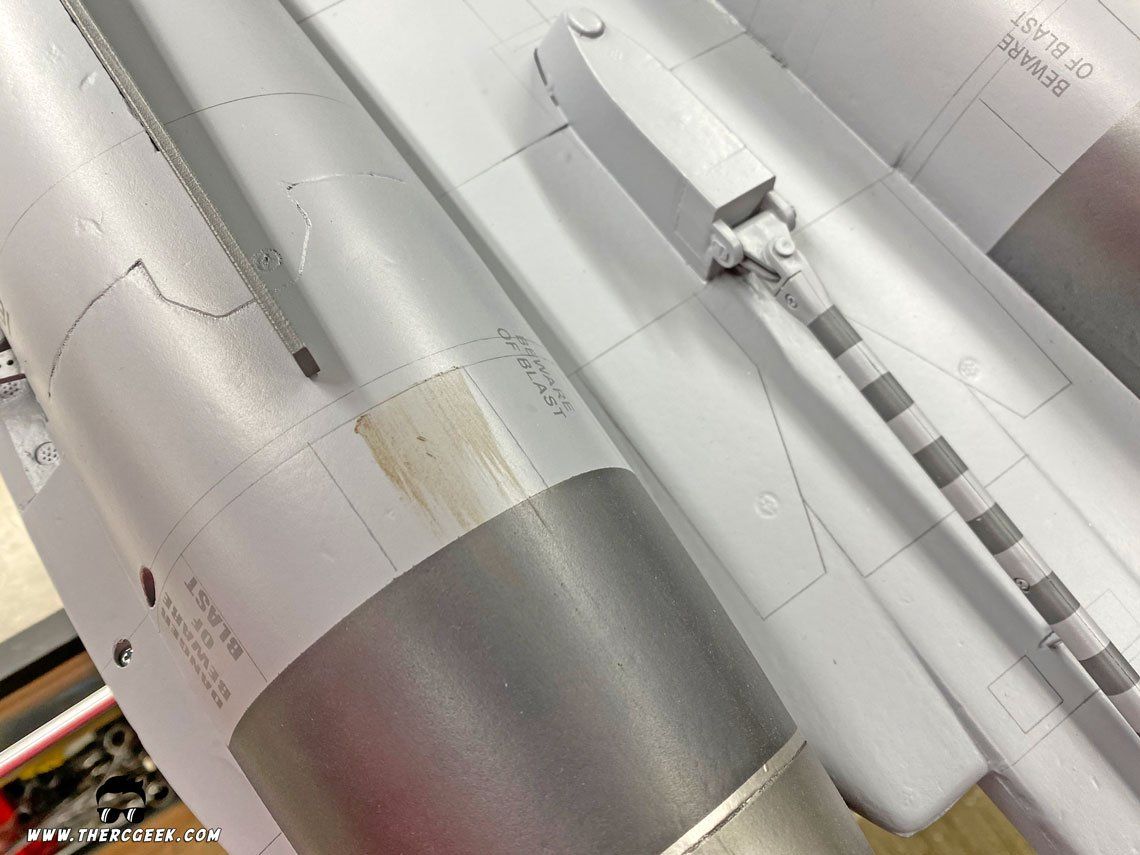
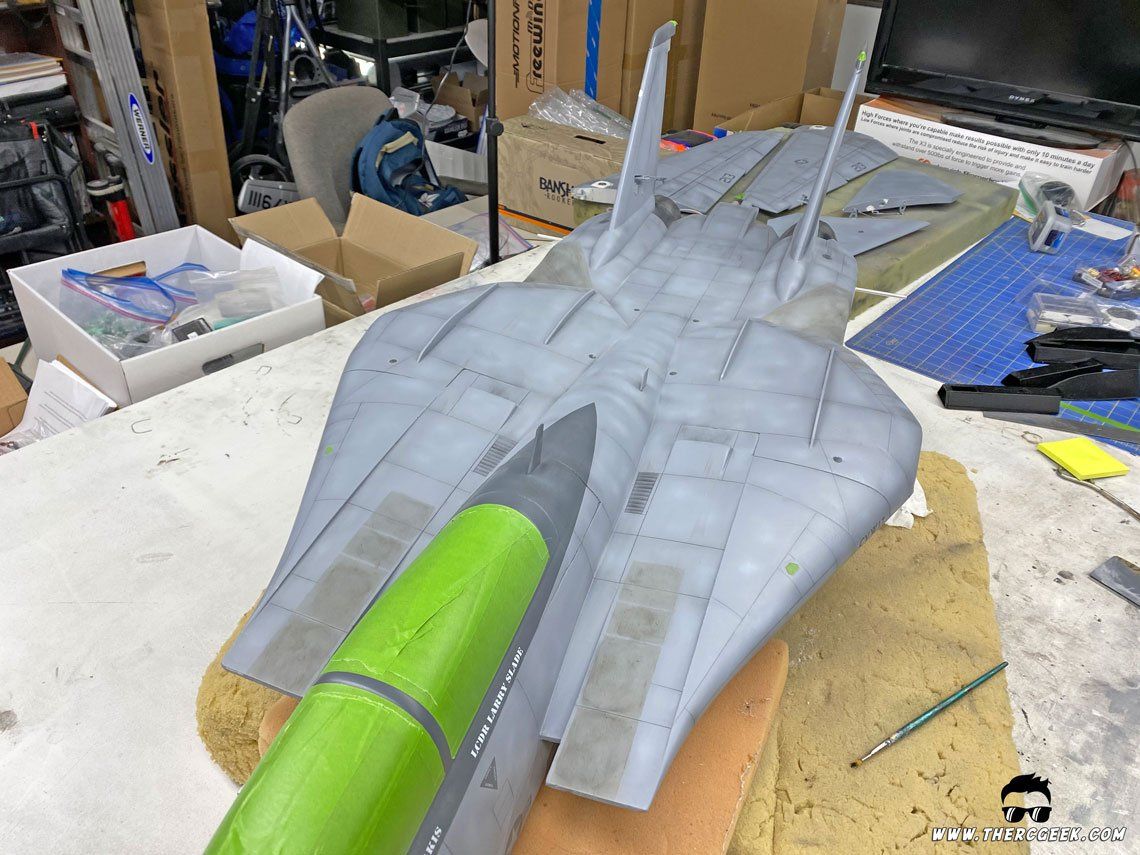
The weathering process starts with the application of oil stains and streaks across the entire airframe. The Tomcats of the late 90’s were extremely weathered and worn resulting from their long career and the continuous maintenance required to keep them operating. To apply oil streaks/stains, I use a combination of FolkArt Raw Umber and Black acrylic pigments. The Raw Umber being a nice dark brown was the primary color leveraged with the black used for accents, etc. (the black can be a bit overpowering on its own) To make the stains/streaks, some pigment was applied to the surface in a desired location along a panel line using a paint brush and a paper towel was used to lightly streak/rub the applied pigment back in the direction of the airflow (vertically for fuselage surfaces). This was repeated as necessary to get the desired look with different applications of paint put down. With the F-14 Tomcat, pictures revealed a good assortment of streaking along the underside of the engine nacelles. Additionally, there was quite a bit of collection along the wings and even the upper fuselage. Using a little artistic license, the streaks were applied until achieving the desired overall look. The nice thing with the acrylics is that, if the desired look isn’t attained the first time, simply soak a paper towel with Tamiya Acrylic thinner and wipe it over the area and it will clean it right up. When going through this process, having some reference pictures is quite helpful as that reveals the typical collection areas along the aircraft where you can focus heavier and/or lighter as needed.
STEP 2: PANEL LINE SHADING
With all of the oil stains and streaks applied, using some very thinned down Enamel “Flat Black,” a quick airbrush shading was applied over all of the panel lines on the model. A light shading is applied and once dry burnished down with a fine Scotch-Brite pad. Burnishing the model down is critical to help even out and blend the layers together because otherwise the black shading will likely come across too harsh. The end result provides the illusion of accumulated grime along the panels and adds some color variation as well.
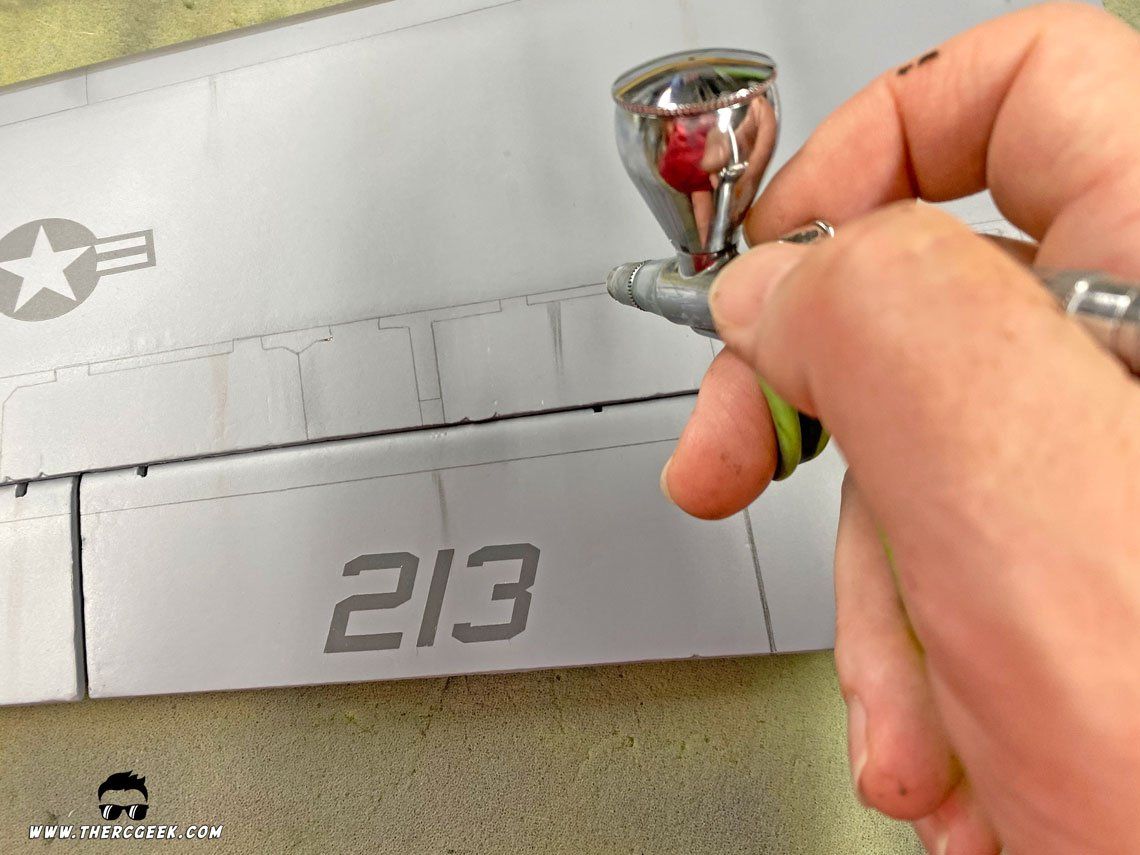
Also through the process, some long strokes were made in the direction of the airflow along the wings and fuselage to help in creating the mottled appearance the low viz Navy Tomcats had. It’s important to note that this technique as a whole should be applied very lightly and subtly as it is very easy to overdo and apply the black shading too heavily. That said, the scotch-brite process can solve most of that if it occurs if you choose to burnish it long enough.
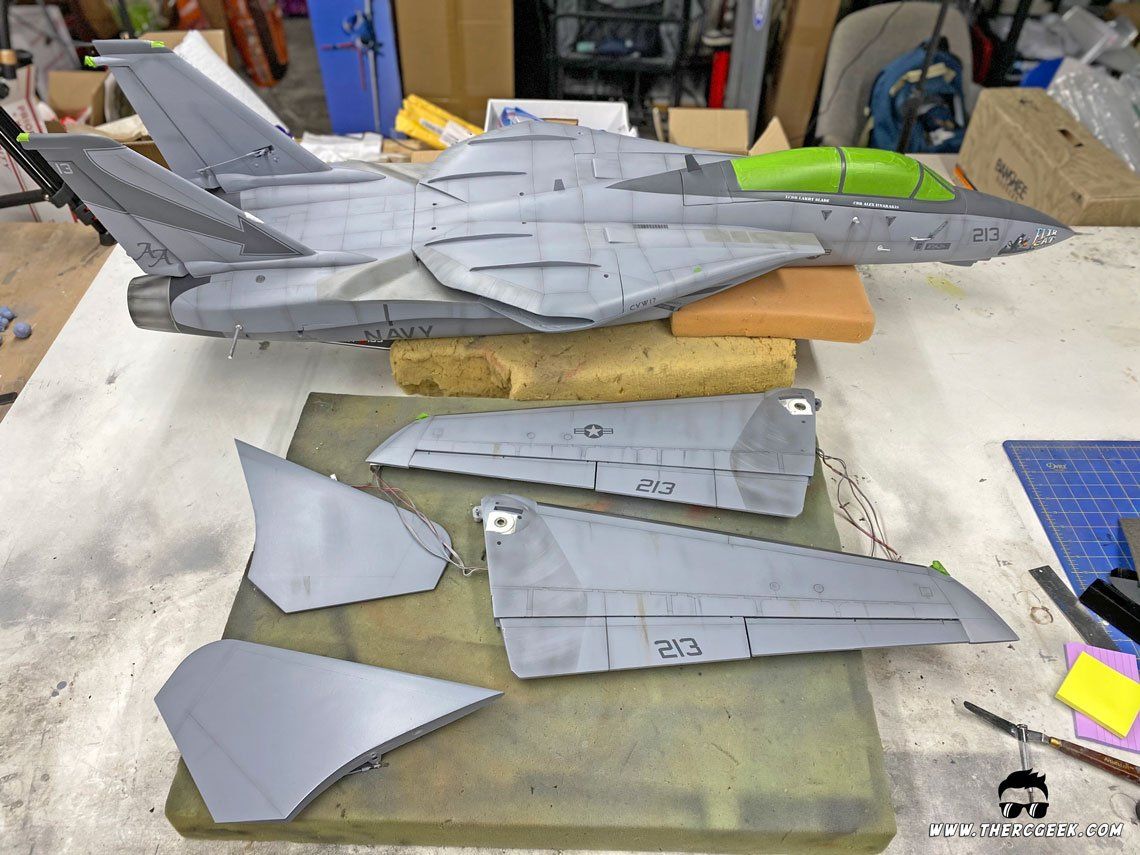
While spraying the black, the wing glove interfacing areas along the wing were shaded. The wings were inserted onto the fuselage and with the top wing glove hatch in place, the wings were swept and taped off along the wing glove interface. From there, the area was lightly shaded to create the grease area that collected from the wing sweep. Once shaded, the tape was removed and the wing glove was pressed down onto the wing and the wing was rotated in and out to create streaks that occur from the seals rubbing along the wings while they sweep.

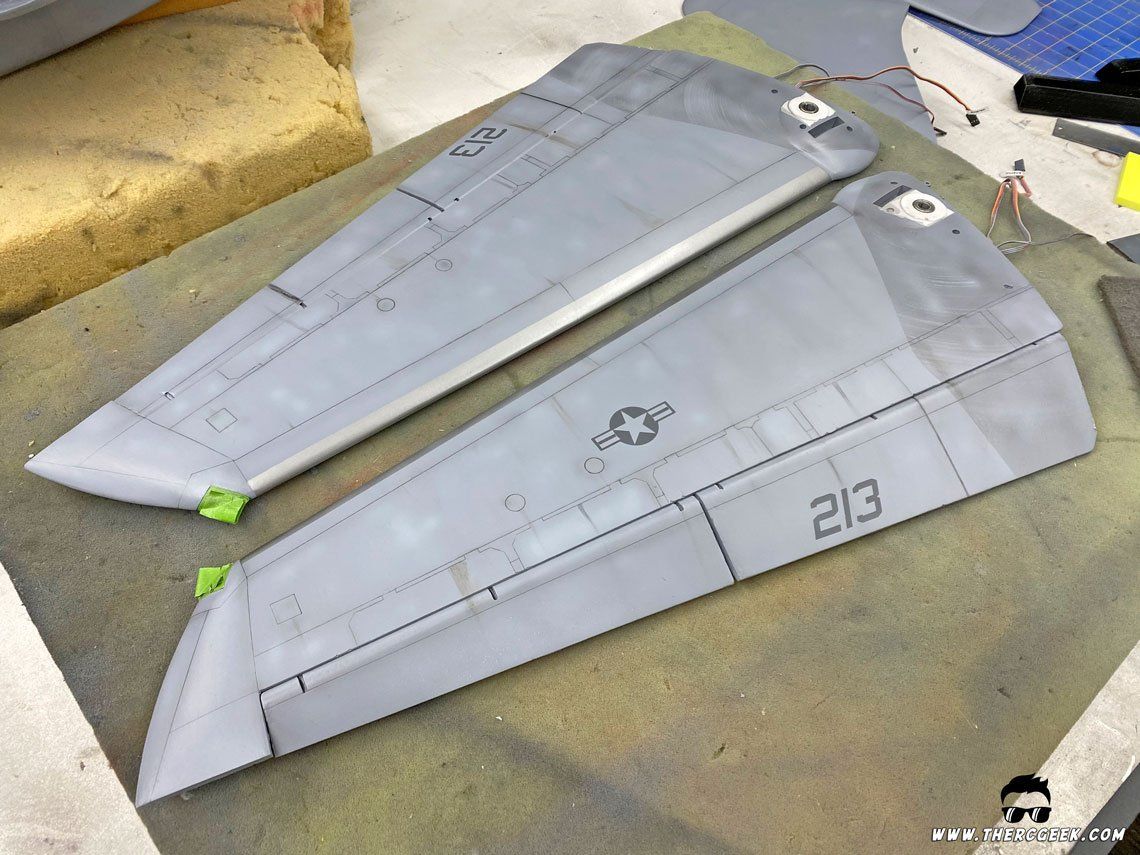
STEP 3: PANEL FADING
In researching Tomcat pictures, it’s apparent that there was quite a bit of surface fading that occurred along the Tomcat as a whole. The salt air environment is quite harsh and panels were also regularly touched up as well. The result is color variation along panels as well as mottling (uneven fading) along the aircraft as a whole. To simulate this, the Dark Ghost Gray base color was lightened with white and thinned way down and the centers of the panels were airbrushed with that in a couple different ways. First off, the centers of most of the panels were lightly faded using the airbrush. Not all panels had this applied just to provide a little more color variation.
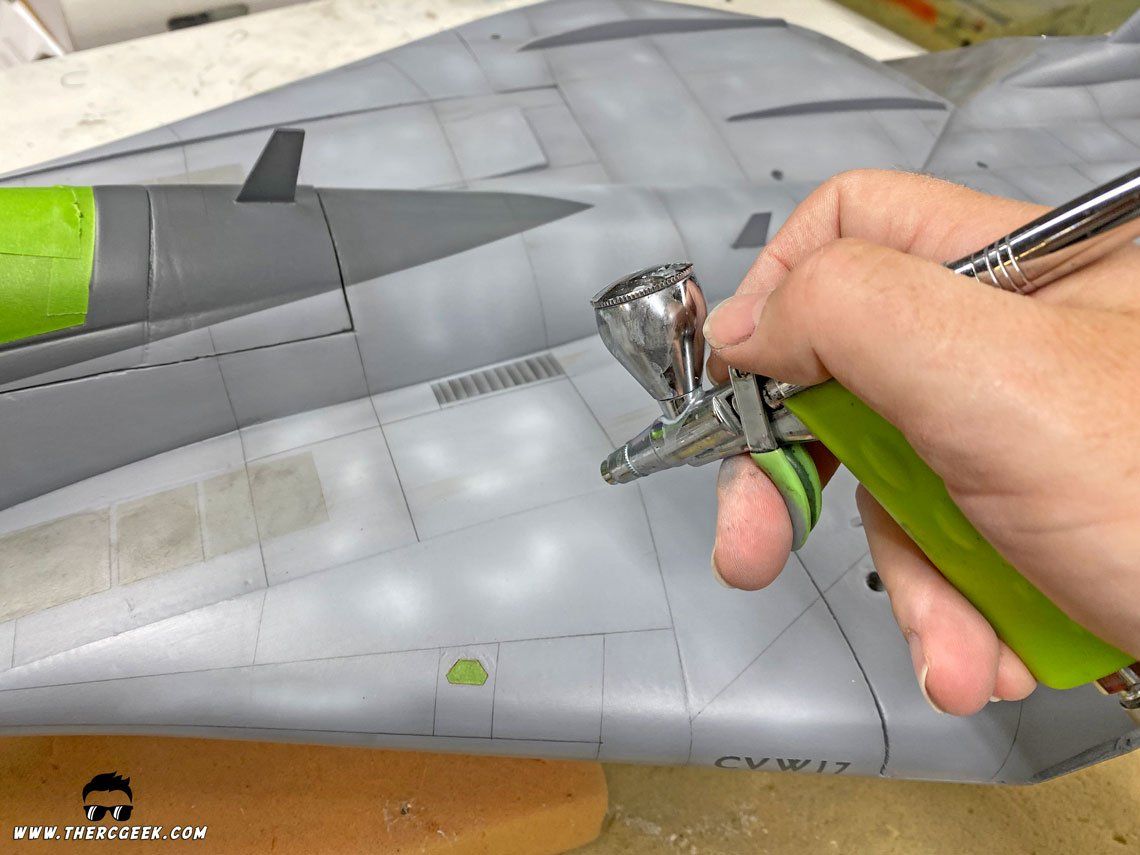
From there, various spots were randomly airbrushed around the airframe within the centers of the panels (especially within the larger panels) to create a mottled type of look as well. Lastly, to finish it off, for some of the larger panels (wings and tails mostly), long strokes were randomly applied in the direction of the airflow for the wings and vertically for the tails to provide additional color variation. There is a considerable amount of artistic license taken in this process, but the effect when done right can be extremely convincing. Once all applied, the airframe was burnished down once again with the fine Scotch-Brite pad for a final blending of all of the layers and that finished up the weathering application.
STEP 4: BLENDING IT ALL TOGETHER
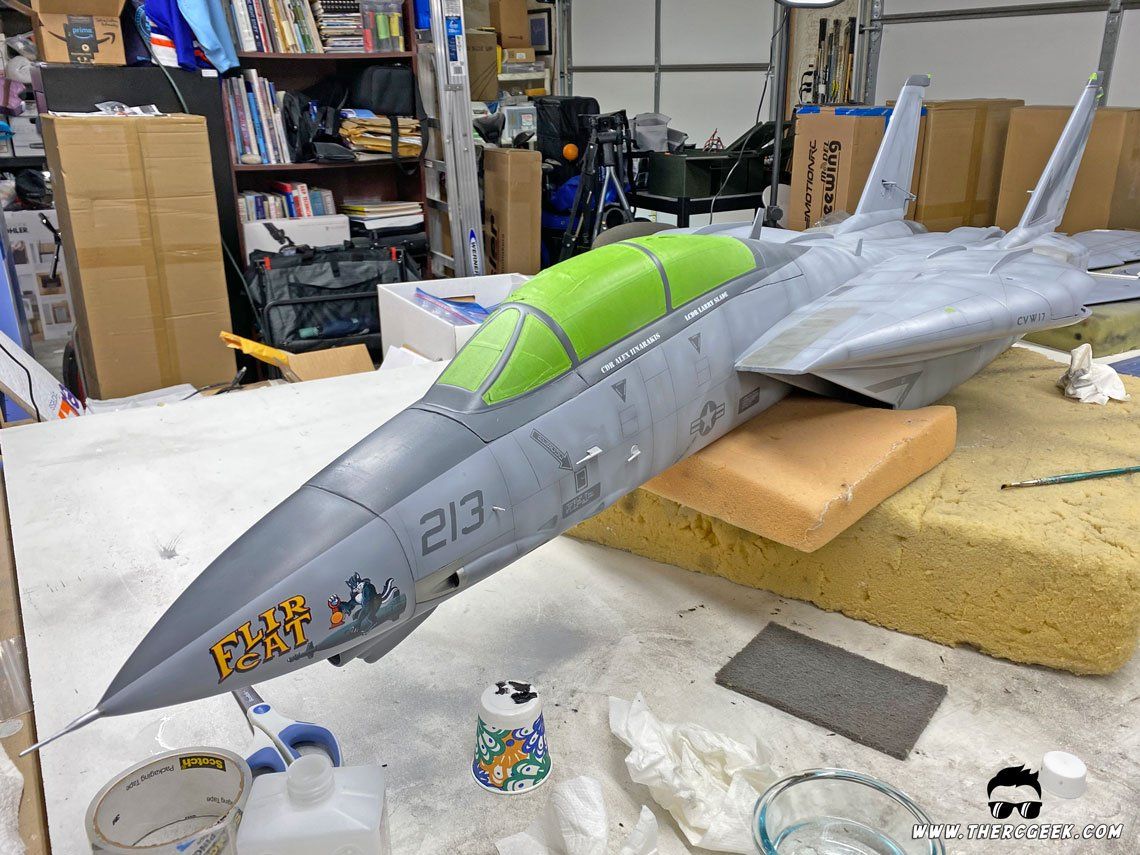
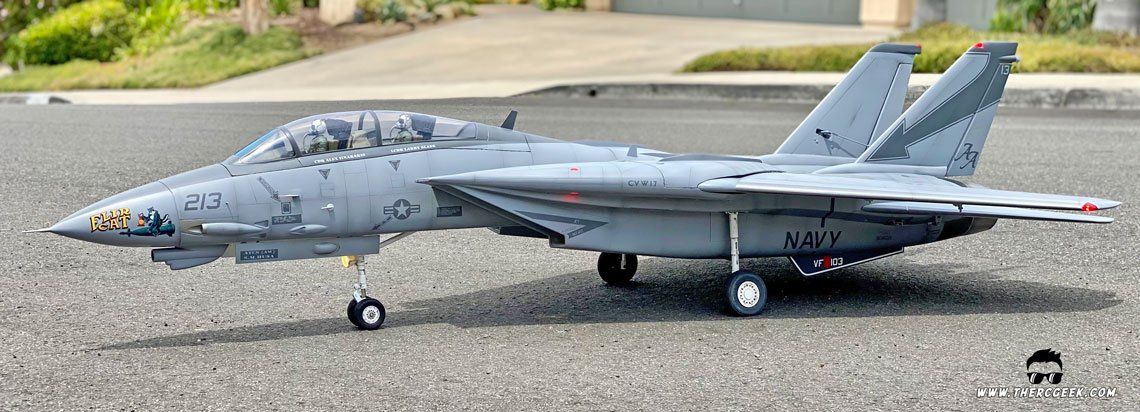
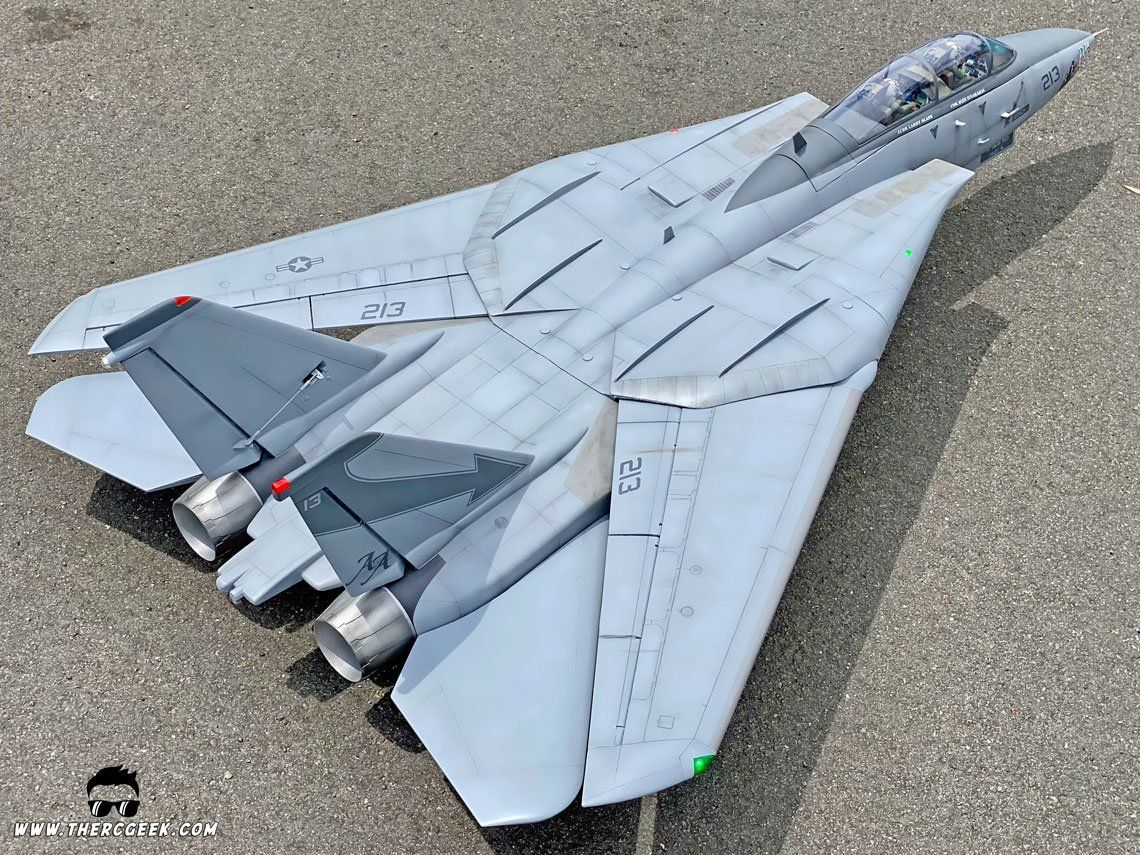
Once happy with it all, a final flat clear coat was sprayed over the entire airframe using Rustoleum 2x matte clear and she was done! Stepping back and looking at the finished Tomcat, I’m super stoked with the result. All of the work put in really pays off in the finish and the combination of the washes and the shading really portray a realistic finish. You’d never know the airplane was foam to look at it.
FINAL THOUGHTS
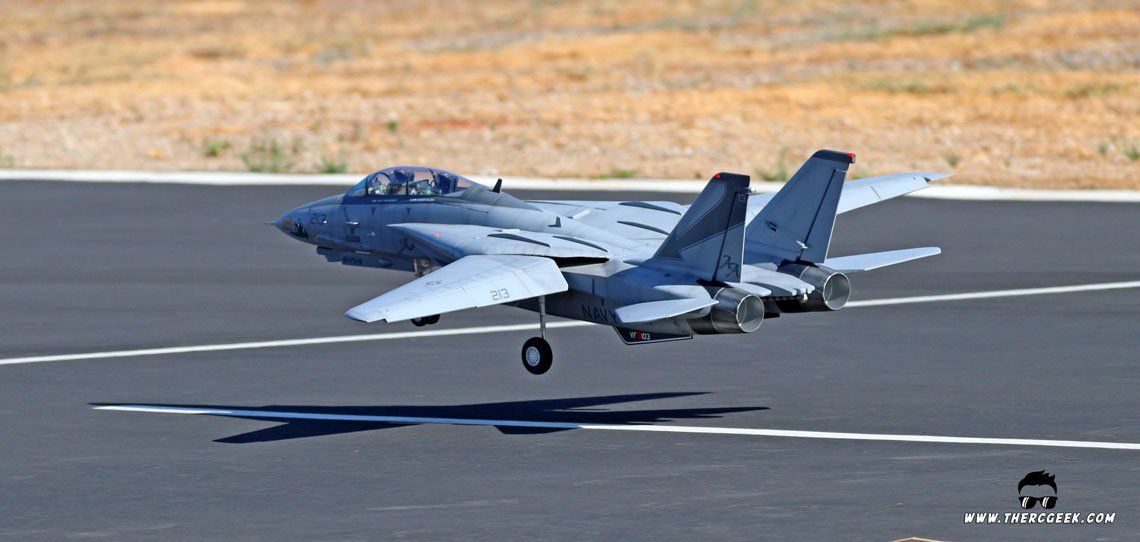
At last, this F-14 Tomcat project is completed, now all that’s left is to get her flown in her final colors. The weathering process really is what brings a scale project to life and is a process that I thoroughly enjoy. This Tomcat project took a bit longer than anticipated, but life happens as they say. No matter how long a project though, they’re always completed with a sigh of relief and satisfaction. Now that the airplane is done, to finish up this series, we’ll give a flight and talk through the final setup and tweaks that were made in the programing since my review of a few years ago. So, until then, I’ll see you at the field!
The RC Geek Blog is your place to learn about all aspects of the RC hobby. Learn to build, design, drive or fly that RC project you’ve always wanted to build, but have been intimidated to try. This blog is here to help you on your journey and provide tips and tricks as you go! My hope is to inspire builders both experienced and new! So, welcome, please look around, it’s an exciting beginning! I’m currently documenting my latest competition scale RC jet build, a Mark Frankel F4D Skyray, along with some other fun tips and videos. If you can’t find what you’re looking for on this front page, click on any of the categories to the right and it will show just posts related to those categories. Please feel free to add comments and/or contact me directly if you have questions, I’m here to help! And don’t forget to check out my YouTube Channel, I post new videos every week!
Subscribe To Our Blog Now