The RC Geek Blog
By: Chris Wolfe
10 channels of power…and 1 receiver to rule them all!
I personally love having the option for more channels, especially when building my own scale aircraft. While not always necessary, having channel options available is almost always helpful and it opens up opportunities to add scale functions and/or customize the controls more to your liking. And that's not to mention having individual servo setup across the same functions. So, I was excited to finally see the AR103060T and AR10100T 10 channel receivers released from Spektrum. It opens of channel options in a lighter weight package while also supports all of their new technology. Having been flying the NX10 for some time it is nice to finally be able to utilize all of those 10 radio channels.
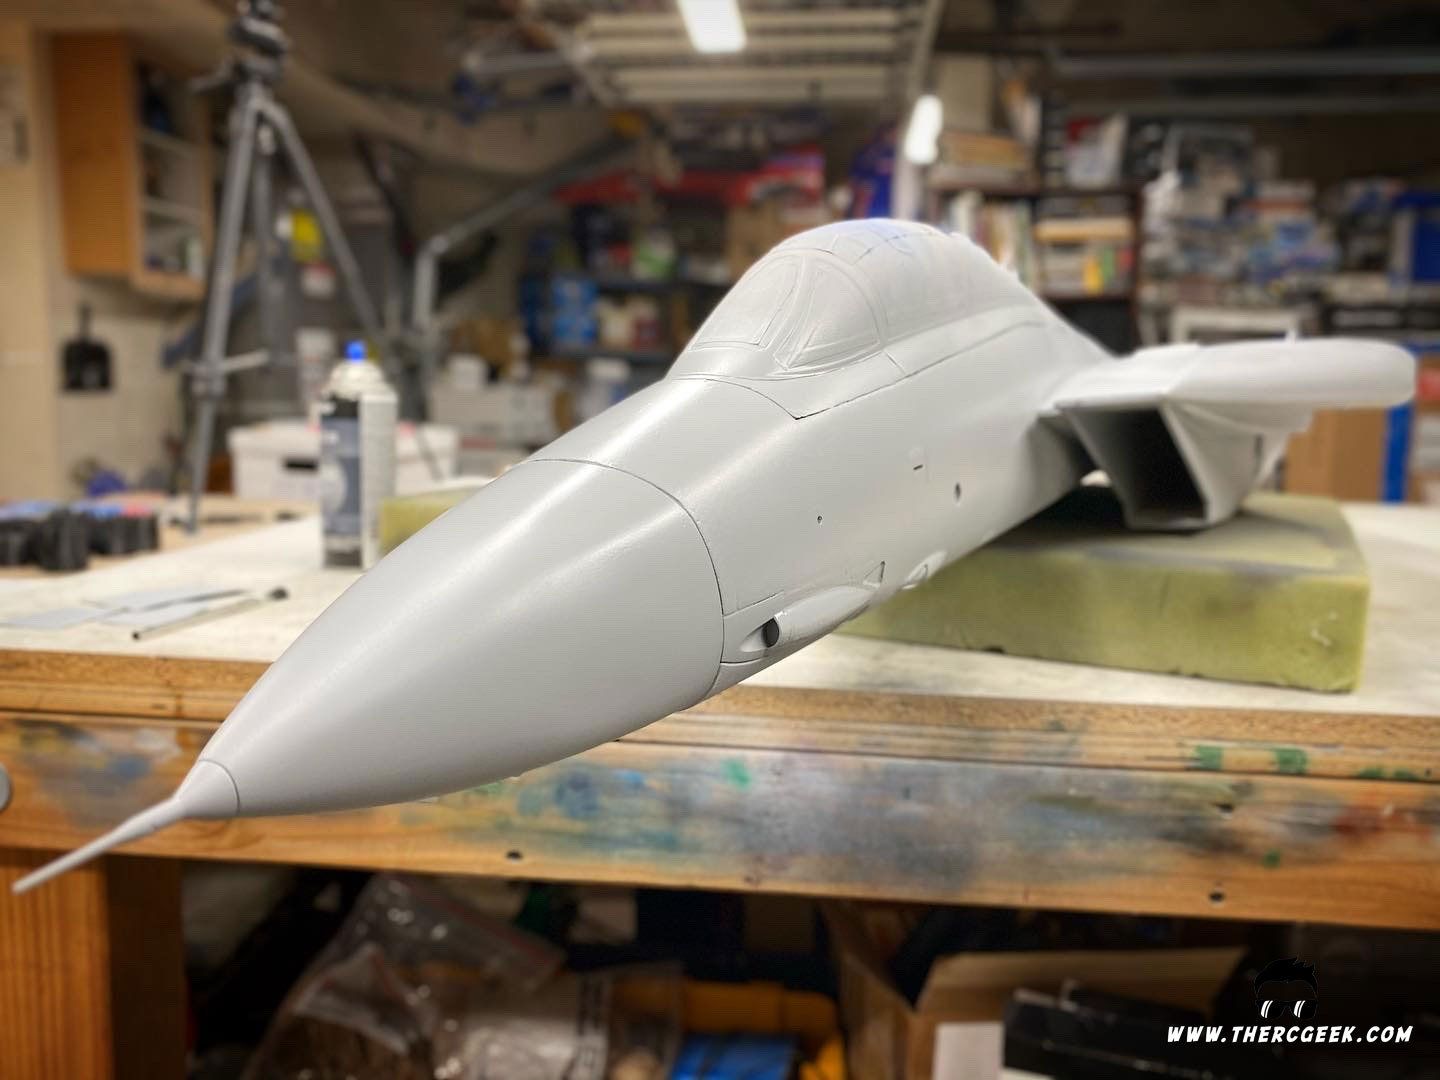
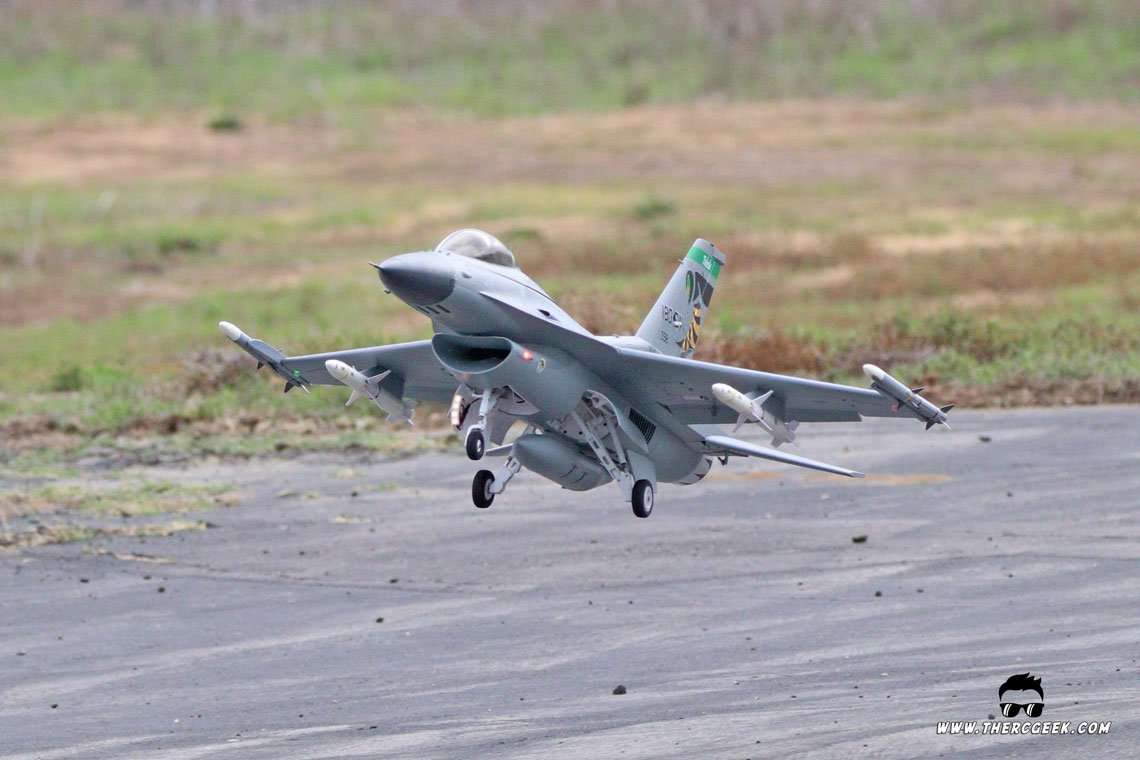
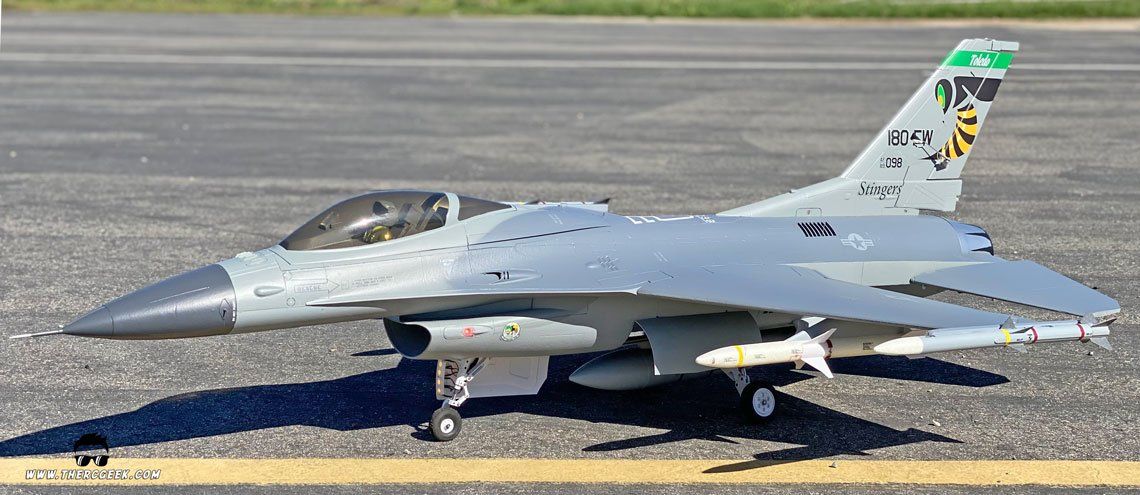
My goal in putting together this review is to introduce the receiver and some of its key features and then from there run through some programming and then talk through setting up AS3X. The subject for all of this is the E-flite F-16 80mm EDF as I had been wanting to try out a more scale flaperon type control setup that included tailerons to help recover the loss in roll authority when the ailerons are deflected as flaps. Spoiler alert, I really like the result with that airplane!
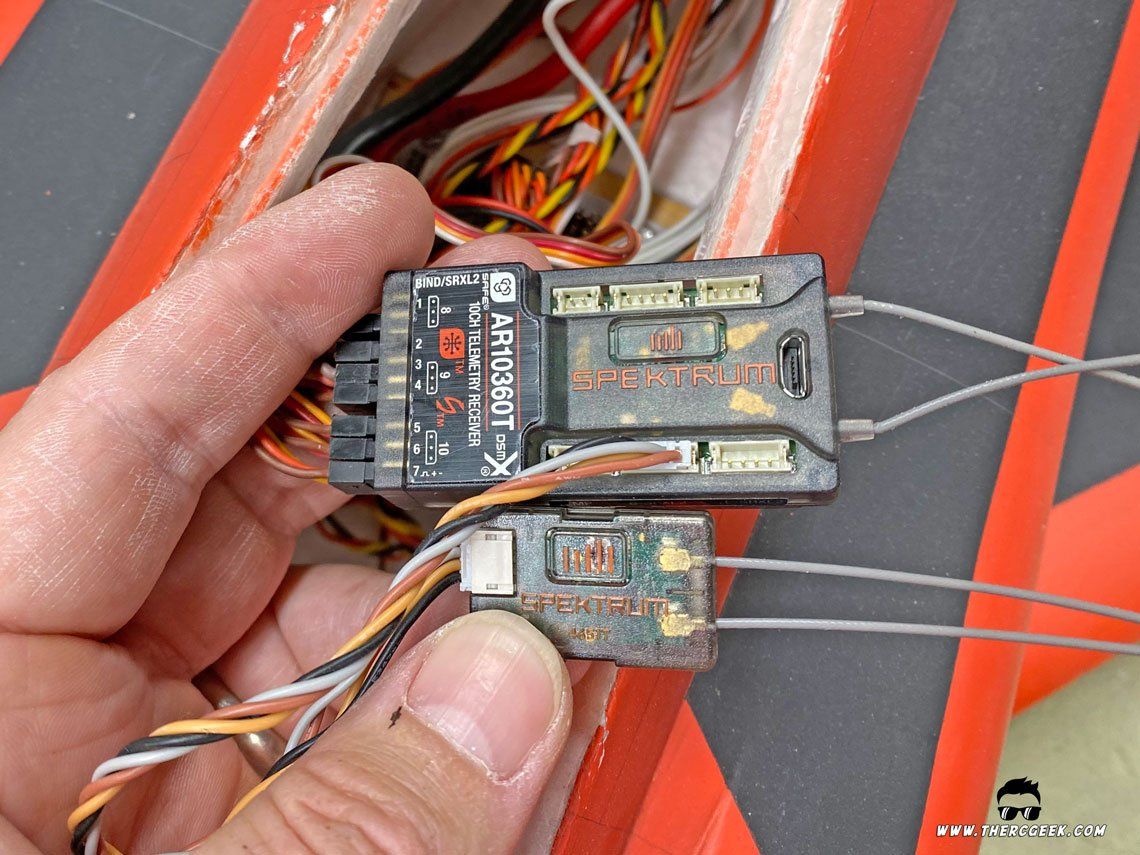
A QUICK RUNDOWN OF THE AR103060T RECEIVER
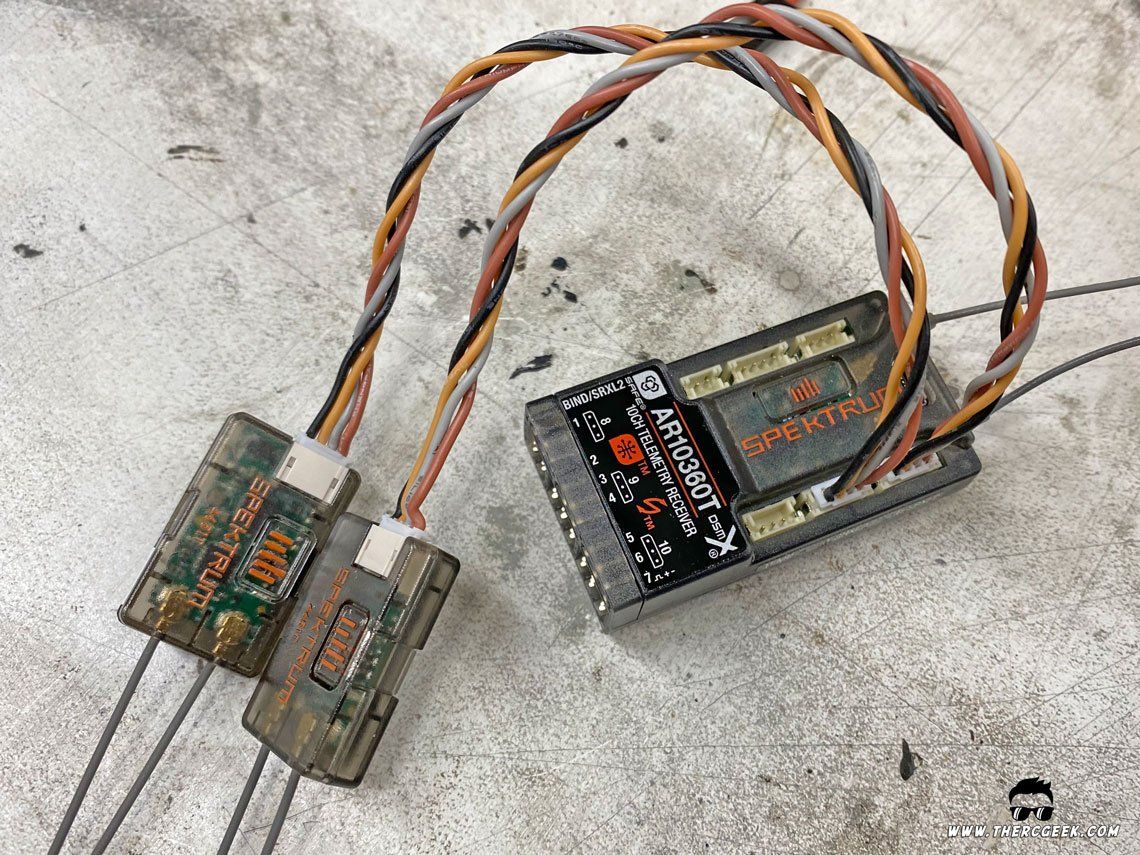
In short, the Spektrum AR10360T receiver is a full range 10 Channel AS3X/SAFE Telemetry Receiver compatible with a DSM2® and DSMX® (note that the AR10100T is the same, but does not have AS3X/SAFE). While many of the standard features of the receiver is similar to the current Smart/SAFE 6 channel and 8 channel receivers, the 10 channel receivers feature integrated barometer and vario telemetry data as standard. Additionally featured is an SRXL2 port for an SRXL2 Remote Receiver (SPM9747 or SPM4751T) to add additional RF path redundancy. Lastly, a Micro USB port is built into the receiver that can be used for firmware updates and model setup sharing, etc. (USB programmer required).
When these Smart/SAFE receivers are used in conjunction with a Spektrum Avian ESC, it opens up all sorts of telemetry data from the electric power system that is displayed on the transmitter. Additionally, warnings can be setup for any number of things that can be helpful in monitoring the health of the battery and power system. This is a very nice feature that I have discussed previously which is shown below.
A LITTLE PROGRAMMING WITH THE E-FLITE F-16
In putting this together, I thought a good use case for the receiver would be to setup combination flaperons and tailerons on the E-flite F-16 80mm EDF. I had experimented with flaperons in my review, and while I generally liked the results for helping with landings, they could only be deflected so much without affecting the roll control too much. In order to maximize the flap deflection on the flaperons, additional roll control can be gained through the use of tailerons on the full flying stabilizers. Since the BNF comes with only a 6 channel receiver, the only way to achieve this is through a higher channel receiver. Note that in order to make this work, the two elevator servo wires are harnessed together into a single plug. So, that connection needs to be split. I highly recommend getting some servo crimpers for making your own plugs, works great for stuff like this!
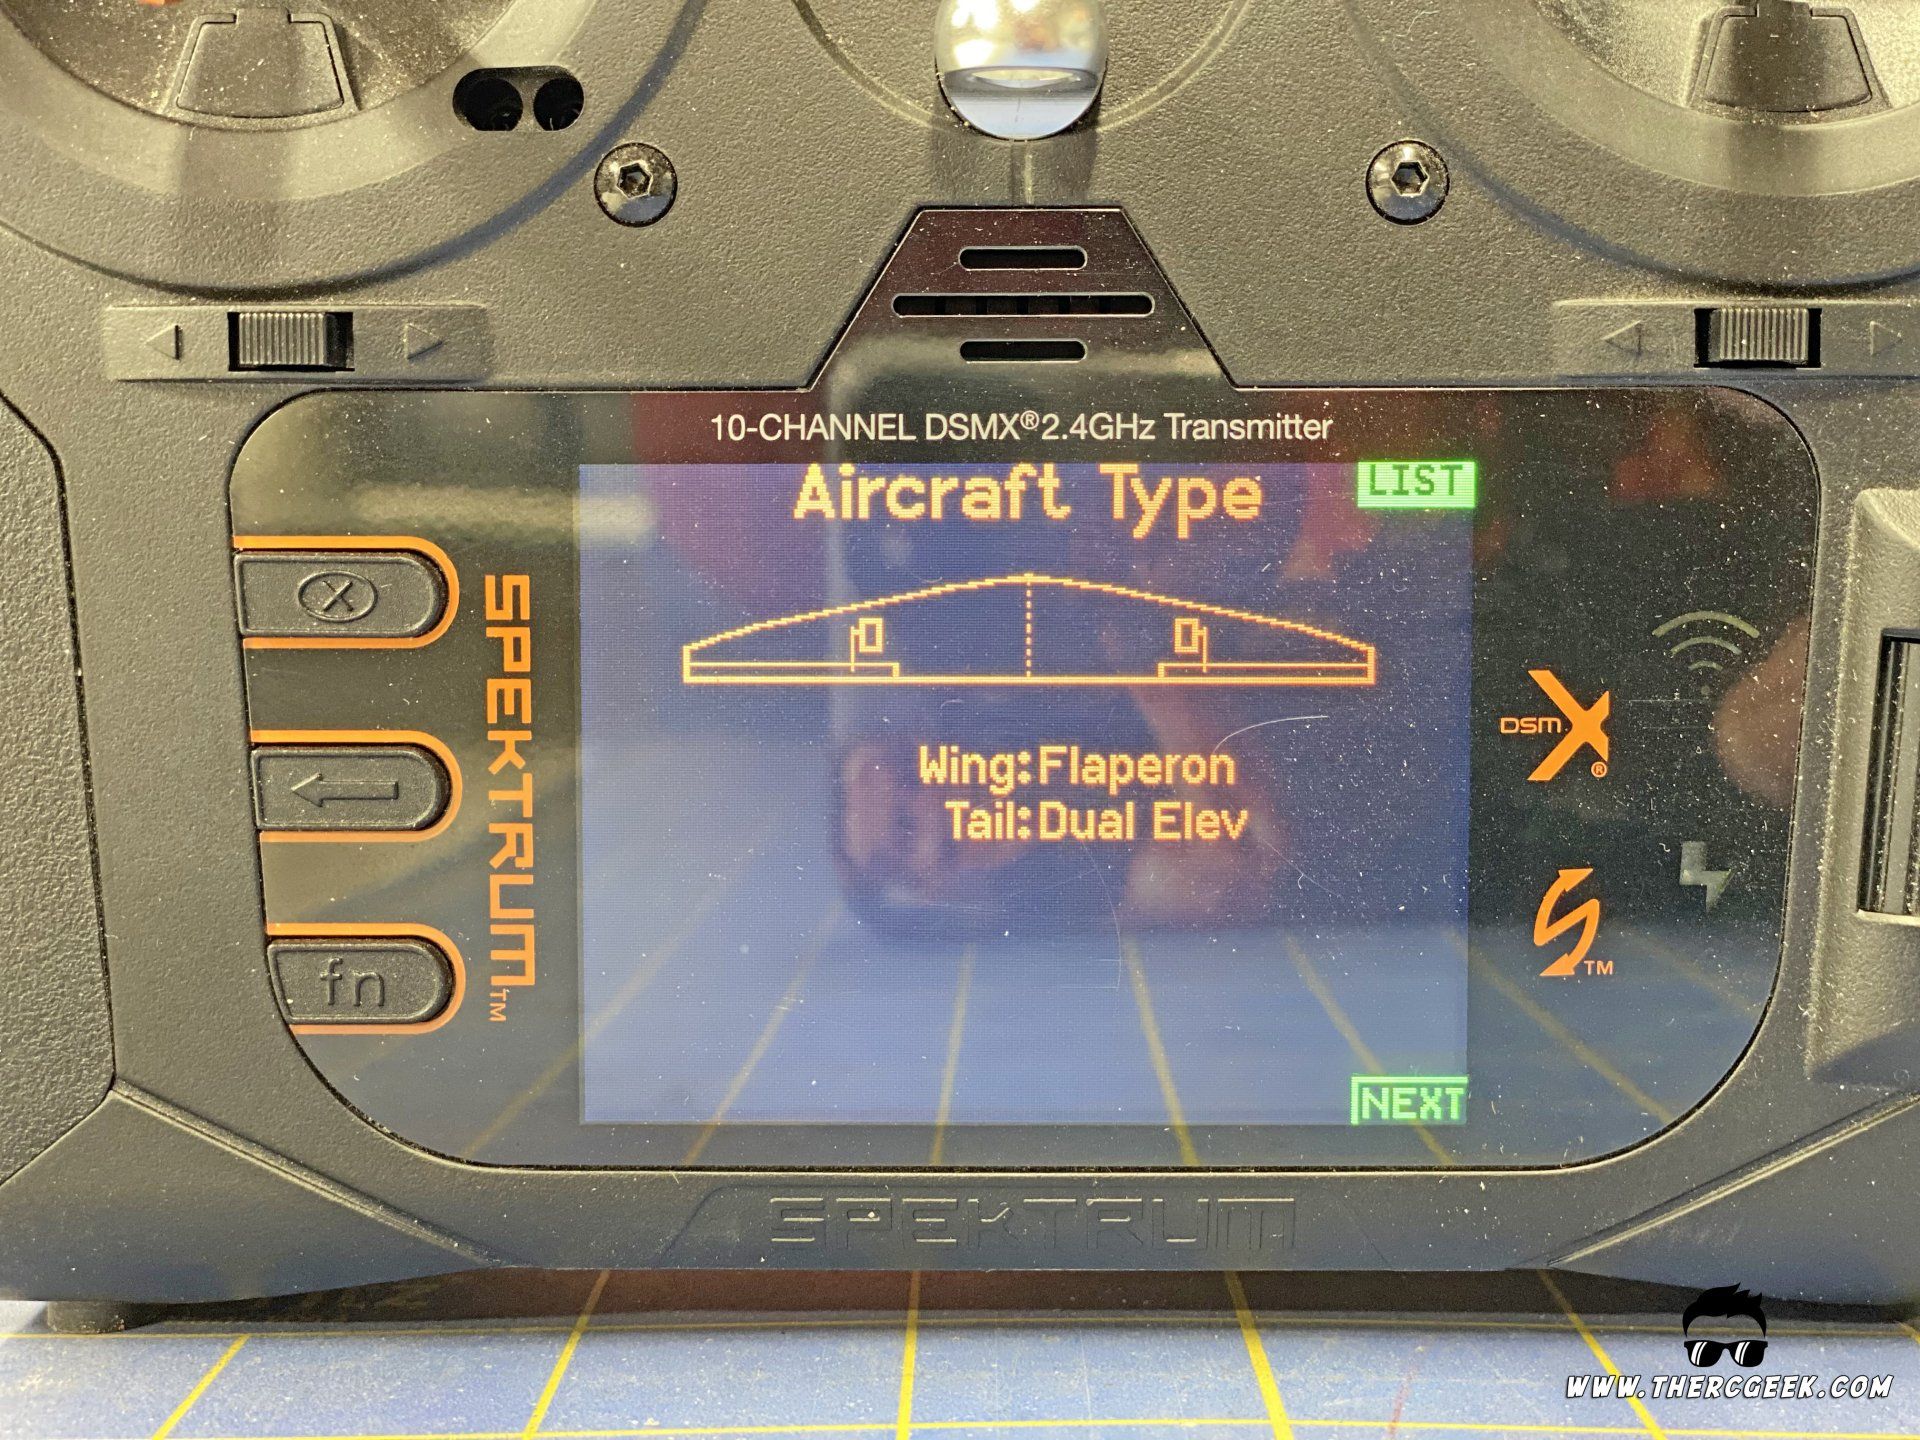
Spektrum programming is generally quite intuitive for standard type of configurations which is great as a whole. However, when it comes to more advanced programming, it can require generating some workaround mixes to get the desired functions for the desired surfaces. In the case for the F-16, it starts with assigning the correct “Aircraft Type” in the extended menus. As as shown below, the wing type was set to flaperon and the tail was set to dual elevator.
- Wing: Flaperon
- Tail: Dual Elevator
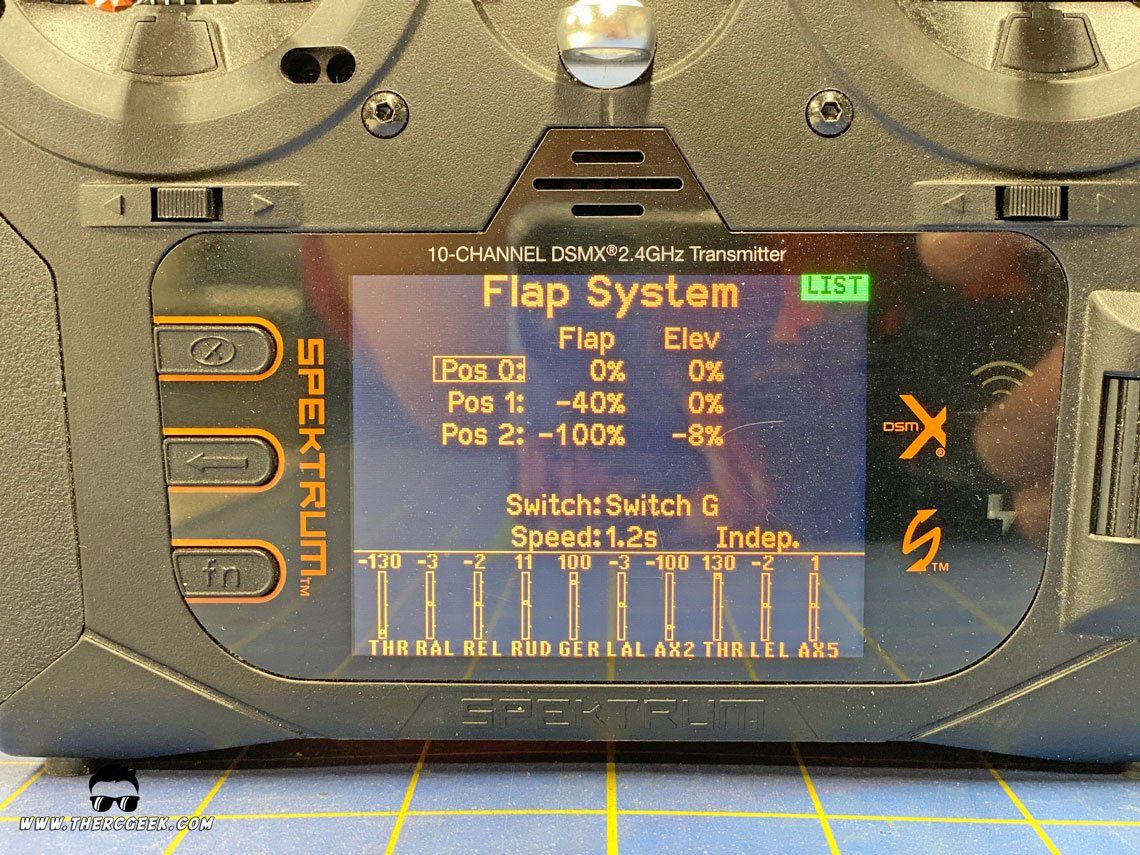
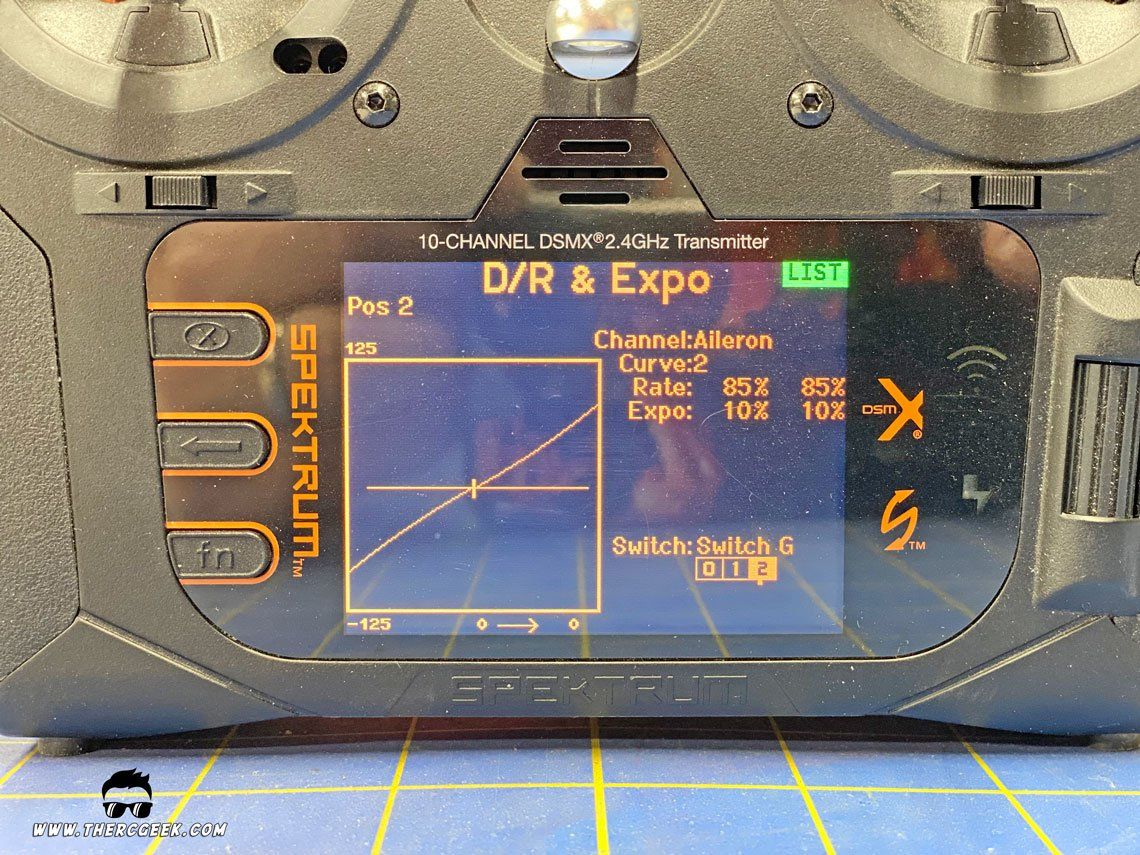
By selecting flaperon, that easily provides the flaperon function as desired and also opens up the “Flap System” menu. The positions were set to provide a mid flap setting and a maximum full trailing edge down flap setting. In addition, through flying the airplane, I discovered that the model needed an 8% up elevator mix at the max flap setting. In addition, aileron differential was set for each of the flaperon settings as the more cambered the flaperons become, the less effective they are when deflected downward. The flap deflections and associate differential is listed below:
- Mid Flap – 5mm, no elevator mix, 60% differential
- Full Flap – 17mm, ~2mm up elevator (8%), 100% differential

With the flaperons set, it was a matter of obtaining the taileron function at the elevators when the flaperons were extended. This was obtained through a simple Aileron to Left Elevator mix. This mix provides the full roll function to the tails with 100% rate. In addition, having liked how the airplane flew with standard aileron/elevator in flight, the mix was assigned to the flap switch and set active only when the flaperons were extended.
- AIL>LEL Mix (Assigned to flap switch and active (100% rate) only when flaperons are down)
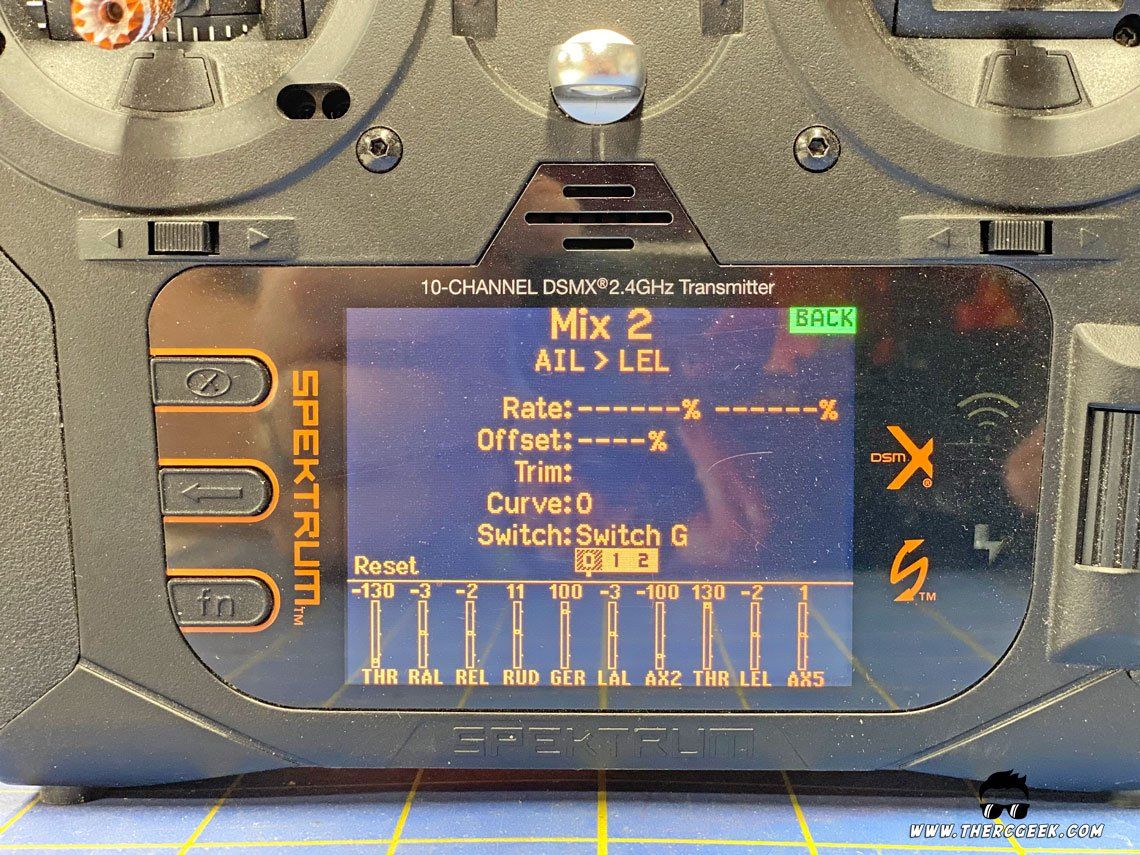

Lastly, through testing, it was found that the 100% taileron rate was too sensitive. So, the Aileron rate was adjusted to 85% for when the flaperons were down. This was accomplished by assigning the aileron rate switch to the flap switch so that the roll rate was reduced to 85% with the flaperons down.
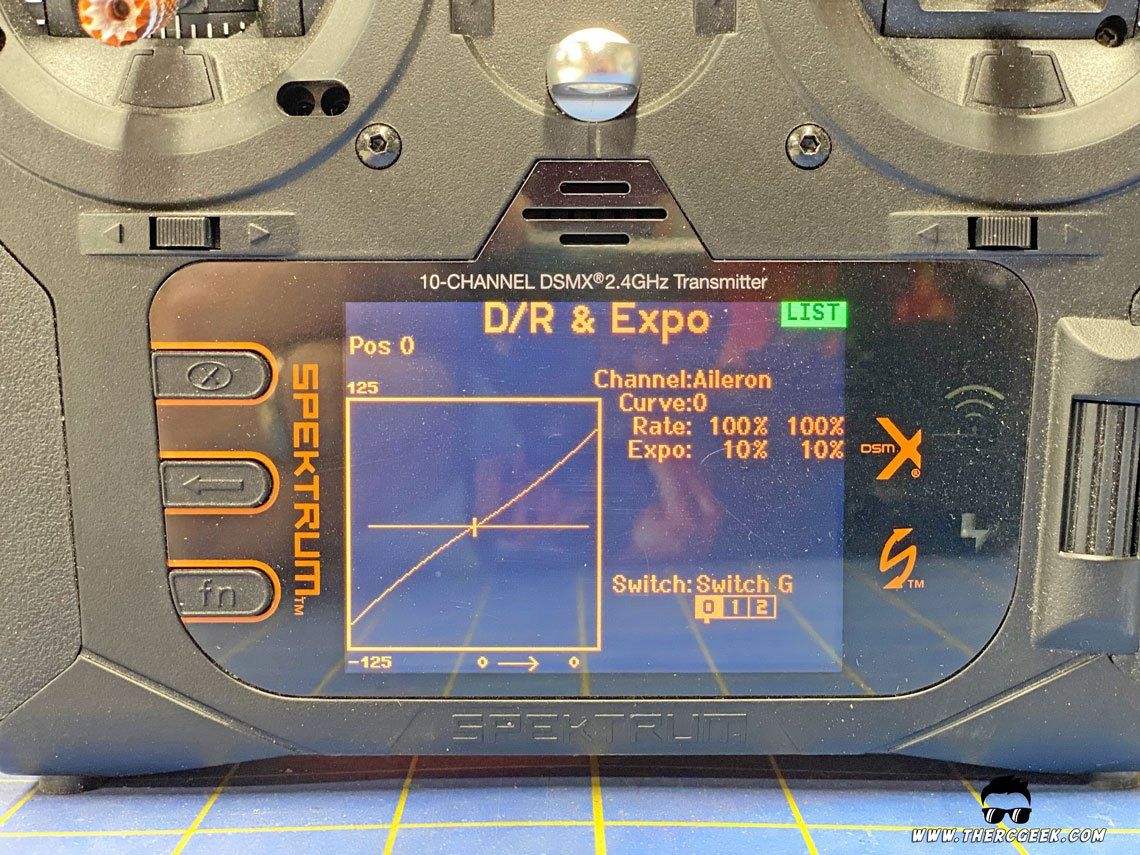
- Neutral Aileron Rate 100%
- Flaperon Down Aileron Rate 85% (rate assigned to flap switch)
SETTING UP AS3X
Having really liked how the E-flite F-16 flew with AS3X, the last item of business was to setup AS3X for this new control configuration. The nice thing is that with these newer radios (and software updates for the older radios) utilize the “Forward Programming” in the radio to recognize the aircraft configuration in the AS3X setup. Additionally, there’s an initial setup option that simplifies the receiver setup as well and applies some gain defaults. So, in setting this up, I went through the initial AS3X setup to set the receiver orientation and assigned some initial gains.
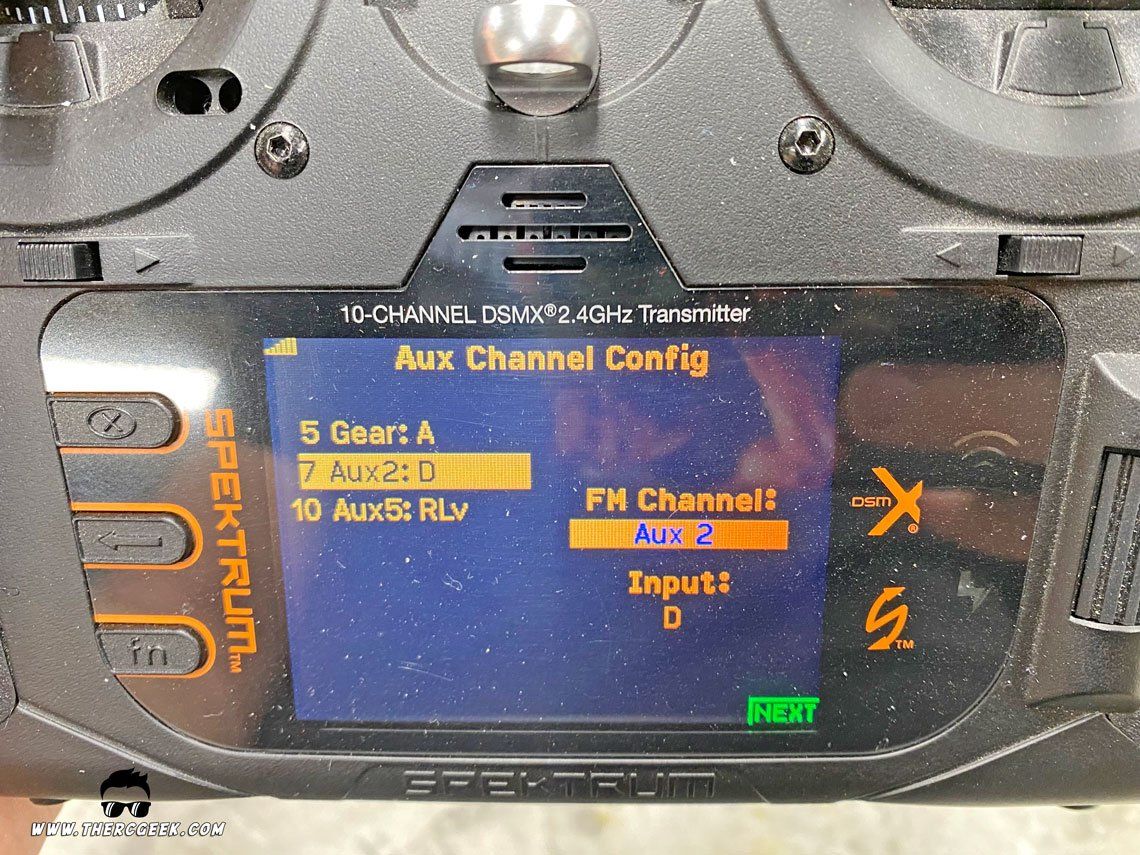
From there, I wanted to be able to turn the gyro on and off and so assigned F-Mode within the AS3X setup to Aux 7 and switch D (assigned in channel assign menu also) and then set the Fixed/Adjustable gains to “Fixed” for all switch positions. Lastly, I set the gains in the AS3X Settings menu set to 0 for switch position 1 (AS3X off) and then set to the F-16 gains that I noted from the previous receiver in the other switch positions (2&3). That was more or less it, but it does take a little patience to get the switch setup working as desired. Also, it’s important to verify that the gyro is working properly, so check and double check once it’s all setup.

FINAL THOUGHTS
Well, I think that about covers it. As I mentioned at the beginning, having more channels available when programming a model is always a nice thing to have and when you start getting into more advanced programming, it’s a necessity. I’ve really been liking these new Smart receivers and now having a readily available 10 channel receiver means that will likely be my go-to receiver going forward. Until next time, I’ll see you at the field!
The RC Geek Blog is your place to learn about all aspects of the RC hobby. Learn to build, design, drive or fly that RC project you’ve always wanted to build, but have been intimidated to try. This blog is here to help you on your journey and provide tips and tricks as you go! My hope is to inspire builders both experienced and new! So, welcome, please look around, it’s an exciting beginning! I’m currently documenting my latest competition scale RC jet build, a Mark Frankel F4D Skyray, along with some other fun tips and videos. If you can’t find what you’re looking for on this front page, click on any of the categories to the right and it will show just posts related to those categories. Please feel free to add comments and/or contact me directly if you have questions, I’m here to help! And don’t forget to check out my YouTube Channel, I post new videos every week!
Subscribe To Our Blog Now