The RC Geek Blog
By: Chris Wolfe
It’s time to buzz the tower…If there was one…
Freewing F-14 Tomcat Flight Review and Setup
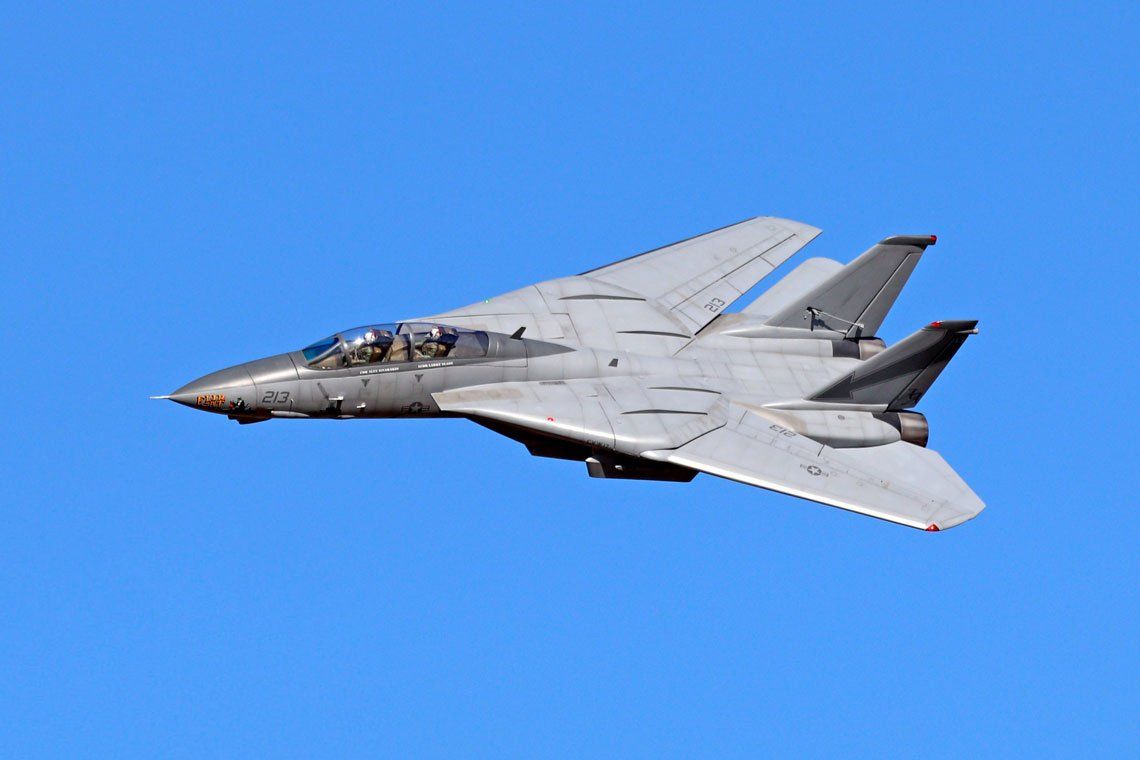
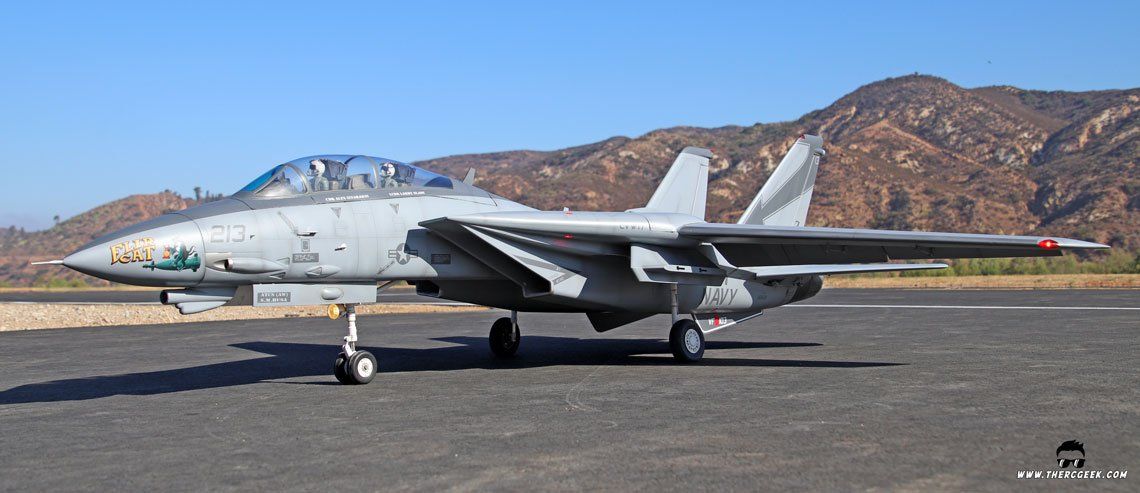
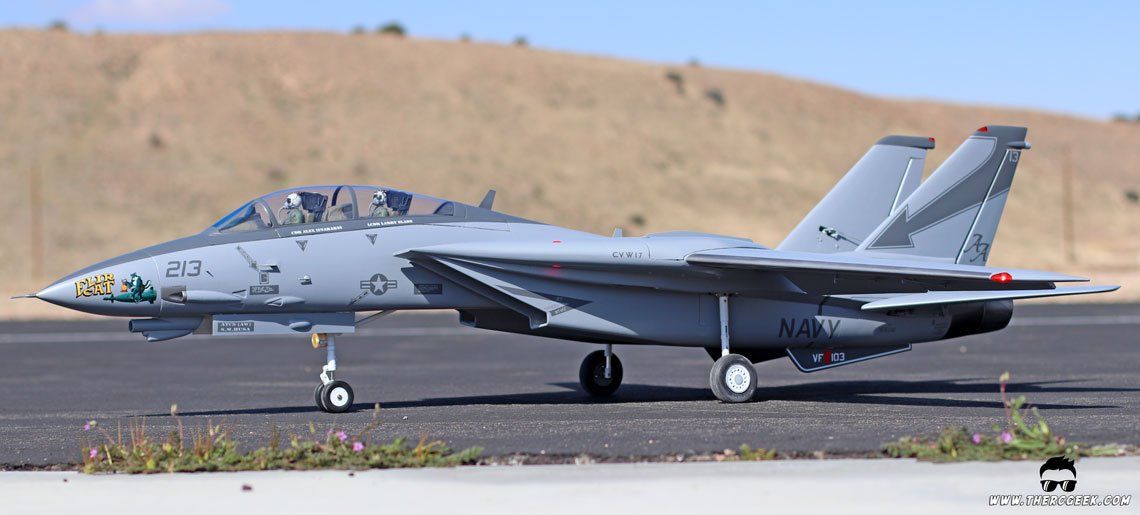
So, how does the Freewing F-14 Tomcat fly? In short, pretty darn awesome! The distinguishable shape of the F-14 looks menacing in the air and the flight characteristics are fantastic. As discussed in my assembly review of the airplane, there are some tricks I’d highly recommend in setting the airplane up which at the end of the day, provide a great flying airplane. This comes from not just flying this particular airplane, but also flying the Freewing production prototype (stock and tailerons only) as well as the twin 70mm F-14 I helped design, test, and fly for my folks at JetHangar.com. They have all exhibited similar characteristics and fly very much the same.
AIRCRAFT SETUP & CG
 In my assembly review
, I covered the installation of two 6s 30C 5800 mah
batteries that I’m using in the airplane. To maintain the CG, the battery area was modified so that the batteries could be pushed as far back as possible up against the swing wing carry through spar. This maintained the CG well per the manual (87mm measured back from the leading edge of the forward most hatch cut on the overwing fairing hatch) which has shown to be about perfect! Also the manual provides a trim elevator setting (31mm measured
from the top of the fuselage to the leading edge of the tail) that is a very good
starting point for flight. Note that there is nothing to worry about regarding CG with wings extended vs wings swept. I found that the airplane could use just a touch more back pressure for flying around, but for me not enough to warrant adding any kind of mix. Also, the CG doesn’t change as a result of the change in wing position either. These have been the case with every F-14 Tomcat I’ve flown and are two of the most common questions I regularly get.
For the control throws, this is where it’s interesting. The control system on the full sized Tomcat uses the tails as the primary surfaces for commanding pitch and roll. The wing has spoilers to augment the roll control with the wings extended which are then disabled with the wings swept. Lastly, there are full span leading edge slats and trailing edge flaps. Now, in the case of the Freewing F-14 in the stock configuration it’s setup a bit differently than the full sized airplane. There are outboard wing ailerons and inboard wing flaps in addition to the taileron surfaces.
All of the servos in the airplane are routed into an electronics board which automatically sets the mixing between the outboard wing ailerons and the tailerons. That’s all well and good and works well for flying with the wings extended, however in this stock configuration the wing ailerons remain active while in the swept wing position and that causes problems. Disabling the ailerons in the wing swept position is absolutely necessary for a good flying model in the swept wing position. So, to get around this, we must program the two aileron servos separately by directly plugging them into the receiver (bypassing the electronics board) and programming their function independently (more discussion on this below). Note that the airplane flies well with the wings extended in the stock configuration, but I found the high rate aileron recommendations much too hot for my liking.
Since we’re programming the wing ailerons independently, I’m using the ailerons more as the function of the turning spoiler like the full size by having them act trailing edge up only to help augment the roll control provided by the tailerons when the wings are extended. Also, since we’re playing with the ailerons in this way, the scale geek in me figured why not set the airplane with full span flaps while we’re at it for a little more scale swag?! By doing this, I was pleasantly rewarded with a beautifully landing airplane that when executed right lands extremely softly! Lastly, having two rates on the tailerons between wings extended and wings swept is an absolute must! I mitigated that through some switch assignments such that the rates change automatically depending on where my wing sweep switch (and subsequently wing position) is. I talk through the radio programming methodology a bit more below. Note that based on the Freewing wing sweep actuators used, the airplane does not have a mid sweep capability, i.e. the wings can only be commanded to fully swept or fully extended.
So, after many flights, here’s what I have converged on for control throws. They suit my style of flying and should be a good starting point to tune to your desired feel. Keep in mind these are purely linear with NO exponential (I’m not a big fan of expo typically). Also, there is plenty of authority running tailerons only, I’ve flown the airplane in that configuration and it works very well. However, the roll stick input requires just about max deflection for a decent 360 degree roll.
Wings Extended:
Roll
– tailerons 1-1/4″, wing ailerons mixed with 3/16″ trailing edge up only
Pitch
– elevator 1-1/4″
Full span flaps
Partial Flap
– 5/8″ with a 3/16″ up elevator mix
Full Flap
– 2″ with a 1/2″ up elevator mix
Wings Swept:
Roll
– tailerons 1/2″ ( no wing aileron throw
)
Pitch
– elevator 1-1/4″
RADIO PROGRAMMING METHODOLOGY
My go to radio system is the Airtronics SD-10G which is an excellent radio at an excellent price. It’s a 10 channel radio with a ton of capability which made programming the F-14 Tomcat fairly easy. Since radio systems vary, I figure it best to talk through the methodology I used here which should work across most systems I would hope. In order to do what I’ve done exactly, a minimum of 9 channels are required so that the ailerons can be programed individually to function with the flaps as well as act like a turning spoiler. If limited on channels, then it limits the functionality of the ailerons to work only as ailerons (2 servos connected with a y-harness ) or as flaps (flying airplane tailerons only and connecting the aileron servos through a y-harness with a reverser on one side). I’ve flown the airplane tailerons only and it flies very well, so if channel limited and you want the full span flap, that is a very good option. That said, I do like the addition of the outboard aileron functionality as it adds a little more roll responsiveness with the wings extended that you don’t get flying with tailerons only.
So, utilizing the 9 channel setup (I have a 10 channel receiver in the airplane) the aileron servos were plugged directly into the receiver using 2 available auxillary channels (bypassing the stock electronics board, all other channels are plugged in and remain in the stock setup). This maintains everything essentially stock with the exception of the aileron servos only.
Ailerons as Flaps
 I first setup the ailerons to work in conjunction with the flaps. This was done by assigning the two aileron channels to the flap switch and simply adjusting the servo direction and the servo position (using the end point adjustments) at each switch position to match the flaps in each down position.
Ailerons as Turning Spoilers
 To actuate the ailerons as a turning spoiler, I used two separate channel mixes, one for each aileron servo aux channel), that were mixed to the standard aileron channel. This channel mix was then assigned to my swing wing switch such that the channel mix is active with the wings extended and then inactive when switched to the wings swept position (disables the ailerons in the swept wing config). Within the channel mix is where the deflections of the aileron servos are set and adjusted. Since I’m using them acting trailing edge up only, it required only adjusting a single end point for each mix/servo (approximately 25%). Again, this is within the channel mix only. Note that since this is outside the traditional aileron setup and aileron channel, these channel mixes do not work in combination with the traditional aileron dual rates. However, some creative switch assignments and an additional channel mix or two could probably create this. I didn’t find this necessary since I only wanted the ailerons active with the wings extended and tuned the rates to the desired feel I wanted with my tailerons on high rate.
Taileron Rates with Wing Position
In addition to the above, I assigned my aileron dual rates to the swing wing switch (in addition to the normal dual rates switch) so that with the wings swept, the tailerons automatically reduce to low rates. This is important as the airplane will otherwise be extremely touchy in roll with the wings swept if the tailerons remain at high rate. The airplane will be on its back if you simply breath on the stick!
ESC Calibration
The last item of business before flight is to calibrate the speed controllers to the transmitter ( procedure is available here ). By following the procedure, the ESCs will tune themselves to the transmitter settings and ensures that each fan is producing the maximum amount of thrust each time it’s powered on. If you change the transmitter at anytime, then the ESCs should be recalibrated. I didn’t do this calibration on the production prototype but did on this airplane and this airplane has notably better performance! So, this is an important step!
One thing to note, I noticed some thrust robbing openings in the exhausts around the taileron servo cutouts and where the motor wires exit into the fuselage. I sealed these up by removing the fan hatches and adding some packing tape  internally over the taileron servo and using hot glue to seal up around the motor wire exit. After placing the fan hatches back onto the fuselage, I used a long dowel to completely seal the packing tape over the hatch areas too. Any leaks in the exhaust ultimately reduce thrust and performance. Though it may be small, every little bit helps for maximum efficiency of the system.
FLYING THE FREEWING F-14 TOMCAT
Flying the F-14 Tomcat is an absolute blast and with the 5800 mah packs, I can get about 5 minutes of pretty hard flying if I want to push it. Currently, I keep the timer at 4 minutes and fly the airplane as hard as I like and the packs measure out at about 3.78v/cell. Every F-14 I’ve flown has been a great flyer and the Freewing F-14 is no exception. The F-14 configuration as a whole is just a great platform for an awesome flying airplane. Plus, you can’t beat the shape of the F-14 in the air. It’s one of those iconic airplanes that is unmistakable…though it always seems to conjure up quotes from the movie “Top Gun” whether you want them or not…”No my ego doesn’t write checks…I have an ATM card!” 😉
Here’s a full flight video from a fun flying day at the PVMAC Prado Air Park. Thanks Brent Hecht for manning the camera for this flight.
With the wings extended, the airplane is a wonderful flying machine that flies easily and will handle most of what you throw at it (rudders are very effective though, so be aware). The airplane is plenty fast enough and the vertical is quite good. To give you an example, I’m able to perform a 1/2 cuban 8 return from takeoff just like the full size which is a great deal of fun! Recently I’ve gotten into performing a roll on takeoff followed by a 1/2 cuban 8 return and the airplane handles it like a champ! The slow speed handling is excellent as well and the airplane will visually give you an indication of the onset of stall. As you get slow, the wings will start to rock as you approach the stall speed which is your indication to apply power and increase the speed. This is another characteristic of all F-14s I’ve flown. Note that this is less prevalent when slow and with full span flaps.
The airplane flies just as easily with the wings swept too. Flying circuit after circuit in the swept wing configuration is easy with low rate taileron and the airplane carries speed well overall in that configuration. Pulling hard tight turns does bleed the speed off in this configuration, which is a characteristic of a delta type platform so keep that in mind.
Overall, the trickiest part I have found is managing the transition time from wings extended to wings swept and visa versa. Once you’re aware of it though, it’s easy enough to plan for. As noted in the radio setup, the tailerons are automatically set to switch to high and low rates during wing transition. However, this does not occur proportionally to the speed of the wing transition (I wasn’t sure I could program this into the radio). As a result upon hitting the swing wing switch, the wings transition over a second or two, but the taileron rates immediately change. So, when the wings sweep back, the taileron rate will initially start out sluggish (they switch to low rate) and become increasingly more effect as the wings transition aft. Conversely, when sweeping forward, the taileron rates are immediately high and touchy and then become less sensitive as the wings transition forward. It’s really not a big deal, but is something to keep in mind. You’ll quickly become aware of it when you experience a quick roll response as the wings sweep forward. It’s easily manageable…in fact, my favorite maneuver has become rolling while the wings transition like they used to do as part of their airshow demos.
Call the Ball!
At last, the world can rest easily as there is a nicely done F-14 Tomcat ARF that is affordable for most folks. The $580 price tag is an excellent value and you get a well engineered and great flying model. It’s foam which has it’s limitations (if you’re a builder, my folks have a kit at JetHangar.com
), but even so it’s pretty nice. I can’t help but think how awesome this airplane would be after stripping it down and refinishing it…but for now, we’ll keep it stock. Now guys, remember, as these become more prevalent and more Freewing F-14 flight videos come online, remember to post responsibly…the internet really doesn’t need another RC jet video featuring the “Top Gun Anthem” or “Danger Zone” playing underneath it…it’s hard to believe, I know! Although, if you’re up for a challenge, how about a few videos featuring “Take my Breath Away” or “Heaven in Your Eyes.” 😉 I mean, they are from the Top Gun soundtrack afterall!
Here are a few more videos I’ve captured of some friends flying their Freewing Tomcats. It really is a very cool foam jet and we’ve been having a lot of fun with them!
BONUS! Here’s video of the last F-14 Tomcat demo at NAS Oceana in case you’re looking for some maneuvers. 🙂 Who doesn’t love the Tomcat?! I remember the Tomcat demos being one of my favorites when I was a kid at air shows. The full size airplane was an absolute beast!
OCEANA VIDEO
The post Freewing F-14 Tomcat Setup & Flight Review appeared first on The RC Geek.
The RC Geek Blog is your place to learn about all aspects of the RC hobby. Learn to build, design, drive or fly that RC project you’ve always wanted to build, but have been intimidated to try. This blog is here to help you on your journey and provide tips and tricks as you go! My hope is to inspire builders both experienced and new! So, welcome, please look around, it’s an exciting beginning! I’m currently documenting my latest competition scale RC jet build, a Mark Frankel F4D Skyray, along with some other fun tips and videos. If you can’t find what you’re looking for on this front page, click on any of the categories to the right and it will show just posts related to those categories. Please feel free to add comments and/or contact me directly if you have questions, I’m here to help! And don’t forget to check out my YouTube Channel, I post new videos every week!
Subscribe To Our Blog Now
