The RC Geek Blog
By: Chris Wolfe
Refinish a Foam Jet Ep 3 – Freewing F-14 Tomcat Paint, Markings, & Panel Lines
Making the Flir Cat…Tomcat nose art FTW!
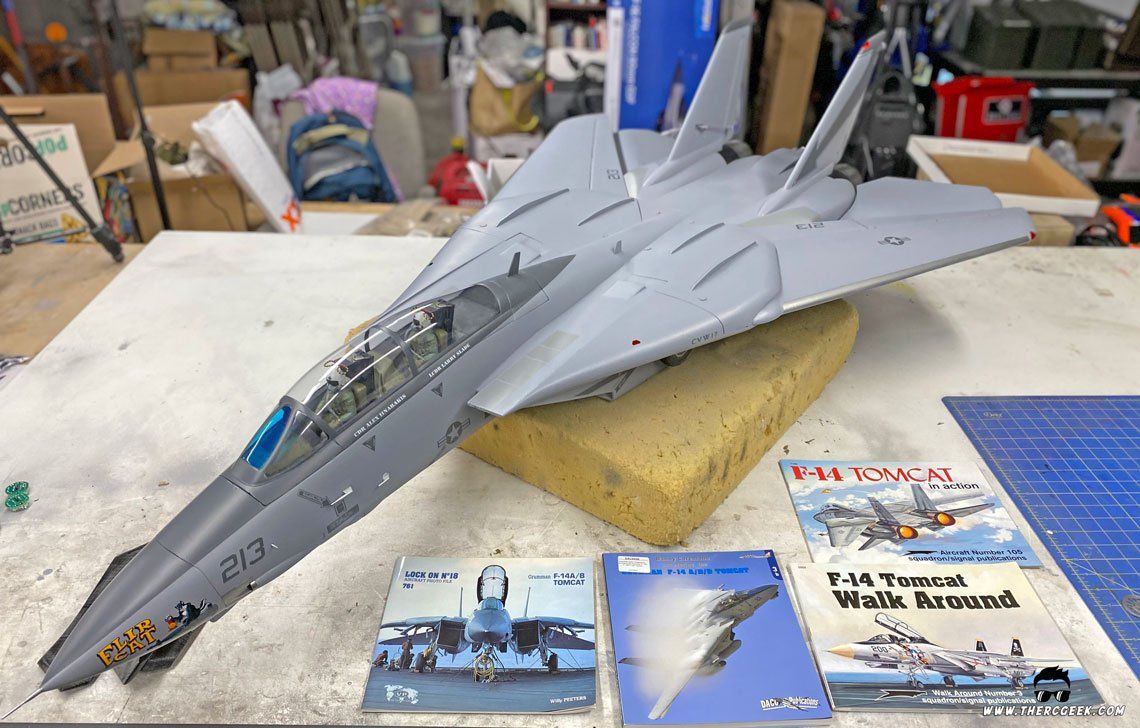
In my previous articles, we talked about the refinish process and making a highly detailed cockpit for the Freewing F-14. Now, it’s time for paint! I will say, I have a love/hate relationship with painting models. Most of the time, I love it, but when there are issues that arise, that’s when I hate it, haha! However, being patient, having the right materials and ensuring the proper preparation is done can usually keep those issues to a minimum, but sometimes you just have to improvise. In this case, the vinyl markings I had made decided to curl up and not want to stick to the airframe which had me thinking all of the markings would need to be completely replaced. As it turned out, at the suggestion of a friend, a little low temp heat with an iron cured the issue (saving huge time and aggravation) and all was right with the world again!
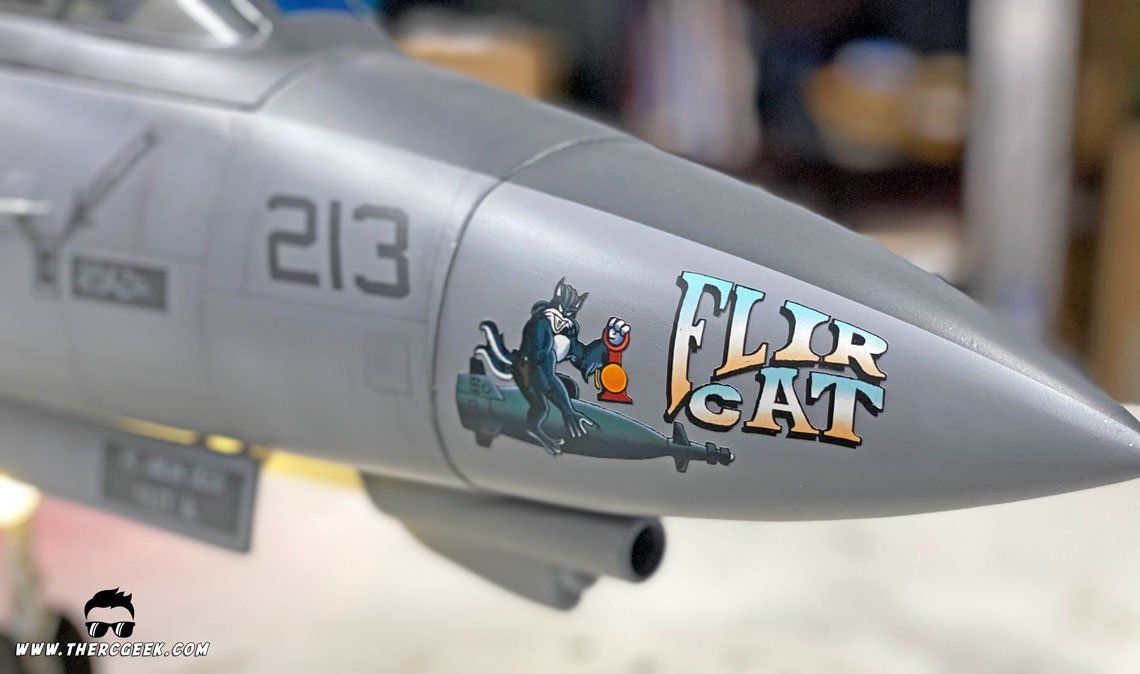
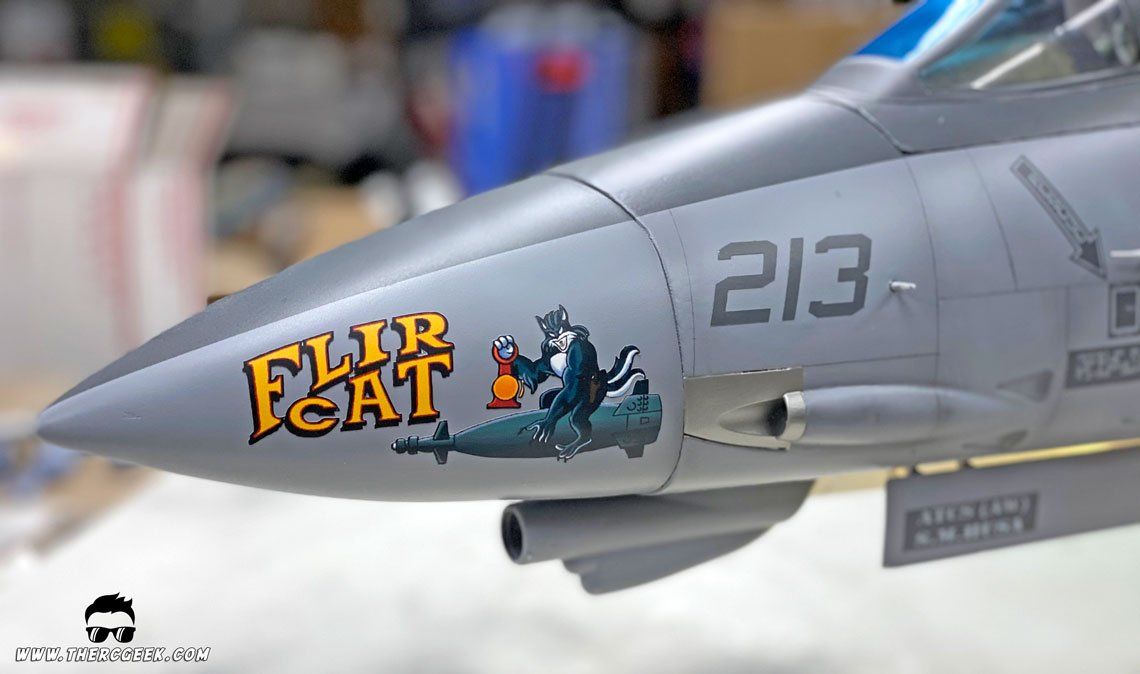
In painting a model, one must first choose a paint scheme of course and this not something I take lightly. :p I knew that I wanted to do something different and rarely modeled and that I also wanted to do a later low viz Navy scheme because it would be fun to weather (they got crazy dirty). In my research, I found a scheme from VF-103 dawning a unique and rare nose art carrying the moniker of “Flir Cat.” As it turned out, this aircraft was used in 1995 to prove out the LANTIRN pod integration and was the first to drop bombs from the Tomcat platform which paved the way for the F-14 “BombCat” which proved quite effective. That’s not to mention too that the aircraft was flown in part by Capt. Dale “Snort” Snodgrass (highest flight time Tomcat pilot ever) as a part of the testing which provided additional appeal. So, it was decided, Flir Cat she will be!

A quick note regarding the Flir Cat nose art. While nose art was a regular occurrence on bombers in WWII, it’s since become a rare thing to see, especially on the more modern fighter jets. The Flir Cat artwork itself was designed and painted by artist PEL during his service in the Navy in the mid 90’s. He chose the artwork color scheme from each side based off of graffiti color palettes of the day and had to use different colors on each side for the lettering due to having an insufficient quantity of paint for both sides (hence the two different colors of font left to right).
THE PAINT PROCESS
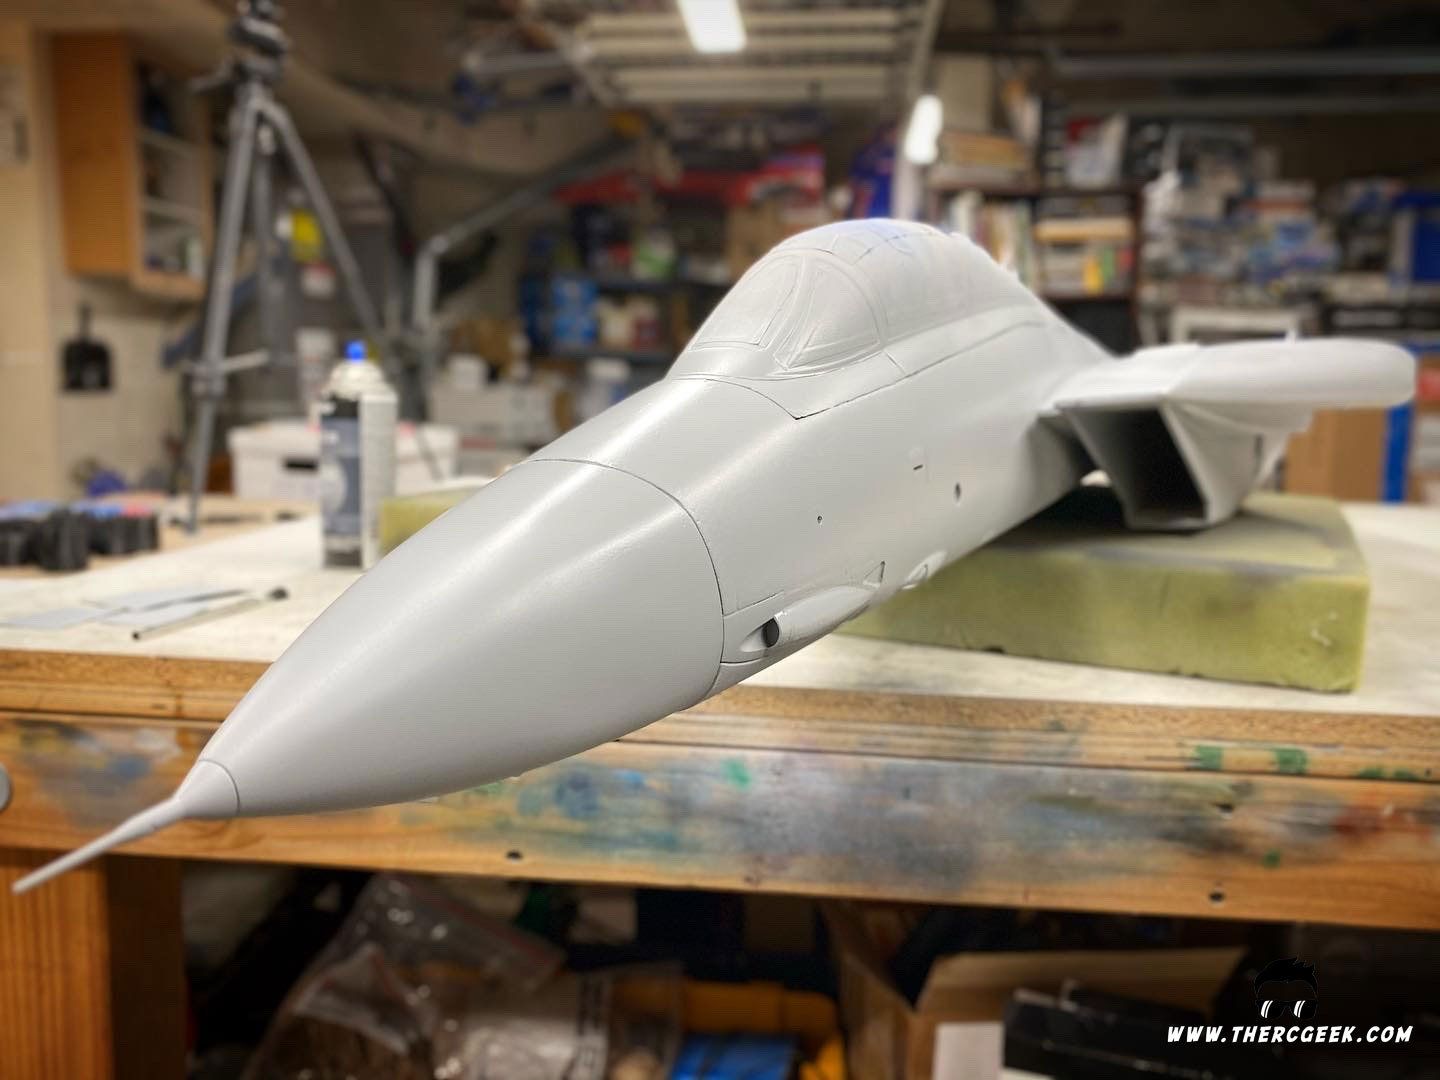
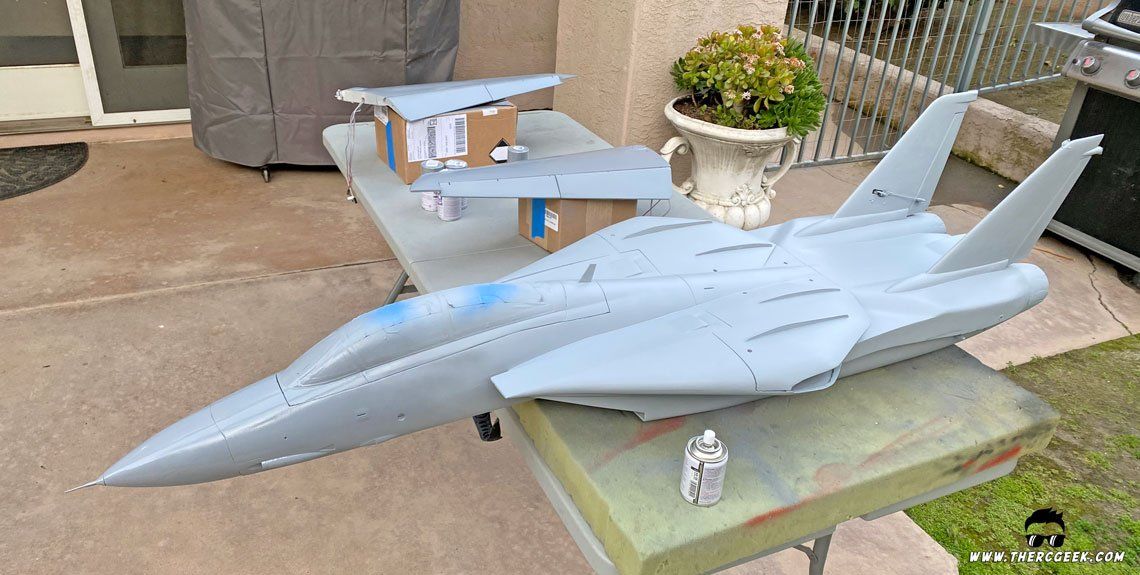
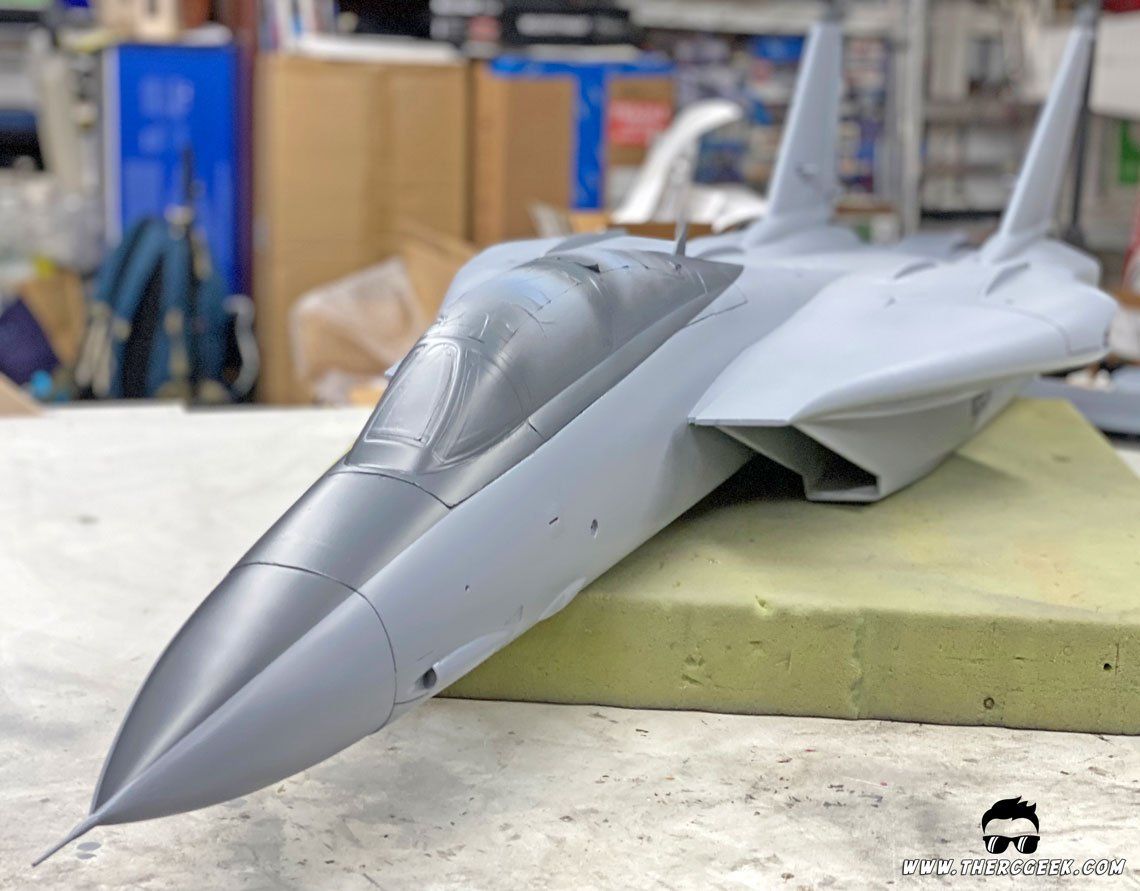
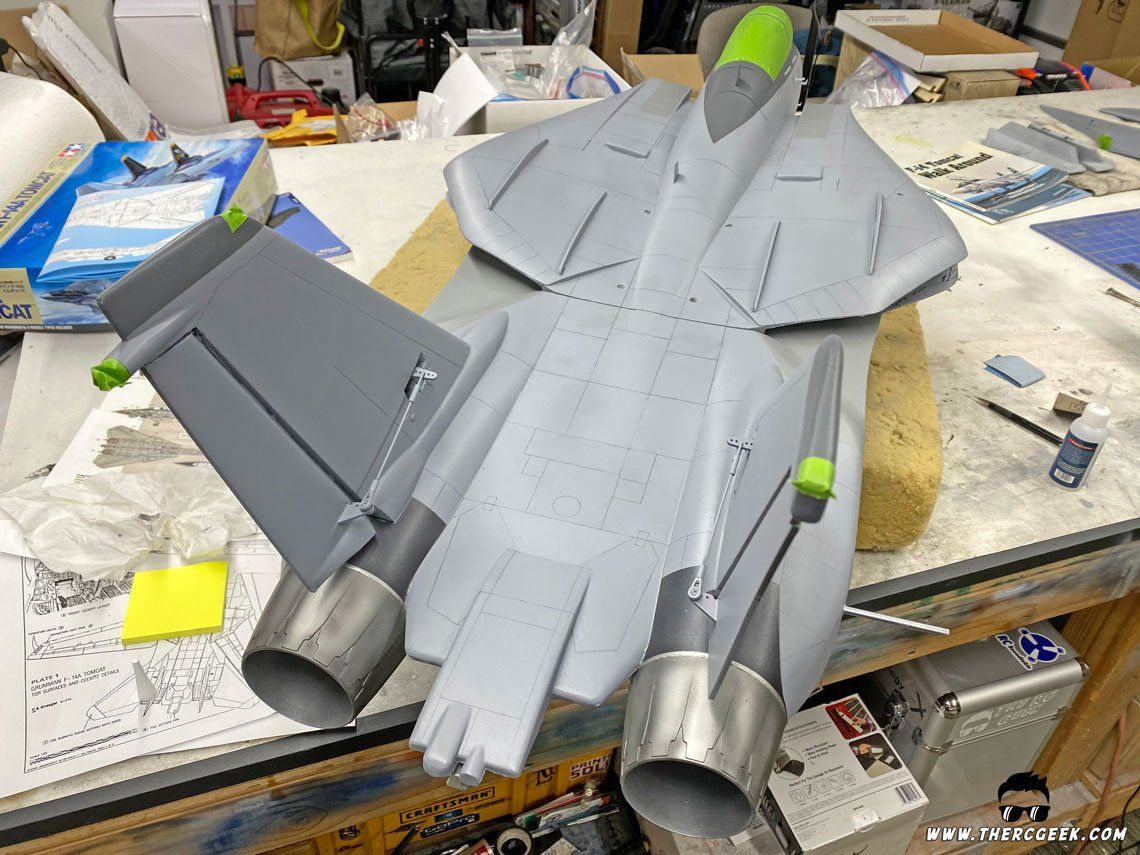
A good paint job starts with a good foundation which is what is done during the refinish and primer process. Once the desired smoothness and finish was achieved through the primer/sand/primer process, the model was wet sanded with 600 grit sand paper in preparation for the first paint color. (note, when wet sanding be careful not to create too much friction/heat to avoid light gatoring). In the case of the Flir Cat, it is all Dark Ghost Grey (FS36320) with some Engine Grey (FS36076) trim and markings. While this made painting fairly easy, getting markings the exact color were going to be a challenge, but I had a solution for that which is discussed further down.
To paint the model, Tamiya AS spray paints were used all around. I love to leverage spray paints as it’s just generally easier to deal with having little to no clean up. Tamiya AS-28 “medium grey” was used for the Dark Ghost Grey base color and was applied over the entire airframe. This color was used as I’ve found it’s a more accurate representation of the Dark Ghost Grey color than the Tamiya AS-25 “dark ghost grey” paint actually is.
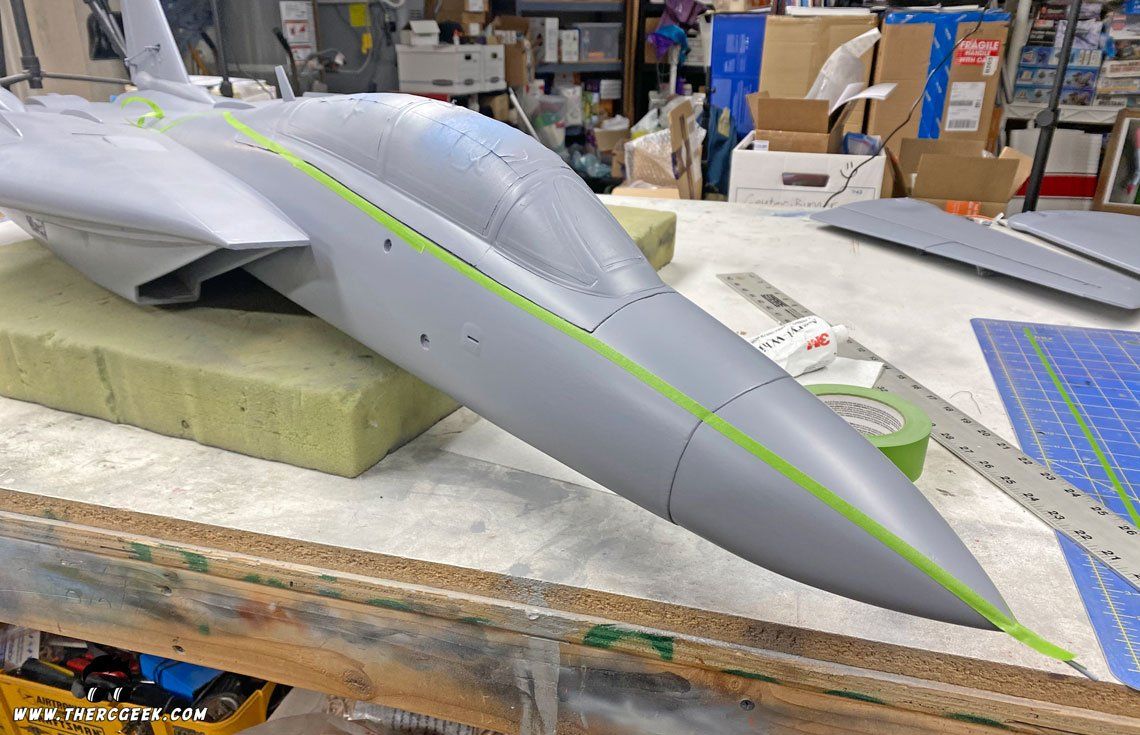
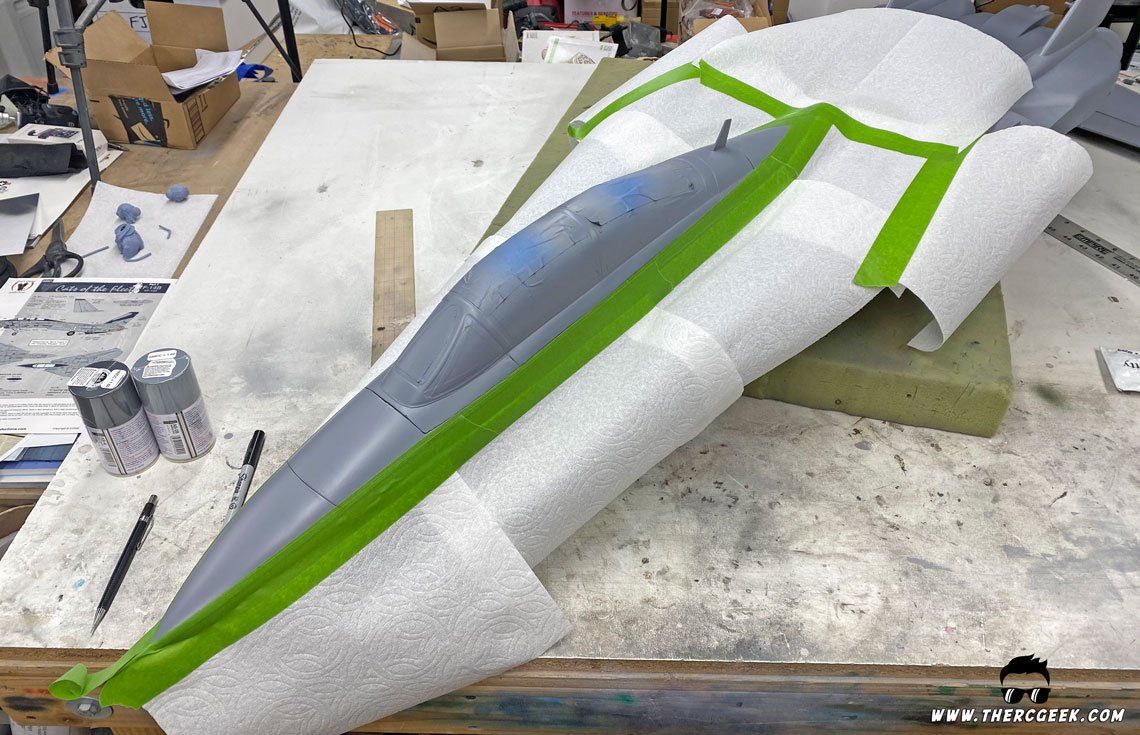
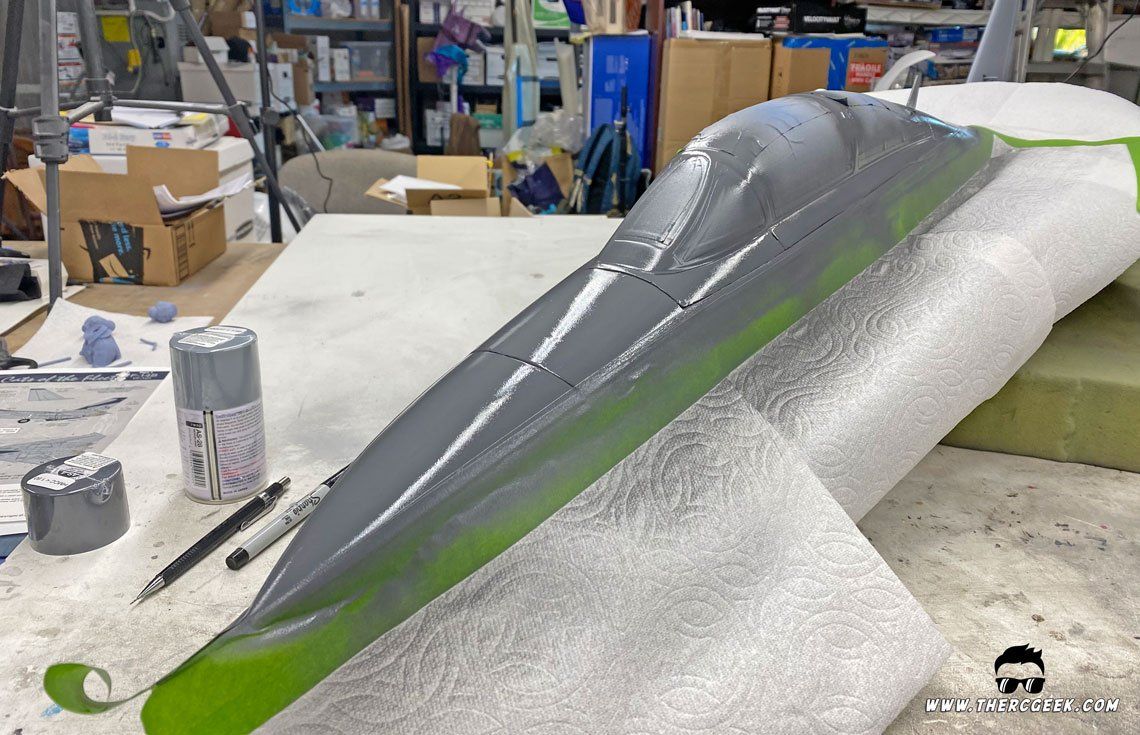
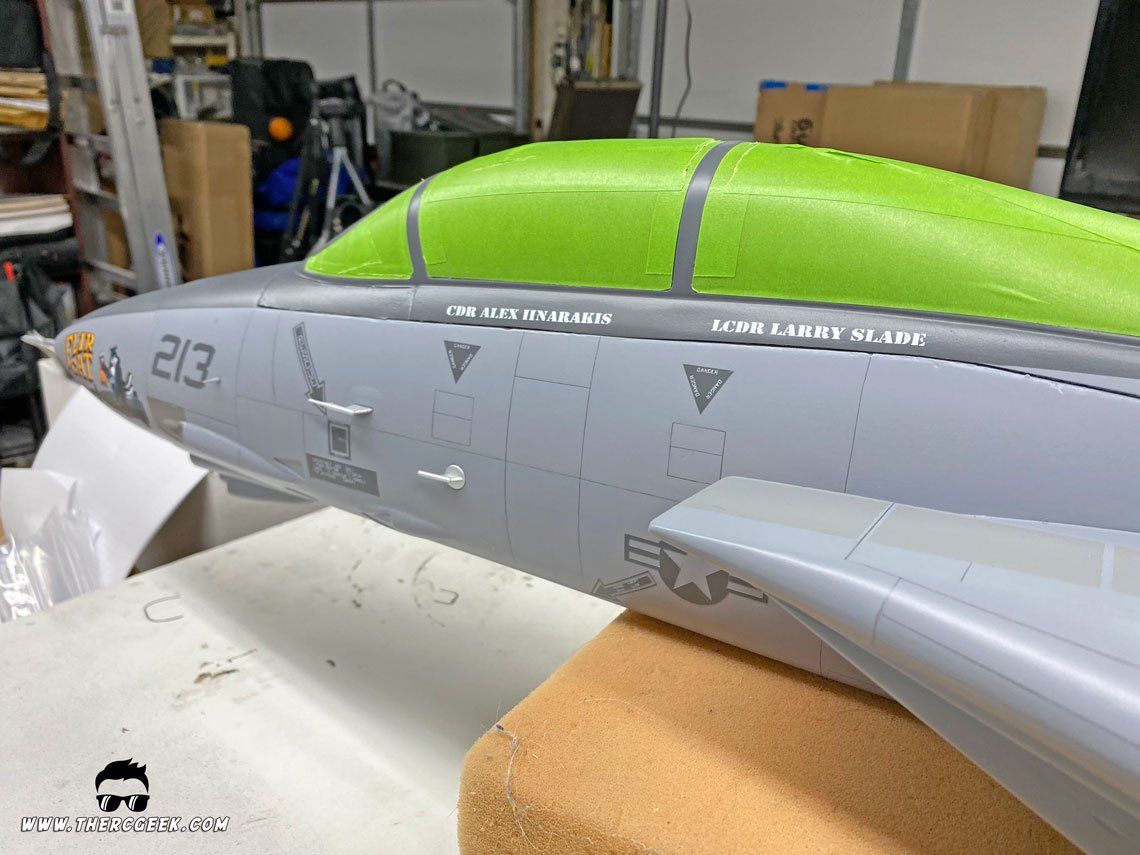
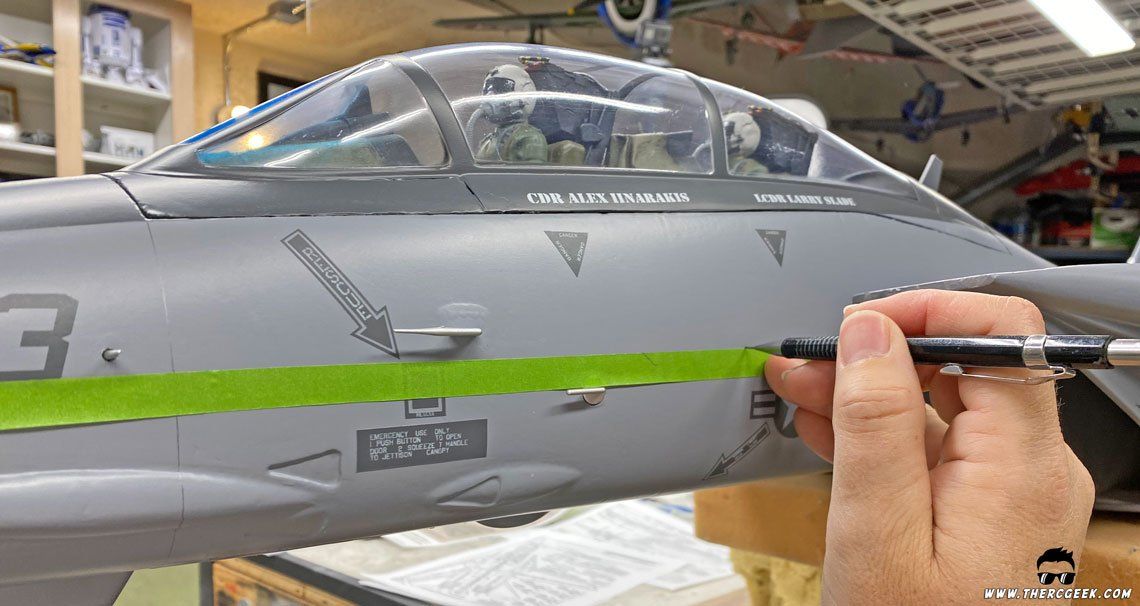
From there, the Engine Grey colors along the canopy trim and tail were masked and painted. Tamiya AS-4 Grey Violet was used in the absence of the availability of a dedicated “Engine Grey” in the brand which proved to be a good representation of the FS36076 color. To mask the lines along the canopy, strips of green Frog Tape were cut at about 1/2″ width and applied along the canopy and fuselage in the desired shape from the nose tip to behind the canopy.
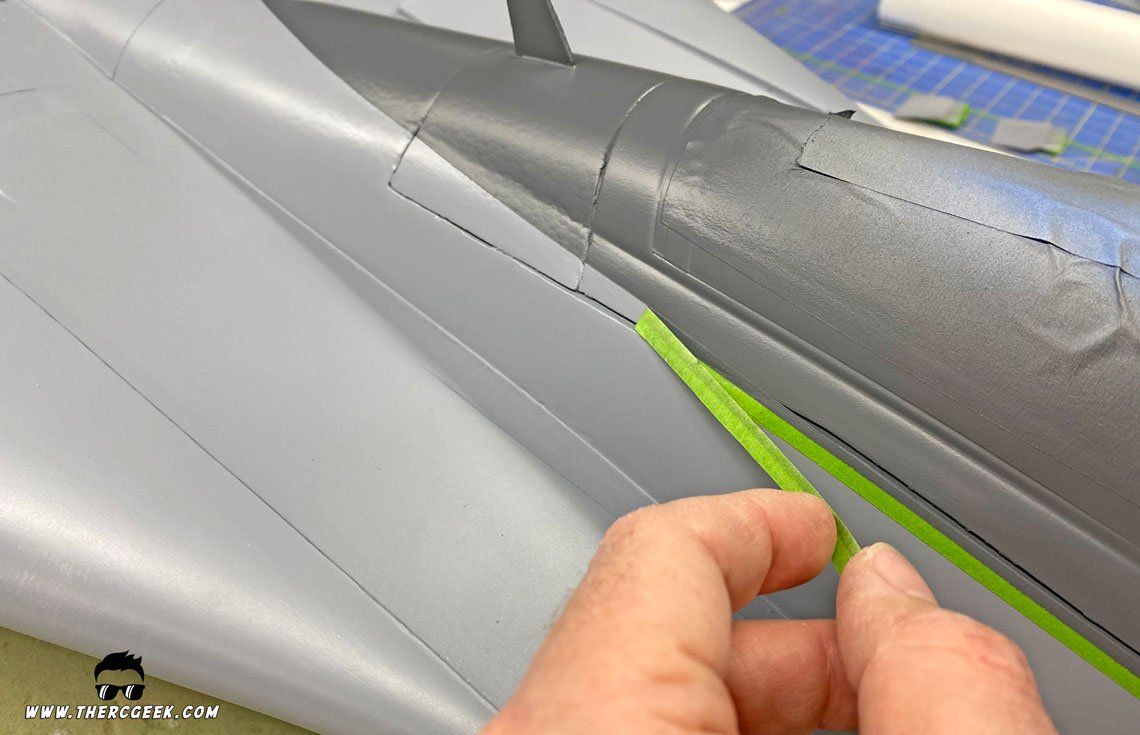
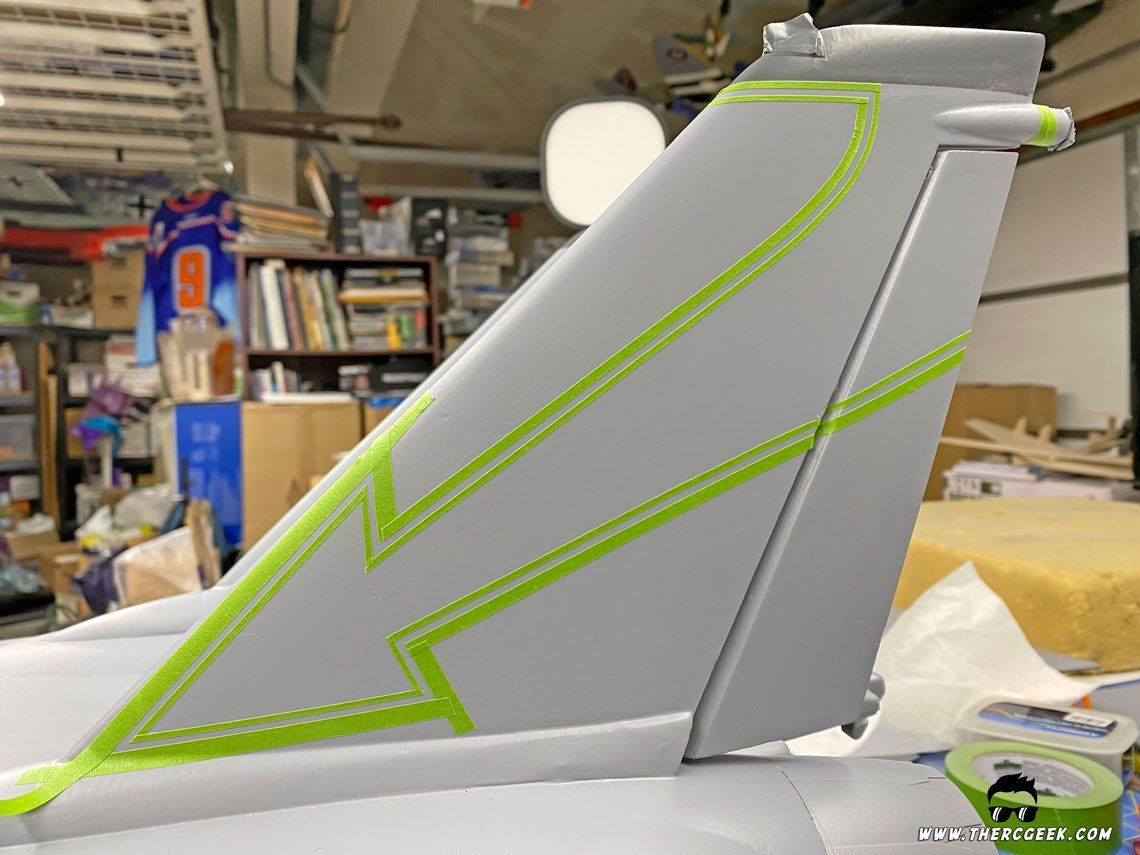
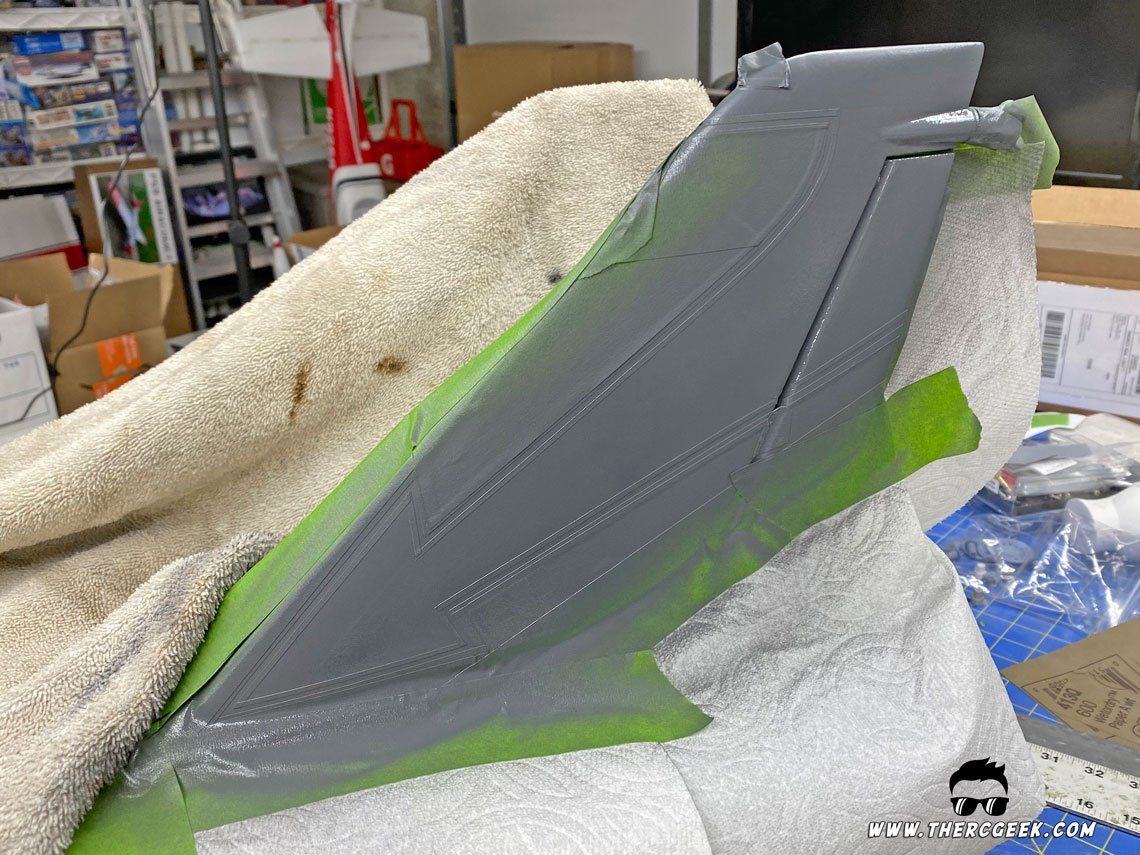
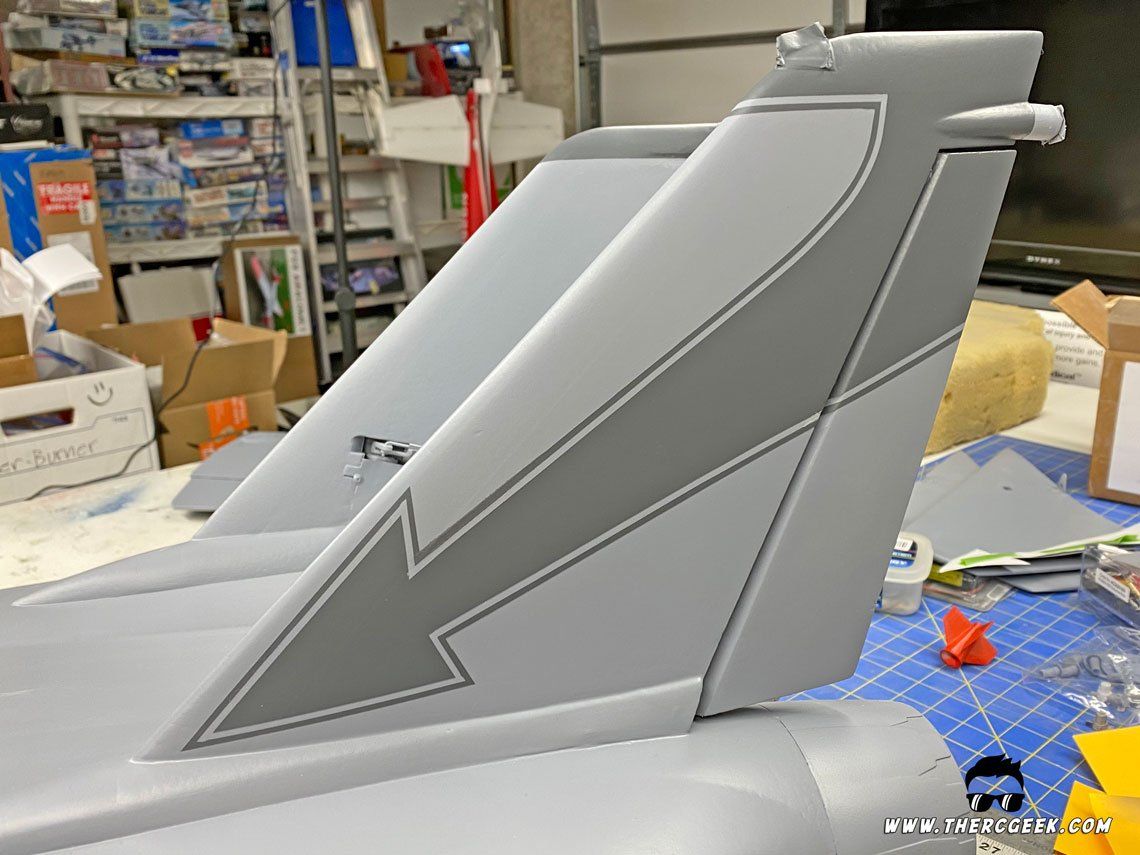
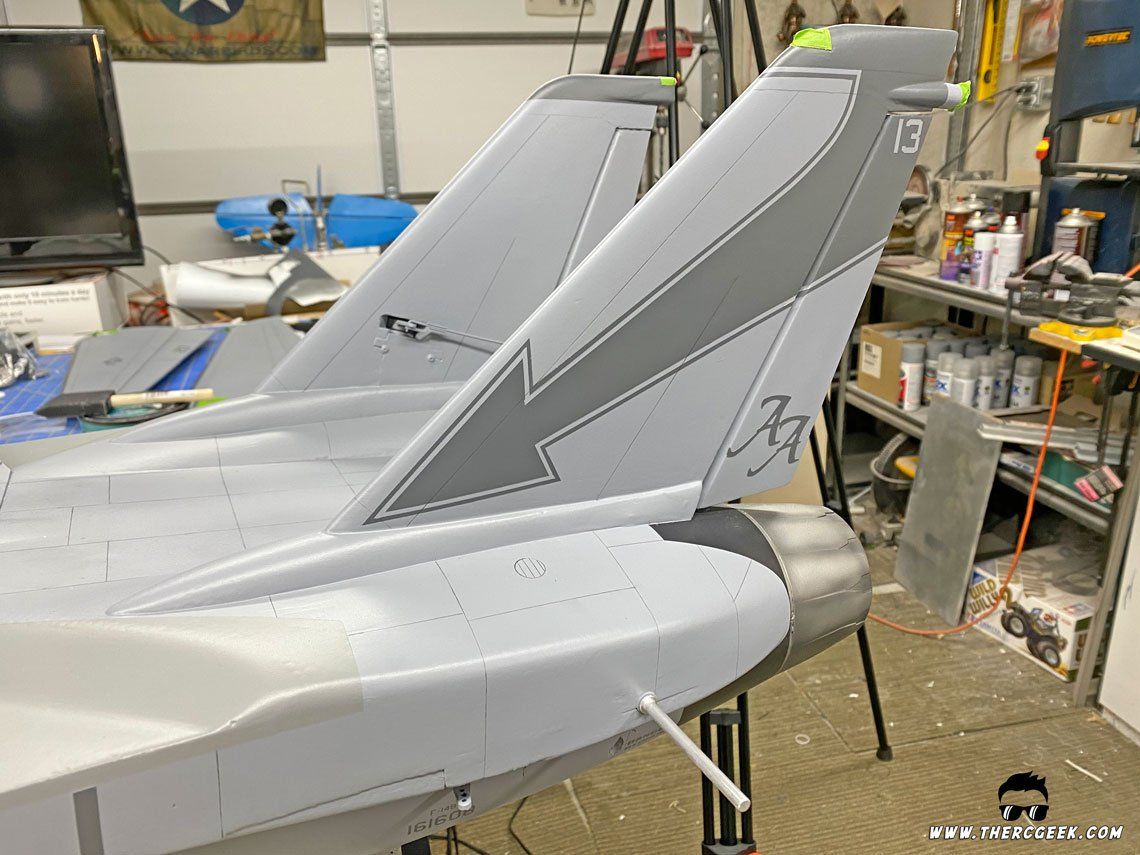
In painting the tail flash, a paper template was made from a scaled up decal sheet to use as a guide for taping. It was lightly taped in place and 1/8″ strips of Frog Tape were cut using a straight edge and Xacto knife and applied along the paper template to match the shape. By cutting the frog tape into smaller strips, it allows bending and curving the tape much easier. The border was taped in the same manner, however 1/16″ strips of tape were cut and applied all around the 1/8″ tape border to use as a guide and 1/8″ stripes were taped around it. Once in place, the 1/16″ strip was removed so that area could receive paint. The frog tape creates a nice clean line, but it is important to ensure that it’s pressed down well. Running your finger along the tape line usually works sufficiently, but areas where there are 3d features (light fairings, etc) require a bit more care.

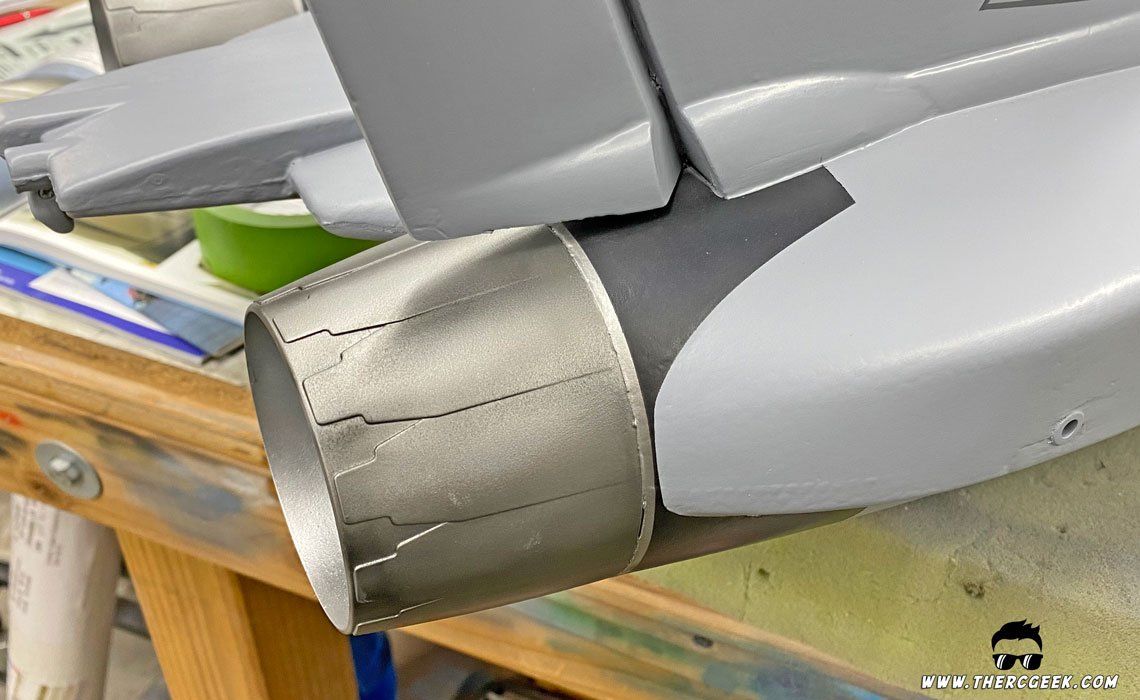
To finish off the look, the exhaust nozzles were masked in the same manner as mentioned previously airbrushed using ALCLAD II aluminum and dark aluminum. Additionally, very thin black paint was used to darken the base and add some shading to get the more characteristic F-14B nozzle look based on pictures
MAKING & APPLYING MARKINGS
I knew from the get go that in order for this scheme to work, the markings had to match the Engine Grey color painted on the airframe. However, knowing that paint adhesion can be an issue with EPO foam, I didn’t want to go the full vinyl cut paint mask route for fear of pulling up the undersurface when peeling the masks off. So, the solution was to design and cut the markings out of vinyl and paint them with the AS-4 Grey Violet before applying them onto the model. The challenge came in how to accomplish the small white lettering to which I used a new to me silk-screen paint mask process which worked out perfectly.

DESIGNING & CUTTING
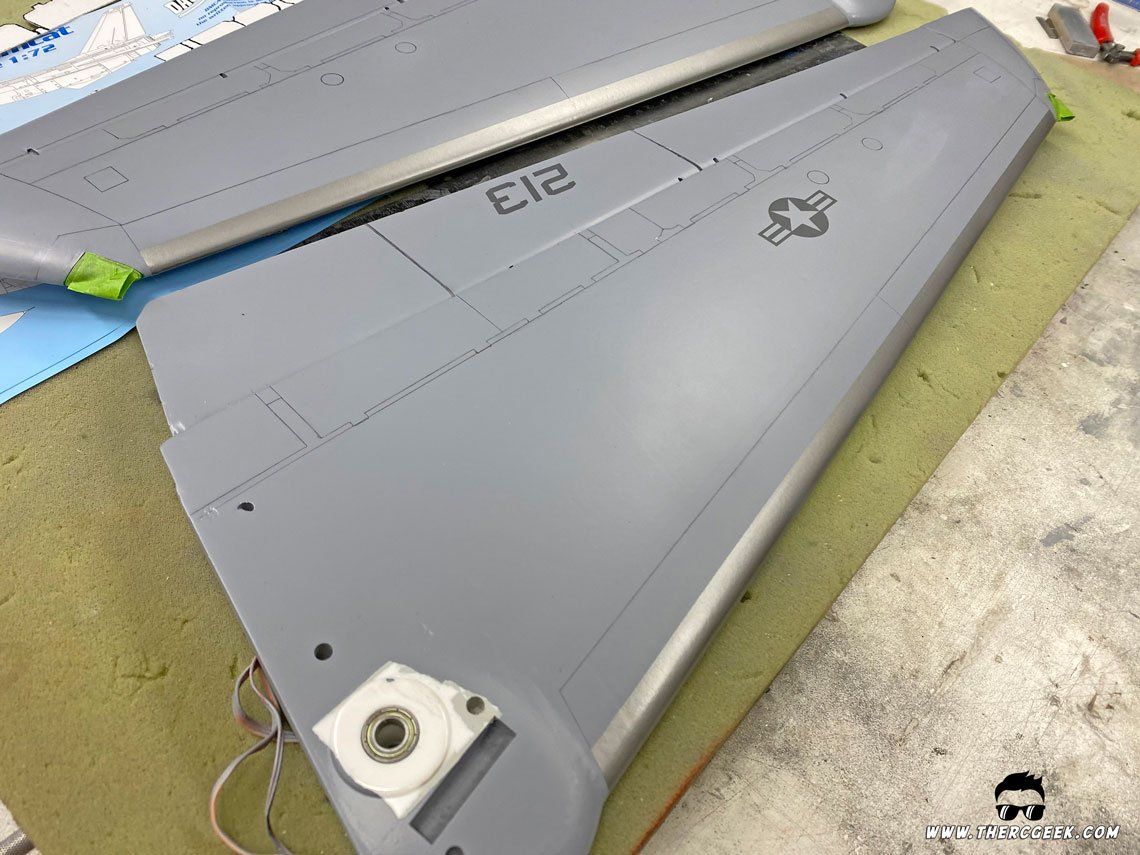
While a bit antiquated software, CorelDraw was used to design the markings. Being primarily lettering and basic shapes, it was a fairly quick process. Plus, I had a plastic model set of Flir Cat decals, so the markings were essentially traced and scaled to the size of the Freewing F-14. All of the markings were printed to check the size against the model and then individually scaled as needed to get the right look. Once ready (and the small letter details removed that couldn’t be cut), the markings were cut on a PrizmCut vinyl cutter using standard white vinyl. The cut markings were then painted with Tamiya AS-4 in preparation for application on the model. Note that the nose art itself was commissioned to a friend’s sister who does graphic art on the side and then sent to Callie-Graphics to be print and cut. Given the intricacy of that type of art, having it commissioned saved a ton of time and allowed focusing on the other markings. Please note that I’ve actually done a previous discussion on making your own markings which is here (video below).
SILK-SCREEN SMALL LETTER PAINT MASKS
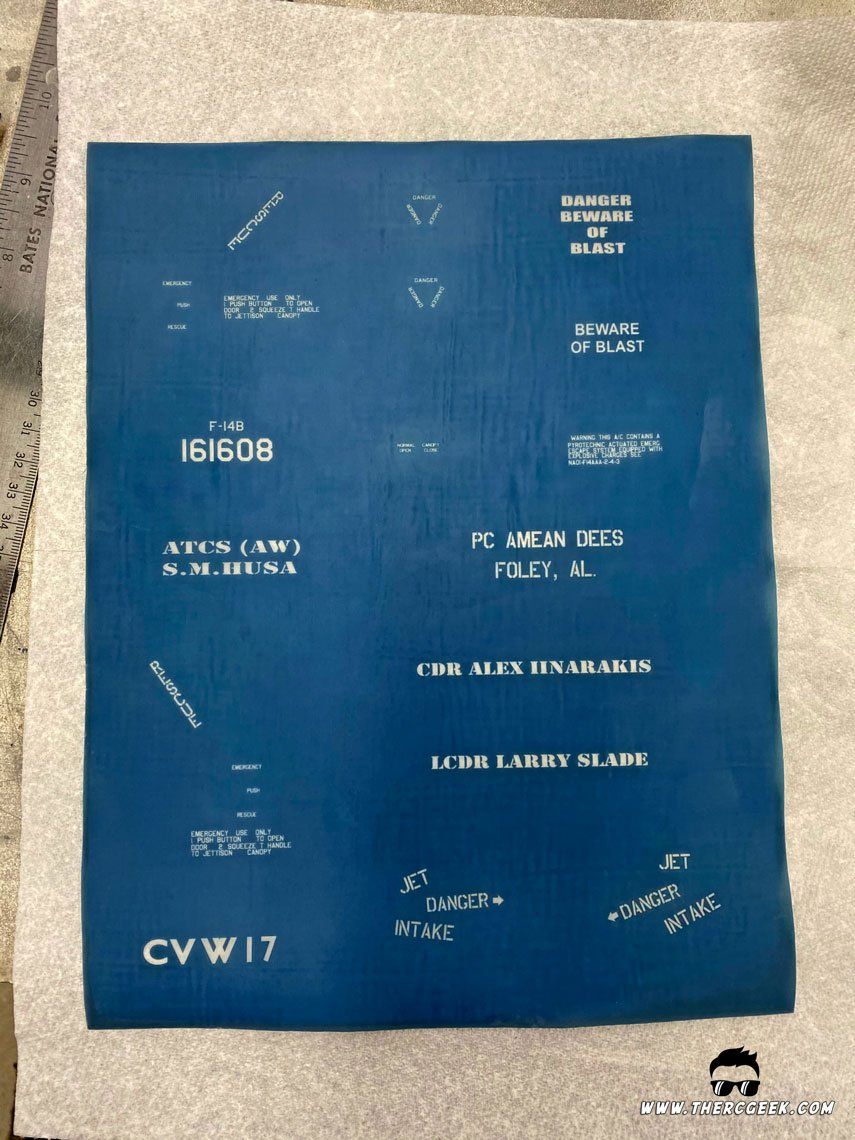
The one drawback with vinyl cutters is that they can only cut so small. This can usually be worked around by printing decals…except when we’re talking light colored lettering applied over a dark background which we have here. In that case, a self printed decal doesn’t work. Well, I had discovered a silk-screen paint mask making process that would allow painting the white lettering and so this was the perfect place to give it a try.
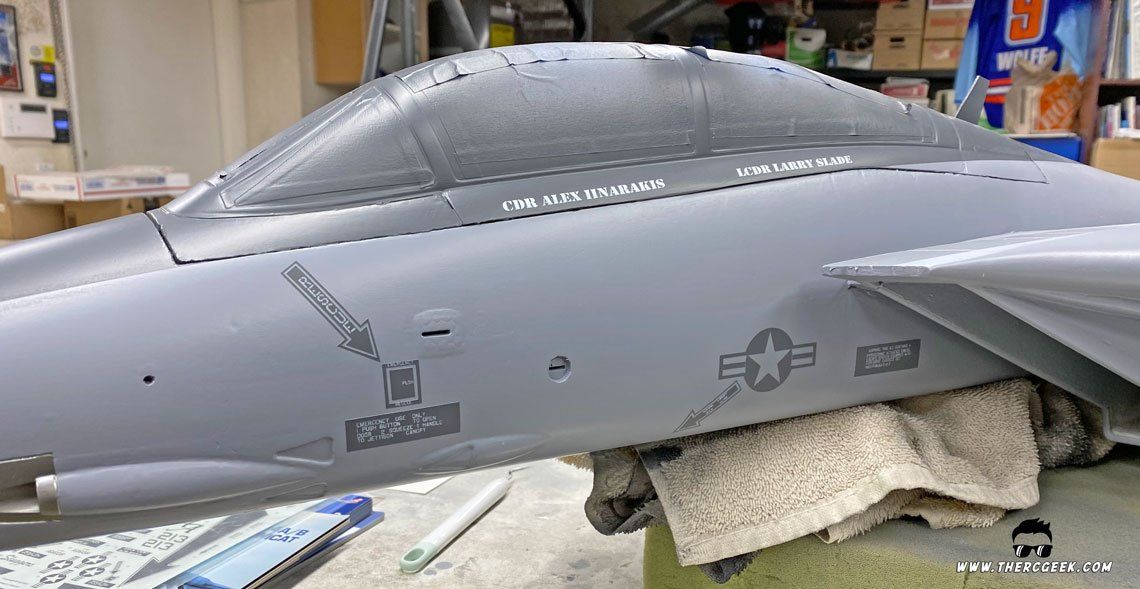
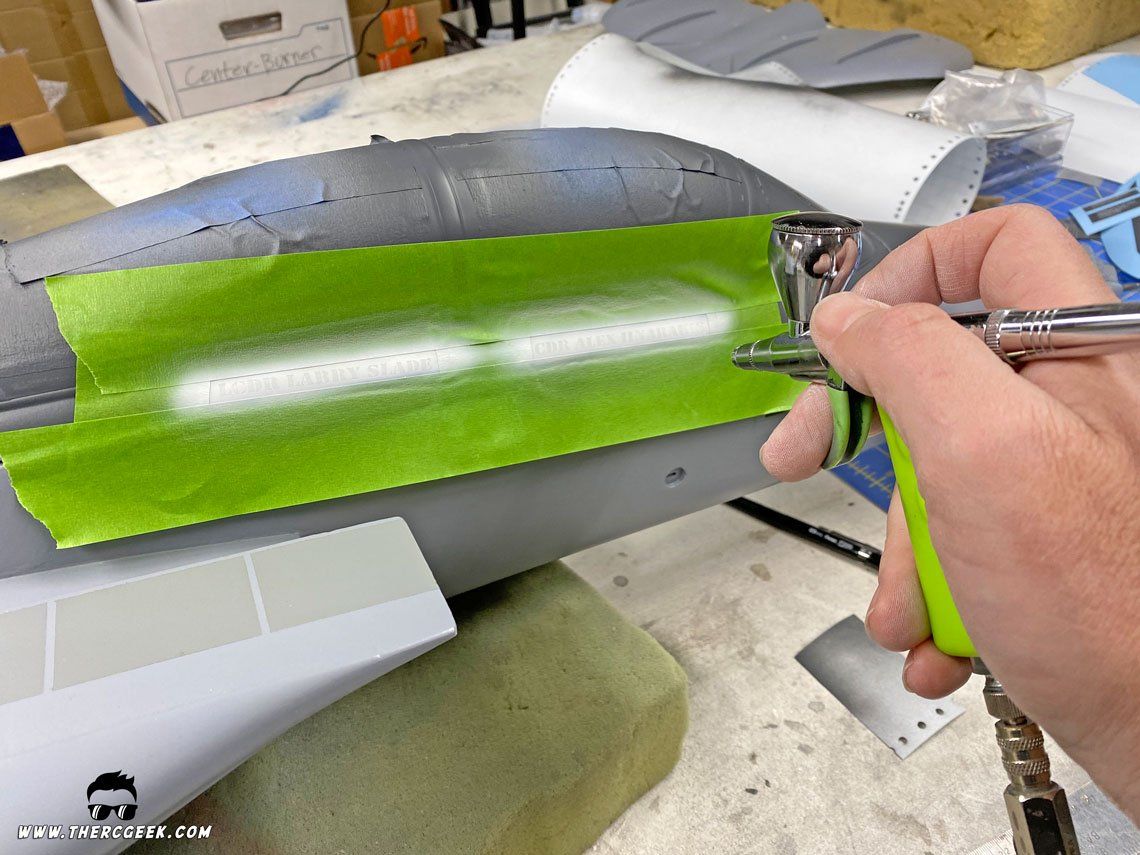
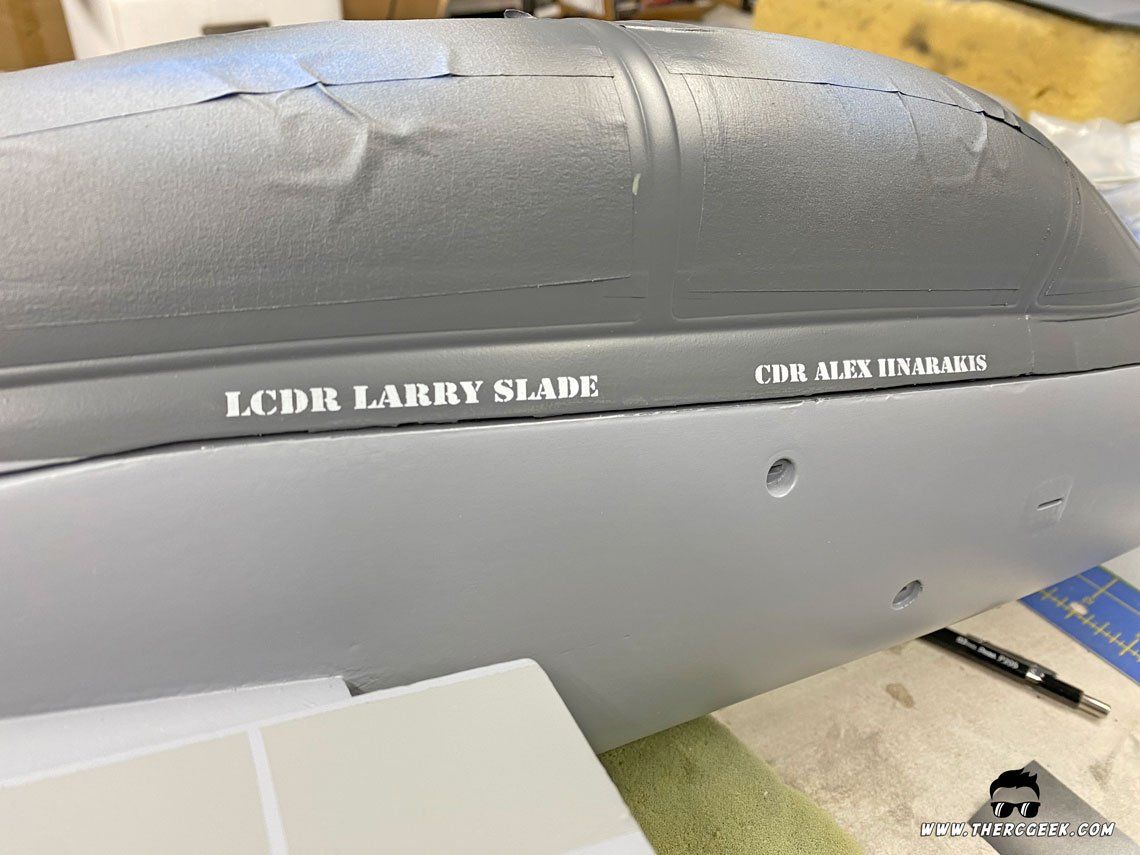
To make the silk-screen paint masks, the hi-def starter kit from ezscreenprint.com was utilized. Following the directions, the lettering was printed onto a transparency slide in black, placed over the screen print material with an exposure board behind it and then exposed to the sun for the recommended time. From there, the screen material was placed in water and the areas behind lettering dissolve away leaving behind a very fine flow through mesh of just the lettering that can be used as a paint mask. The material was allowed to dry fully and cut down into separate pieces and subsequently used to paint the appropriate lettering over the necessary markings using an airbrush spraying flat white paint. The result couldn’t have worked out better! The nice thing is that it gives a very authentic uneven look which I just how it would appear on the full sized aircraft. I’ll ultimately need to do a full video on this as I see it being a process that I’ll use quite a bit in the future.
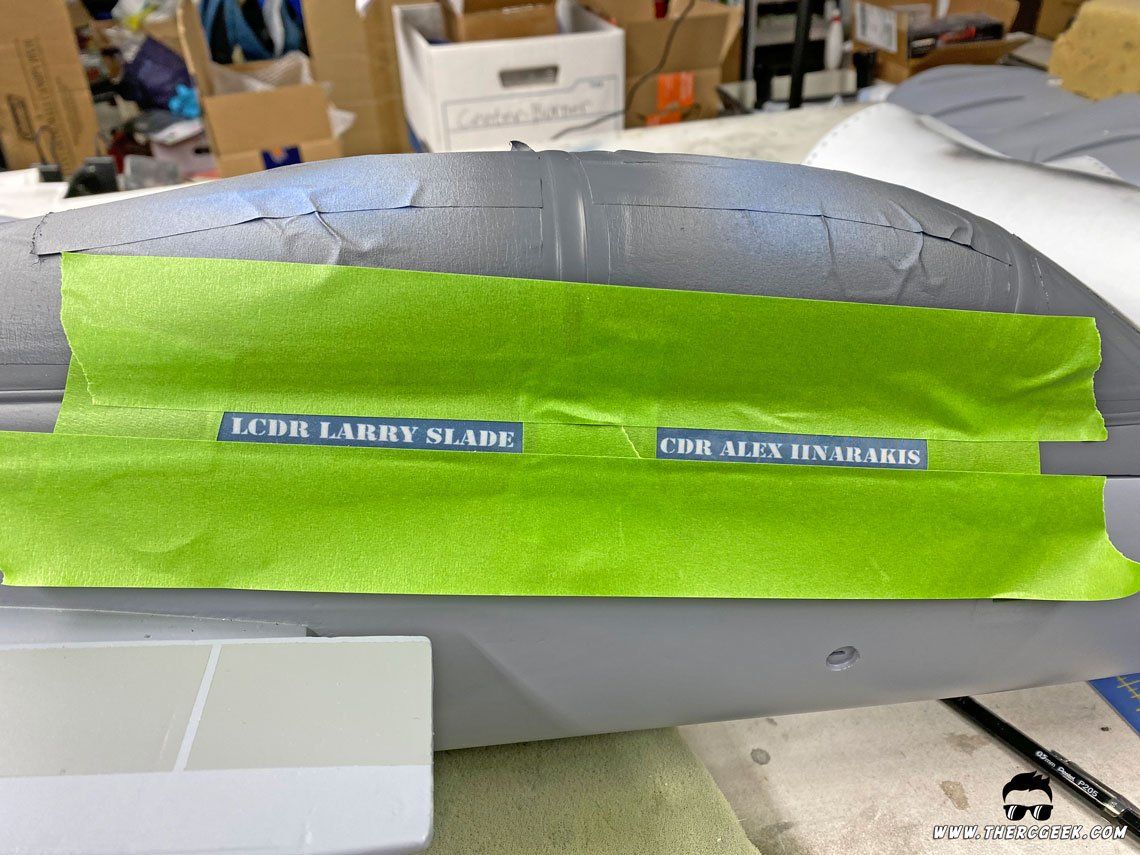
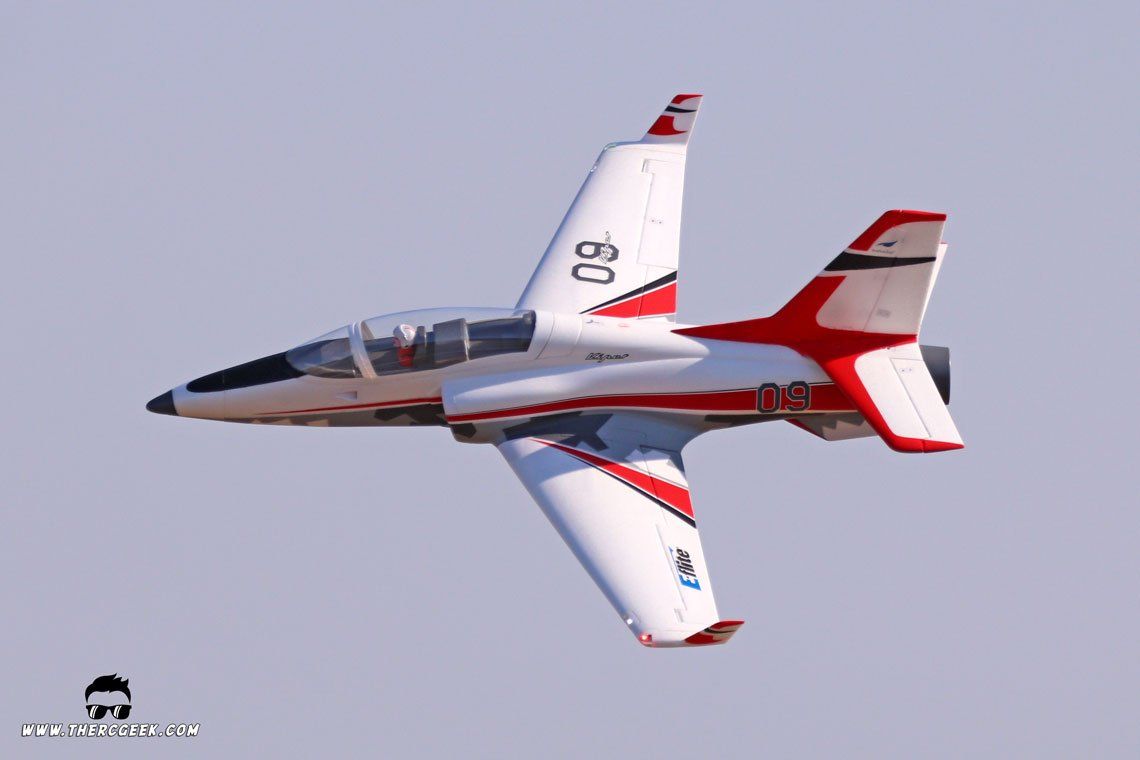
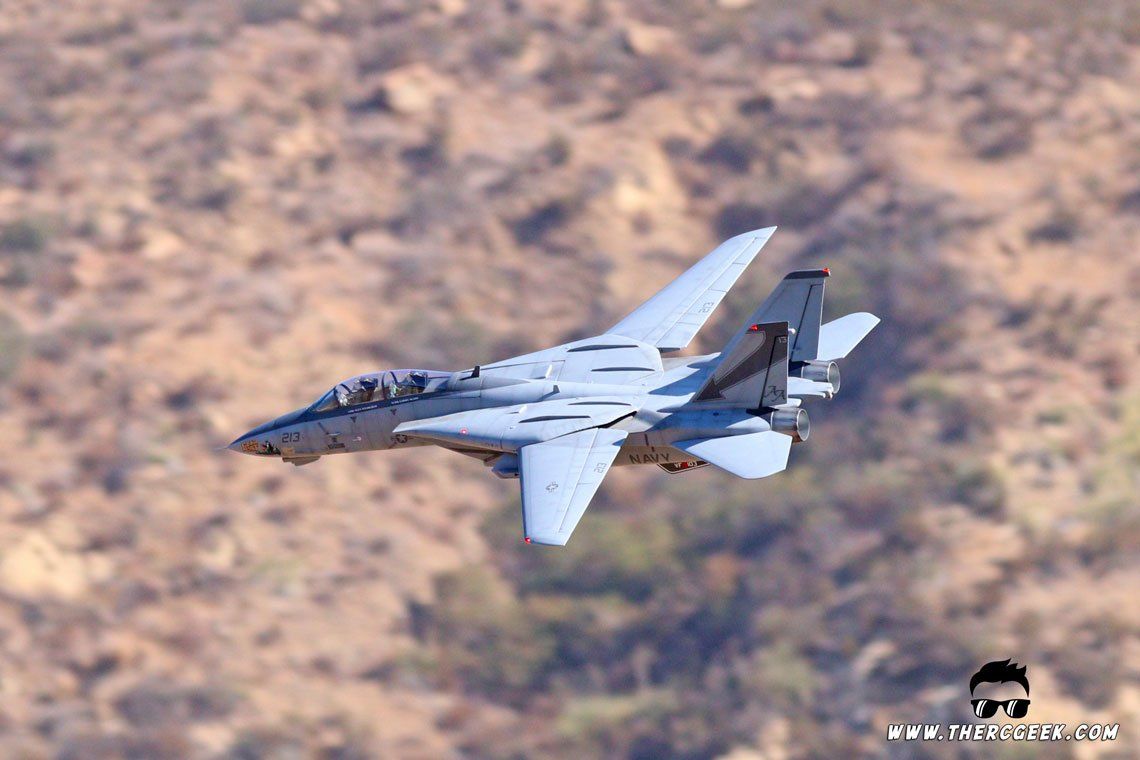
Once all of the markings were ready, they were applied onto the airframe. Transfer tape was used to keep them in place as they were transferred onto the model. Once on, the model was actually assembled and flown for an event (it looks great in the air! video below). The color scheme really came together in the end. Interestingly, following the flights the edges of the vinyl markings started curling up for some unknown reason. Not fully knowing what I would do to resolve it (was thinking I’d have to re-do all of the markings), a friend of mine mentioned applying low heat to try and activate the glue underneath. This ended up working out beautifully and solved the issue. I simply used a monokote iron with the heat turned as low as it could go and applied the iron over each for a few seconds to avoid overheating the foam. That’s all it took and the markings tacked down and haven’t curled up since.
ADDING PANEL LINES
To apply panel lines to the surface, they were simply applied using a mechanical pencil. This works excellent in this case because the pencil lines when applied, are darker than the colors on the airplane. So, as a result, you can get a really fine and convincing looking panel line on the surface. A mechanical pencil with a 0.5mm diameter lead was used with a medium-hard lead to avoid smears as you handle the airplane and avoid applying panel lines too heavily.
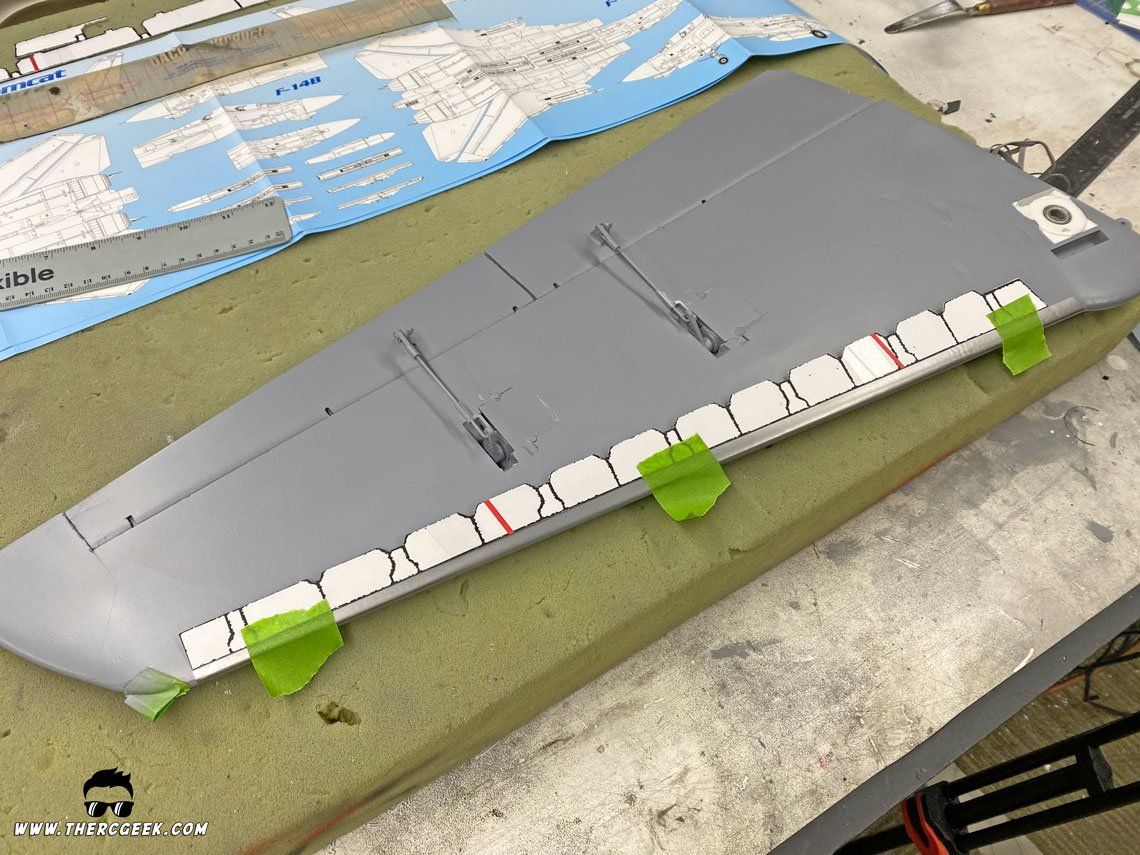
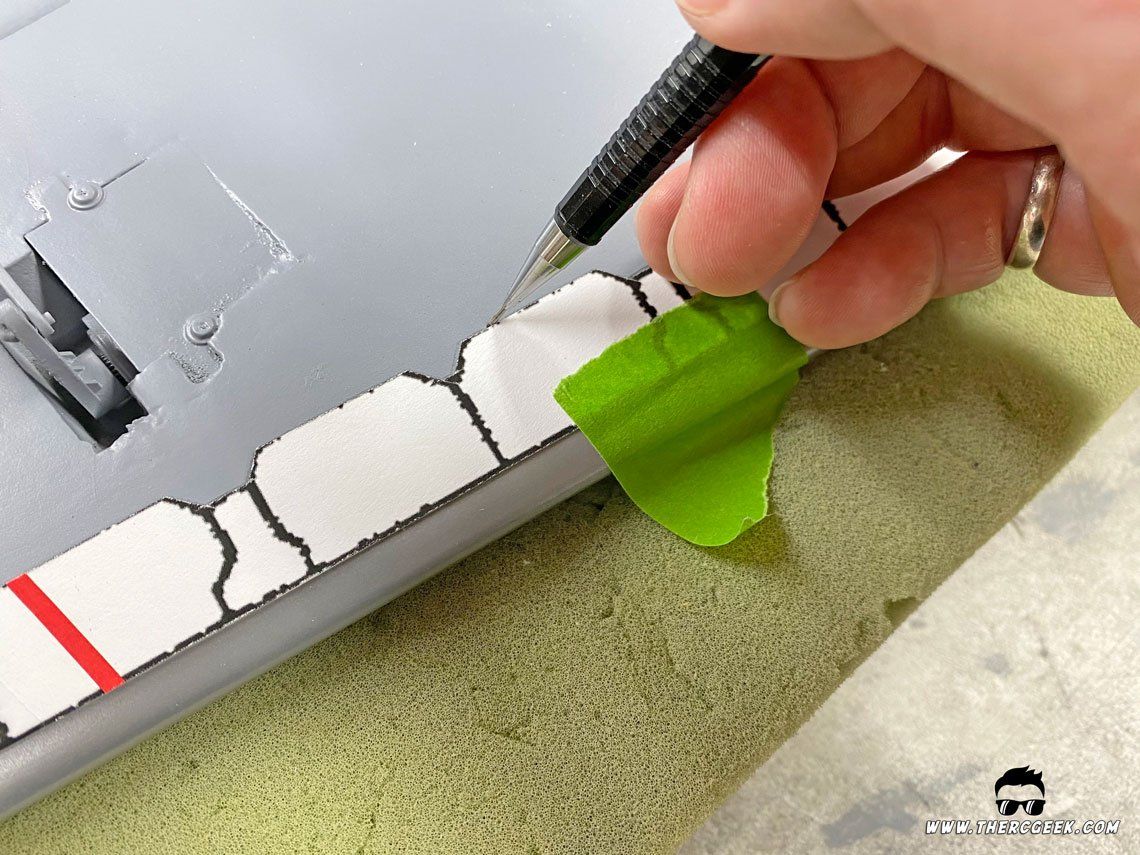
A mechanical pencil with a 0.5mm diameter lead was used with a medium-hard lead to avoid smears as you handle the airplane and avoid applying panel lines too heavily. In applying the pencil lines, a selection of various sizes of straight edges, flexible rulers, and Frog Tape were used as needed to lay the panel lines down across the Flir Cat airframe. A 3-view drawing (a diagram from a plastic model works well) was used as a guide so that the essence of what’s shown on the drawing could be transferred onto the Freewing airframe. As needed to be able to apply lines around some of the complex curves, smaller strips of Frog Tape were cut and applied as needed and used as a guide for drawing panel lines. Being of smaller width, the Frog Tape can be stretched and curved much more easily for complex shapes and curves (the same as was done for painting). Lastly, a selection of circle and square templates were used in drawing out some of the access panels and the like.
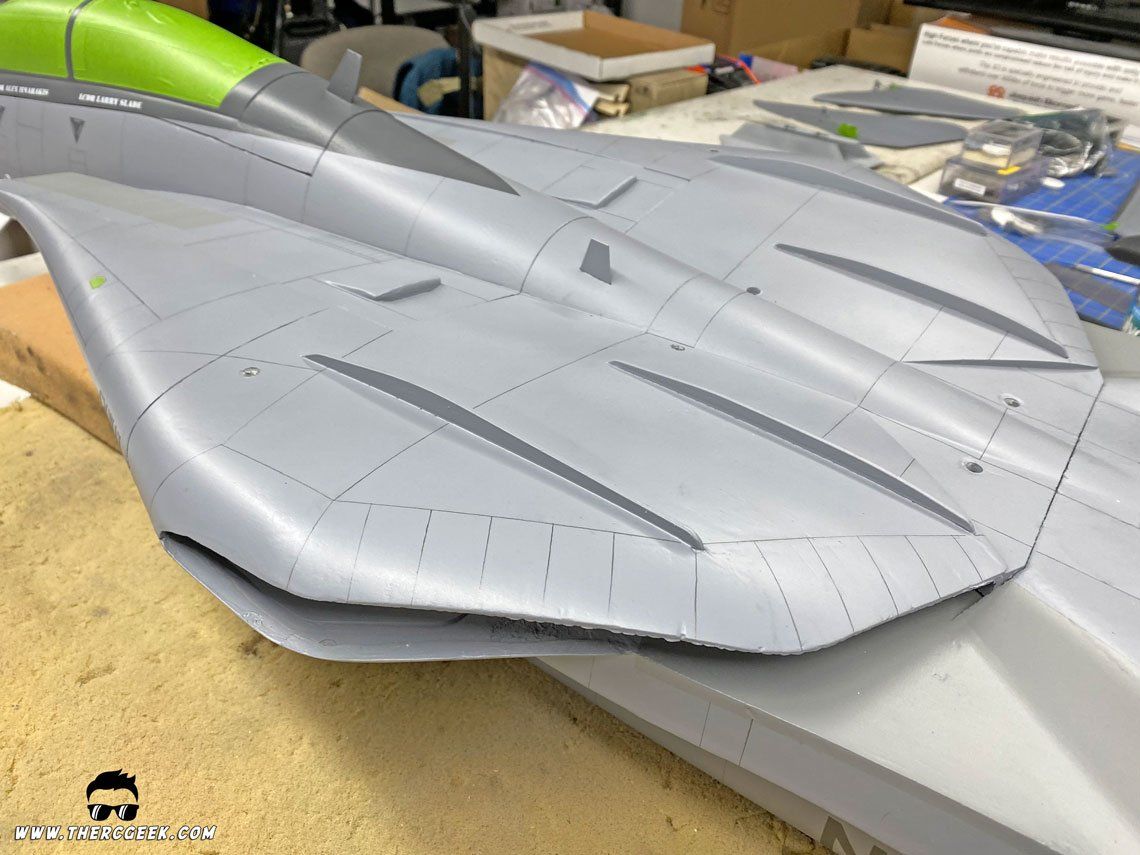
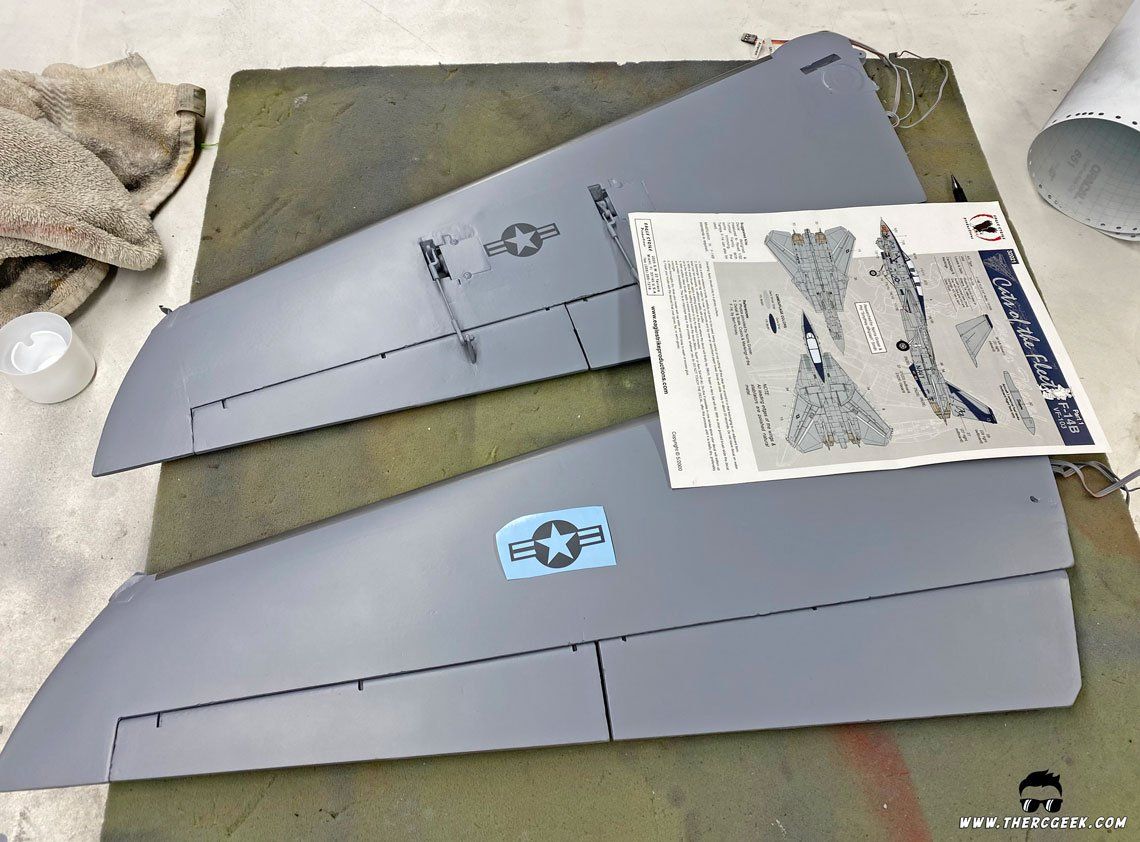
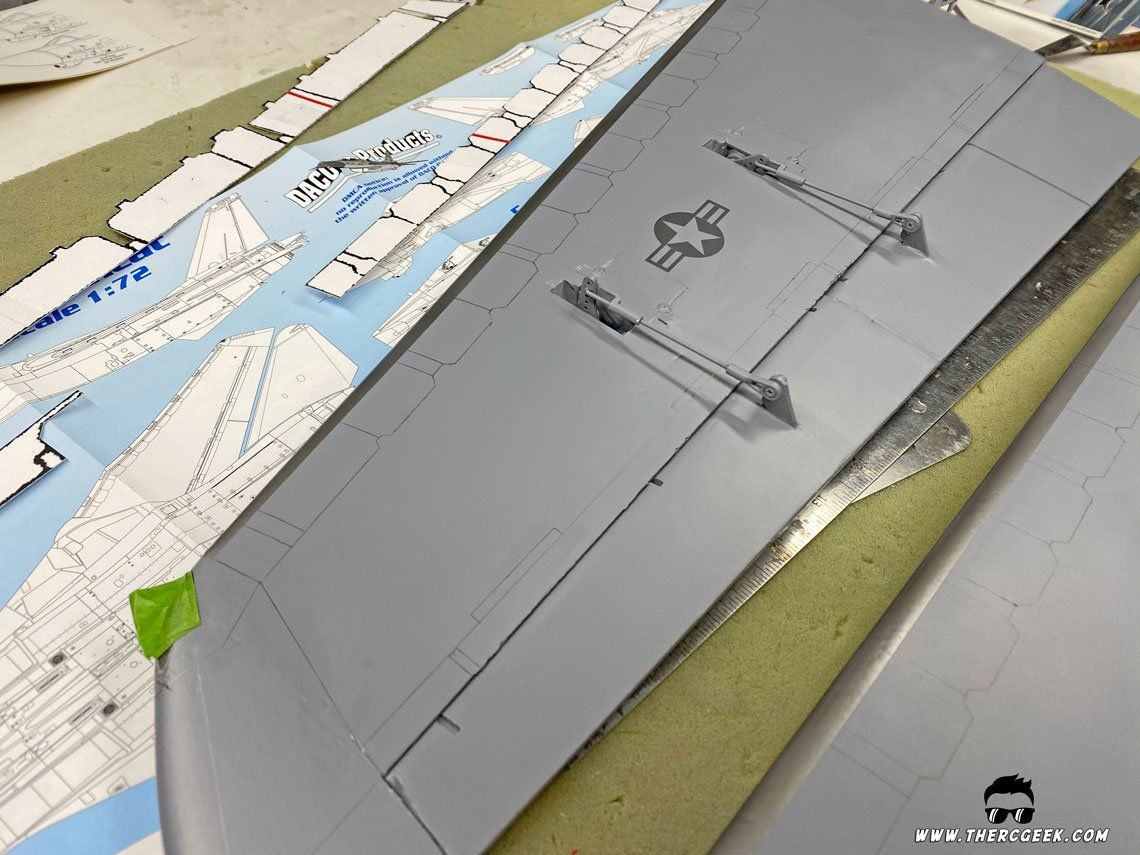
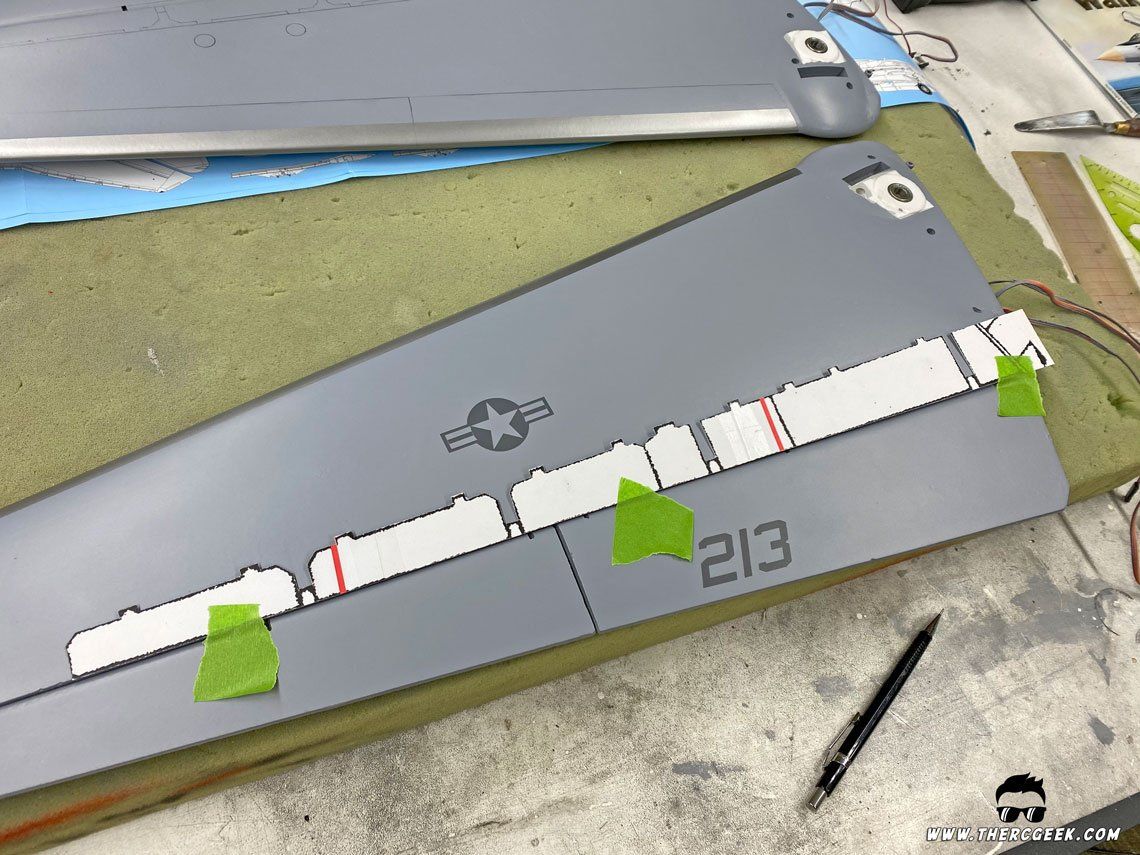
To help with some of the unique and more complex shapes along the wings (and save time), templates were made and used to lay out the panel lines in those areas. Using a multi-view drawing, the areas of interest were enlarged in powerpoint, printed, taped together, spray glued onto some thin card stock, and then cut out with an Xacto knife and a straight edge. From there, they were laid over the surface and simply traced using the pencil. This saved a great deal of time and simplified things quite a bit left to right as well. Templates were used for the upper wing spoiler lines, lower leading edge detail panels, and the upper fuselage speed brake.
To protect the applied panel lines during the weathering process, a light clear coat was applied over the model using Rustoleum 2x Matte Clear. It’s a light dusting and was applied to protect the pencil lines during the weathering process. Otherwise, the panel lines would smear and fade away during weathering. Note that any clear coat should work, but I recommend a non-yellowing one (which the Rustoleum is) to avoid the color yellowing over time from sun exposure.
FINAL THOUGHTS
At last, the Flir Cat is painted and ready for the weathering process! I’m quite ecstatic at how the model has come out and it should really come together when it’s all weathered up. In painting the airplane, the use of spray cans sure makes cleanup an easy prospect which I like and with the single color over the airframe, sure makes things simple too. About 6 cans of the AS-28 medium grey were used total. On the markings, having the complete control over all of it is certainly nice, but it does take a bit of work. However, to get the right colors, that’s what was needed here and I’m excited about the new silk-screen paint mask option. That opens all sorts of possibilities in the future. Until next time when we dirty up this Tomcat, I’ll see you at the field!
The RC Geek Blog is your place to learn about all aspects of the RC hobby. Learn to build, design, drive or fly that RC project you’ve always wanted to build, but have been intimidated to try. This blog is here to help you on your journey and provide tips and tricks as you go! My hope is to inspire builders both experienced and new! So, welcome, please look around, it’s an exciting beginning! I’m currently documenting my latest competition scale RC jet build, a Mark Frankel F4D Skyray, along with some other fun tips and videos. If you can’t find what you’re looking for on this front page, click on any of the categories to the right and it will show just posts related to those categories. Please feel free to add comments and/or contact me directly if you have questions, I’m here to help! And don’t forget to check out my YouTube Channel, I post new videos every week!
Subscribe To Our Blog Now