The RC Geek Blog
By: Chris Wolfe
Fill…sand…poly…sand…primer…sand…aaaannnnddd repeat…
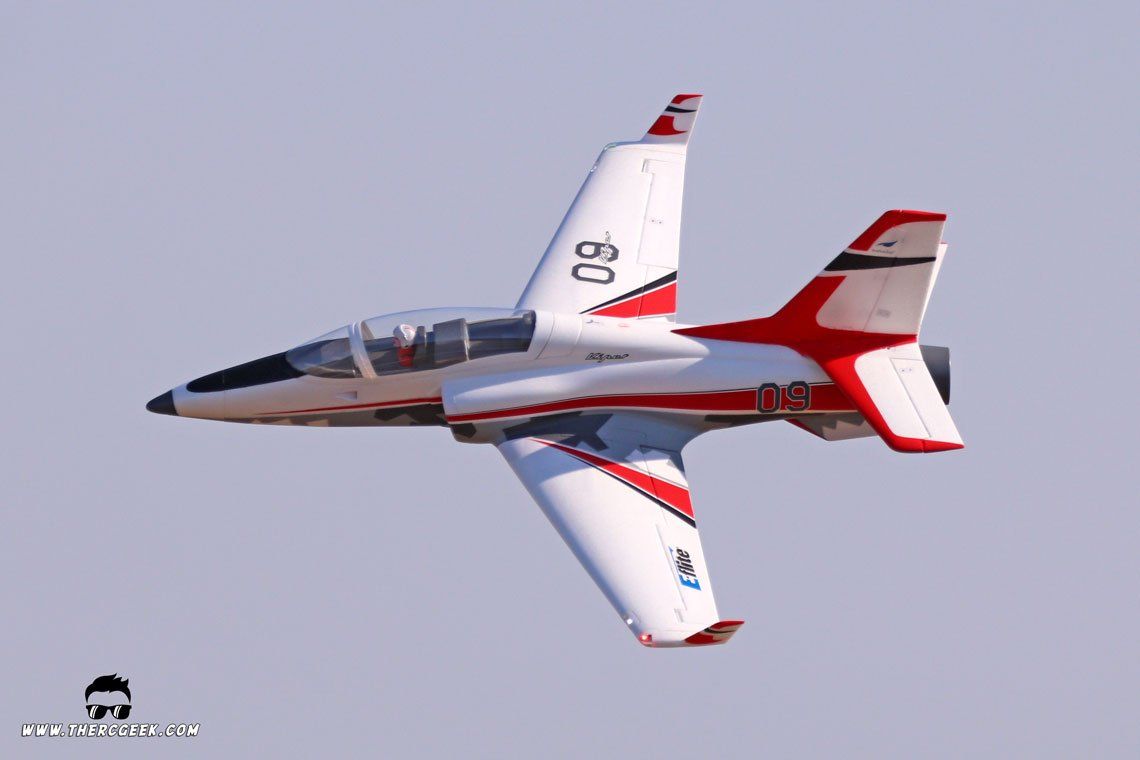
You've probably figured out by now, I have many favorite aircraft. ;) However, if I was to put together my top 5 favorite aircraft of all time, the F-14 Tomcat would probably be at or near the top of that list. The airplane was one of brute force, but packaged in an elegant and distinct looking airframe that truly personified its name, Tomcat. And that's not to mention, it was an extremely capable fighter that filled many roles through the years that operated from the early/mid 70's into the mid 2000s.
So, after putting together my Freewing twin 80mm F-14 Tomcat review a few years ago, I always wanted to come back to that airframe and give it a good refinish. To date, it is still one of my favorite Freewing aircraft and I regretted letting the one go that I had. So I decided it was time to revisit this model and picked up an ARF plus along with some Freewing 9-blade fan systems for a special refinish. This really has been a few years in the making.

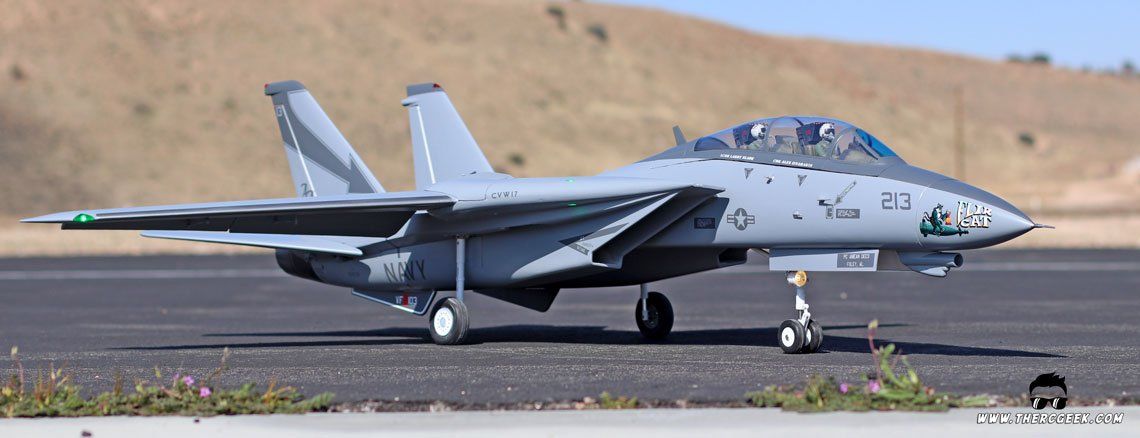
The end goal with this refinish is to build the airplane into a low vis Navy camouflage. Though, I do like the more colorful schemes of the 70s and early 80s, there's just something about a dirtied up ghost gray painted cat from their later years of service to me.
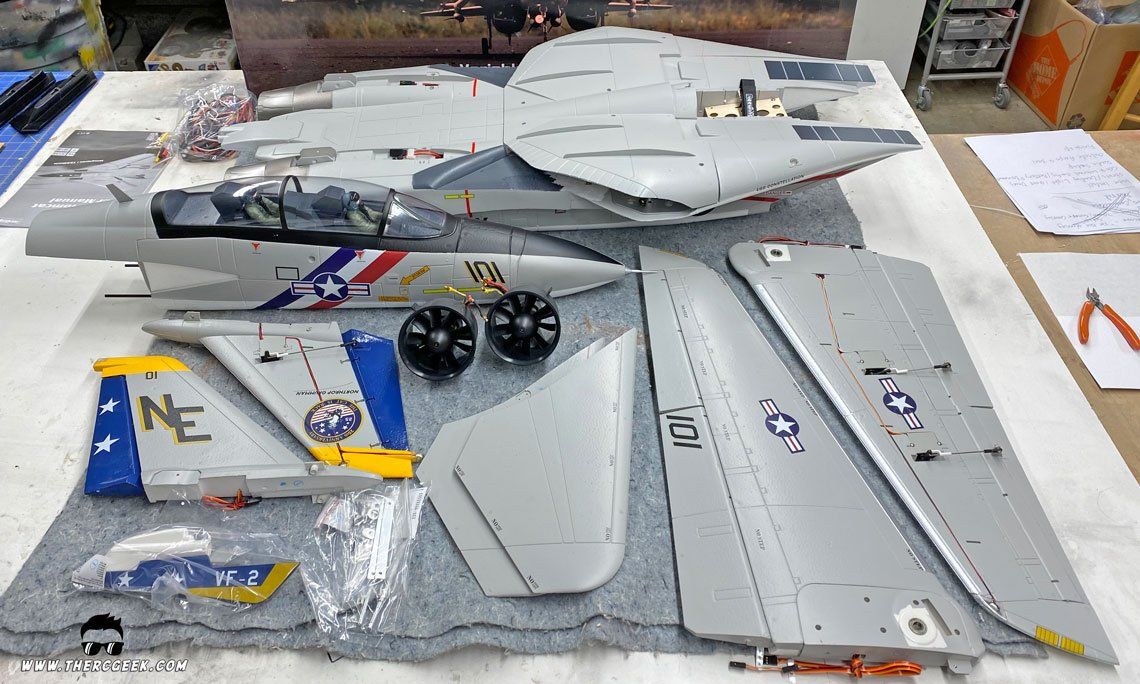
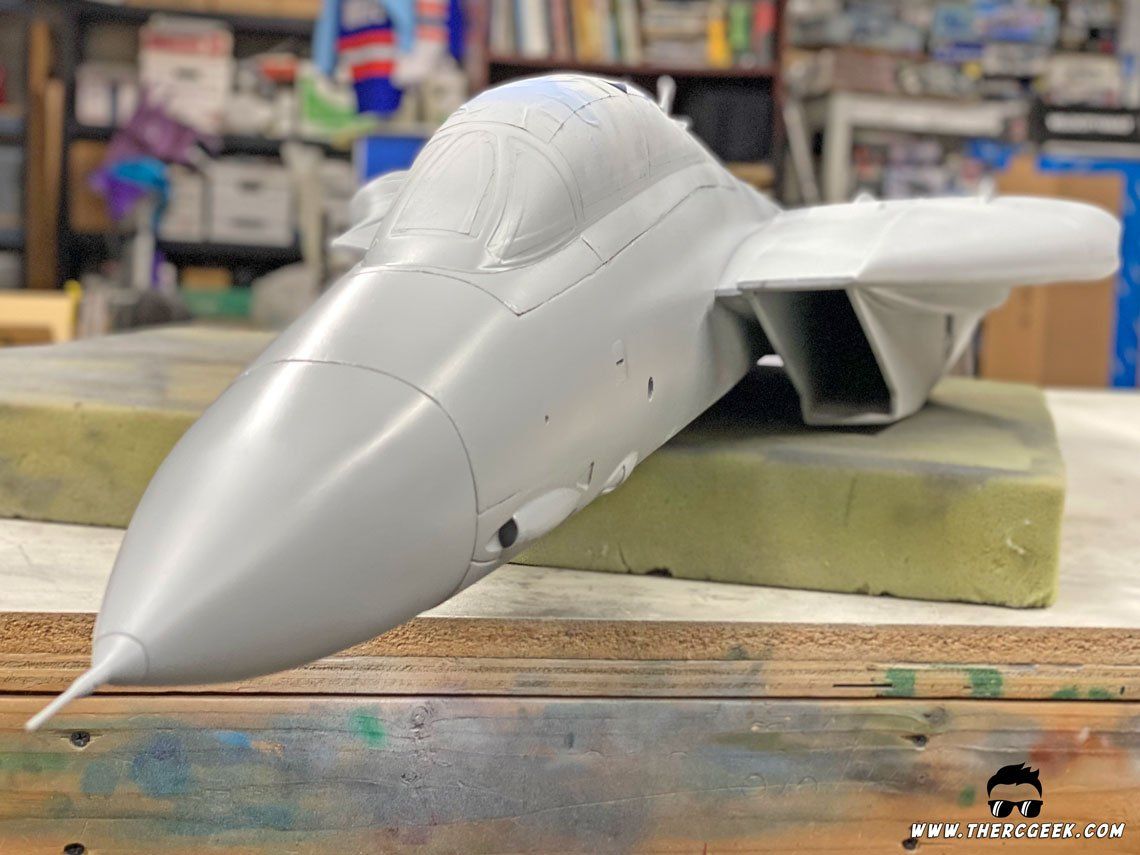
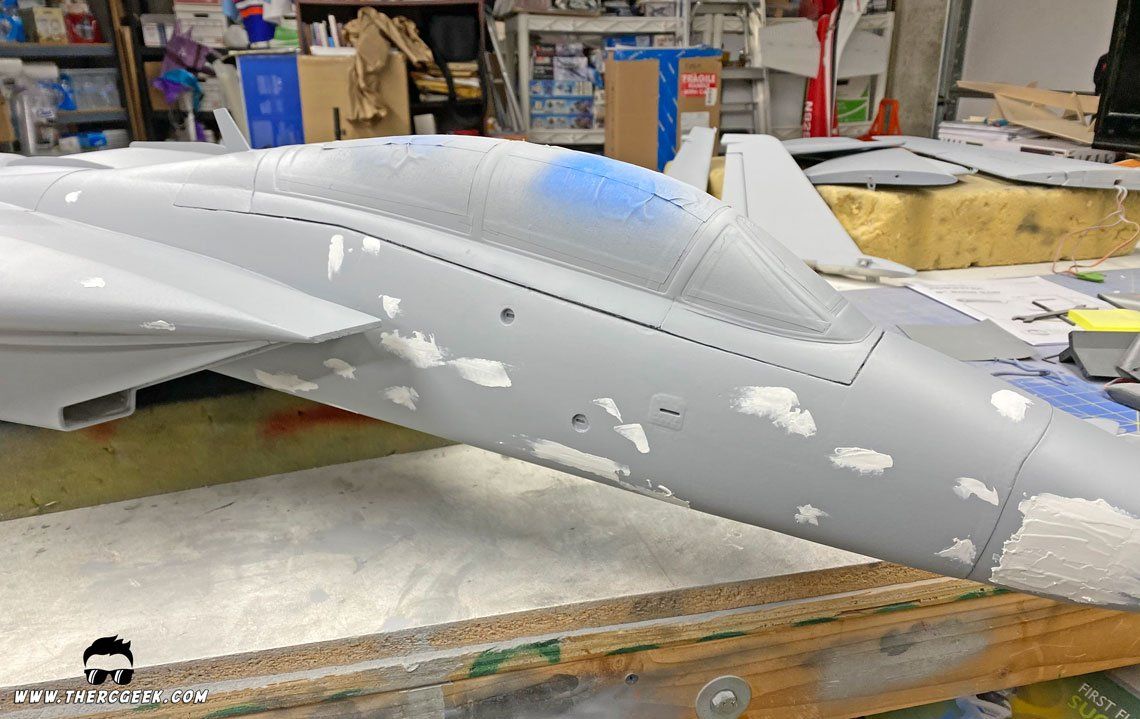
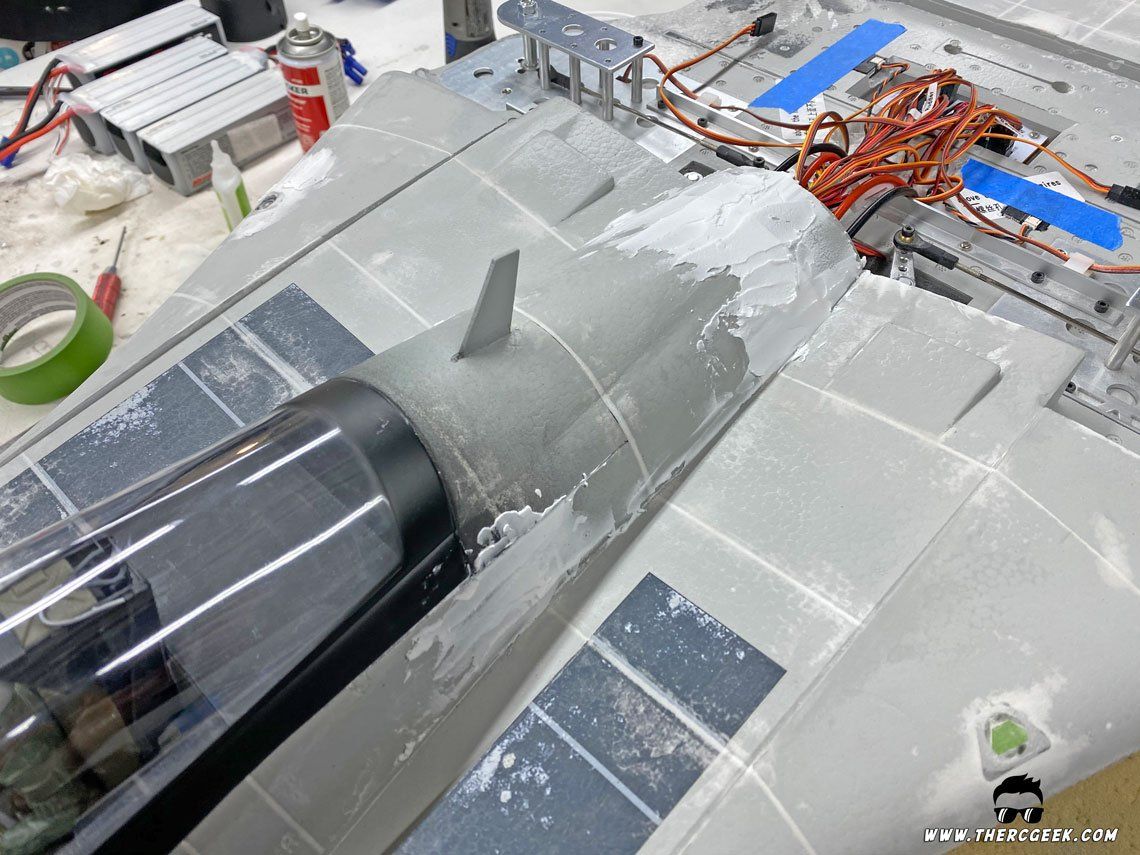
Seeing as though I've already reviewed the model (albeit a few years old now, but still valid!), let's jump right into it! The first item of business in the refinish is filler. The process I employ hasn't changed much since my foam warbird refinish series from a few years ago. However, in recent years, I've strayed away from stripping the paint like I had showed. I've found that the stock paints tend to provide a nice base to work over and take the filler well after a light sanding with some 180 grit sand paper. Also, it saves time and mess which are both wins! Please note that I'm currently using Sherwin Williams Light Weight Spackle for filler. I've found that it's a really smooth spackle that sands quite nicely. As I understand, the previous balsa filler I had used before is now no longer being made.

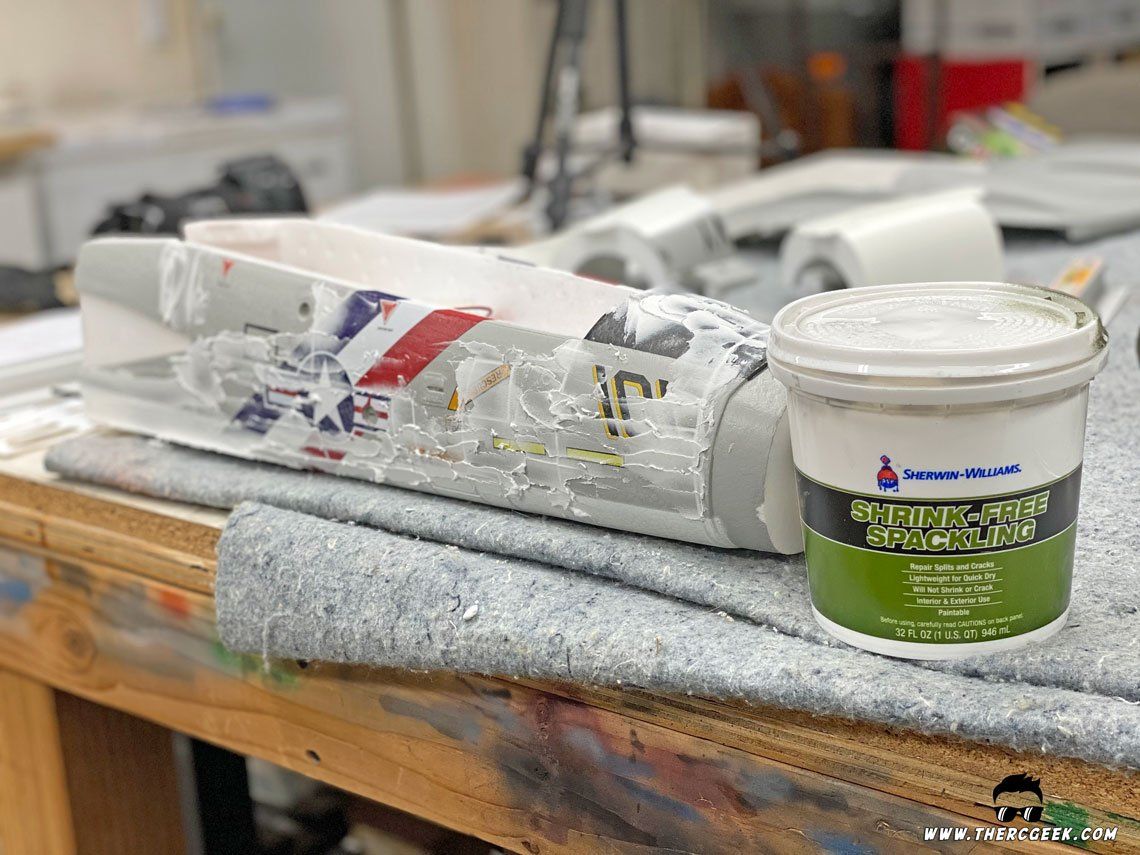
With the filler, all of the panel lines and other imperfections were filled with a squeegee and/or putty knife and subsequently sanded smooth with a small sanding block with 180 grit sand paper on it. The primary purpose of the filler here is to fill in all of the panel lines and any other imperfections. One question I get regularly is why fill in the panel lines? The reason is to smooth out the airframe as the panel lines are just too large for scale. So, by filling and smoothing them out and then adding them back later after paint, you get a much more realistic looking finish. I will say that many of the newer foam aircraft designs are coming with generally thinner panel lines which is nice to see, so in those cases filling may not be necessary, so it's kind of a case by case depending on the model. Please note that for the servo wire troughs in the wings, I simply just filled them in. I figure I can always splice in a new servo if necessary at a later date without having to remove the wires completely. Another option is to tape over them with aluminum tape and/or vinyl too should once choose.
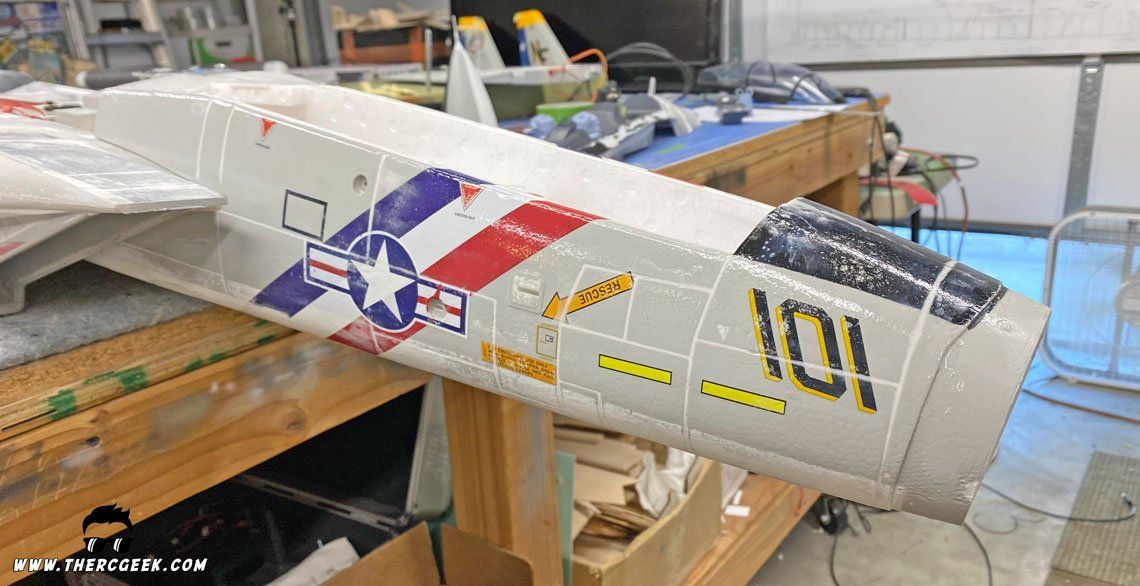
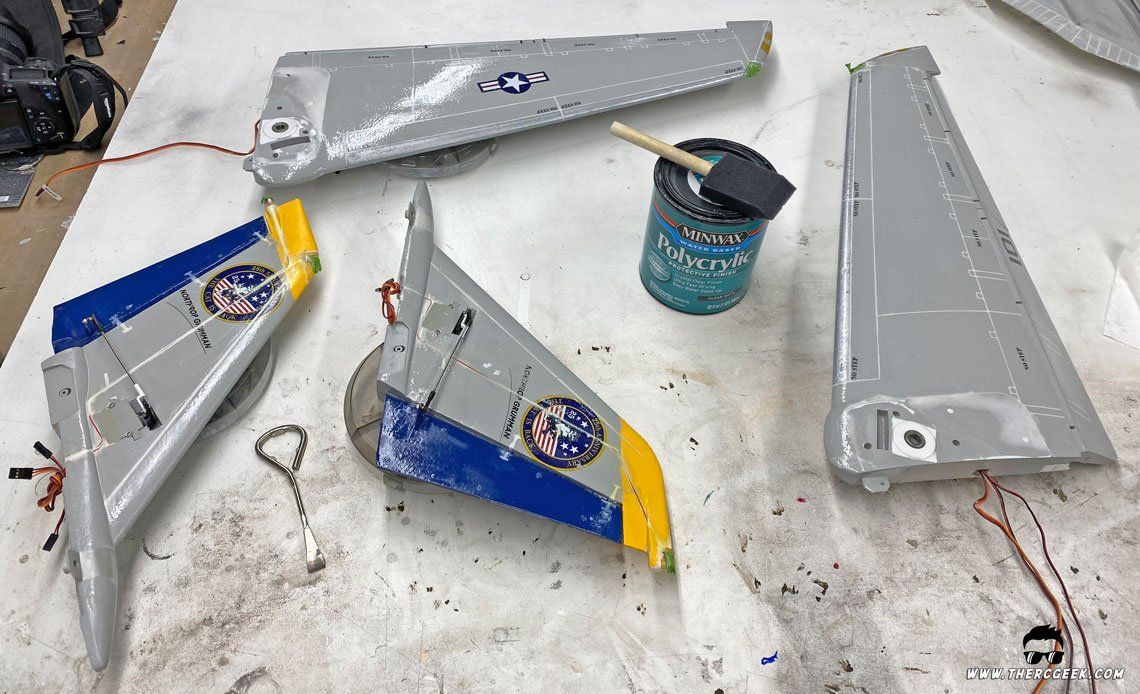
A LITTLE POLYCRYLIC…
With all of the filling and sanding completed, the entire airframe was sealed with 3-4 coats of minwax polycrylic which serves multiple purposes. First of all, since the filler is porous, the polycrylic seals all of the porosity and provides a great base for applying primer and paint. In addition, the polycrylic dries hard and so creates a hardened surface that allows for all of the final prep work to be applied to which also stiffens the airframe. The stiffening of the airframe really helps in flight actually as the airframe will be less susceptible to atmospheric disturbances.
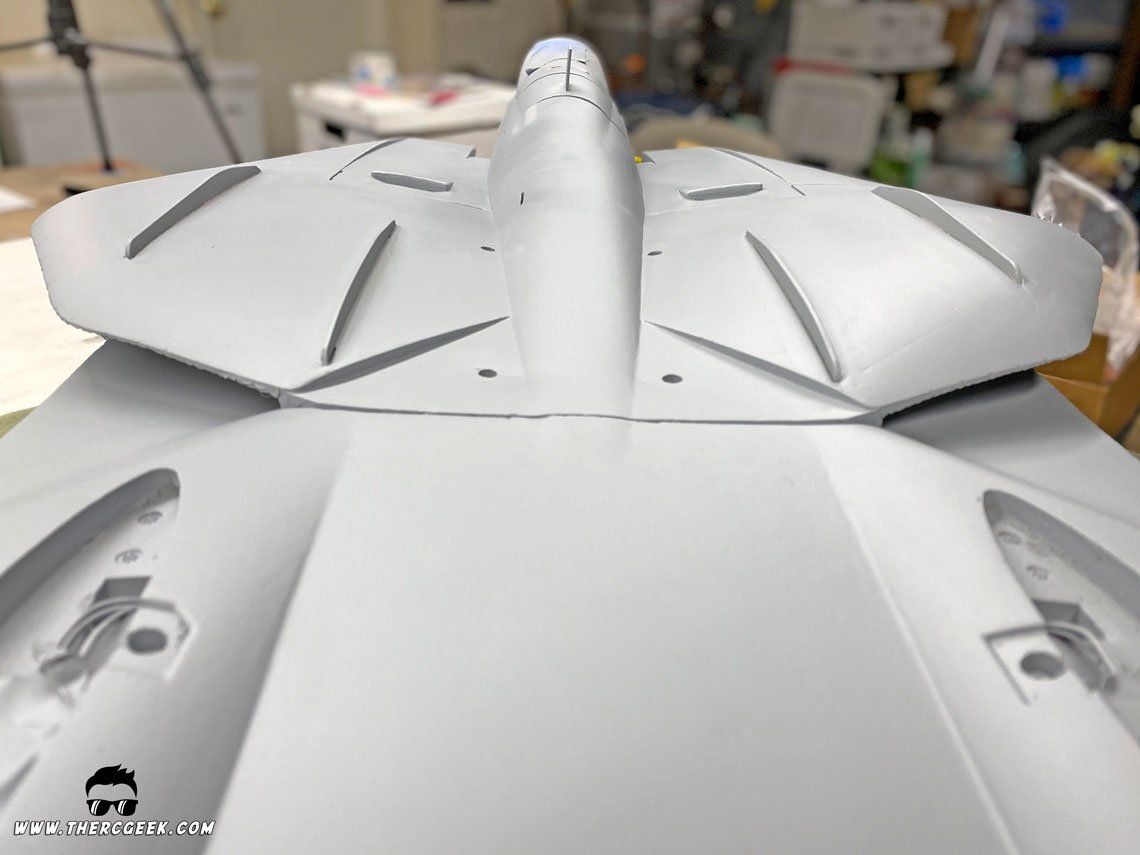
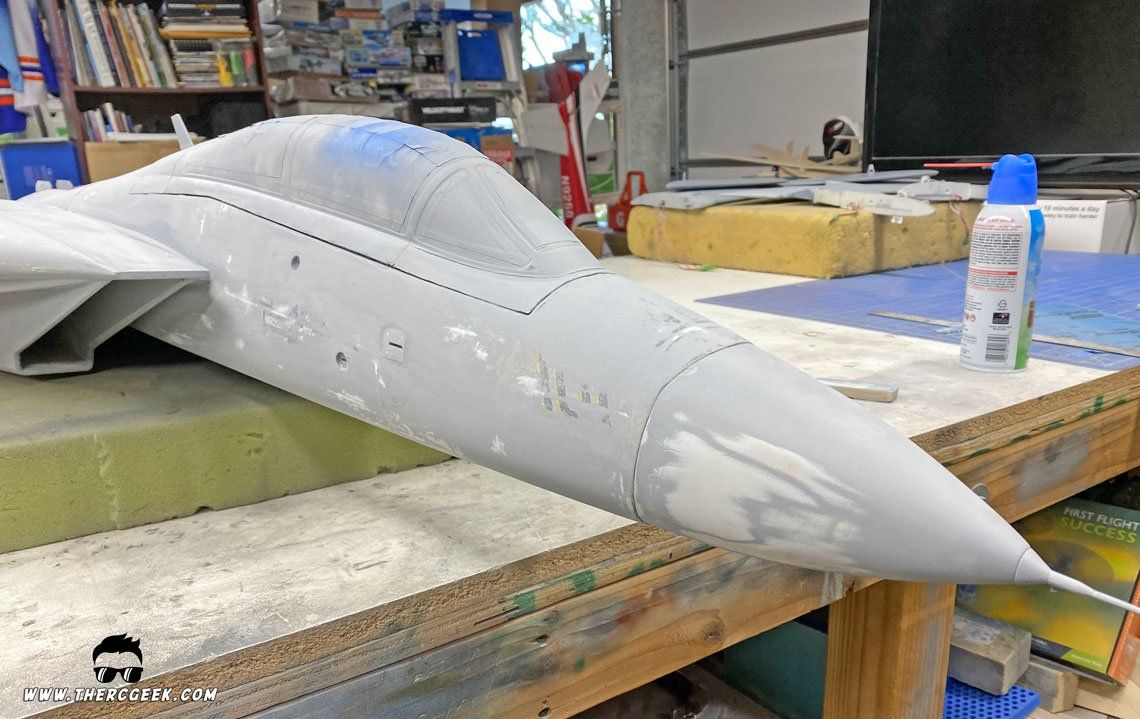
PRIMER, SAND, REPEAT
The final step in the process is to apply multiple coats of primer, sanding in between coats with 180 grit sandpaper. This process is what ultimately smooths and evens out the airframe surface and provides the fiberglass like finish. The primer serves to fill the micro voids created by the foam and so by building up and sanding multiple layers of primer, the primer is able to build up in low spots as the surfaces as sanded. There is no shortcut to this process (i.e. spraying all the primer coats at once and then sanding that once) and the smoothness is ultimately a function of how many layers of primer are applied and sanded. In this case, I used Dupli-Color Filler primer (good stuff!!) and applied and sanded 4 coats of primer with the final coat being wet sanded with 600 grit sand paper in preparation for paint.
It's important to note that for larger voids that the primer wasn't filling sufficiently, 3m glazing putty was used to fill them. Since the glazing putty is harder than the underlying surface, it's important to be careful not to generate too much heat while sanding as this can cause the foam to swell. So, when sanding the glazing putty (if applied), lightly sand it and alternate areas so as you go is my recommendation.
A FEW MODIFICATIONS & IMPROVEMENTS
The nice thing with a refinish is that you can fix things that you aren't happy with out of the box. In the case of the F-14, there were a couple of things I was never happy with on the stock airframe. Most notably, the canopy hatch fit and the over wing hatch fairing fit. Here's a rundown on the modifications that were made in the process of this refinish.
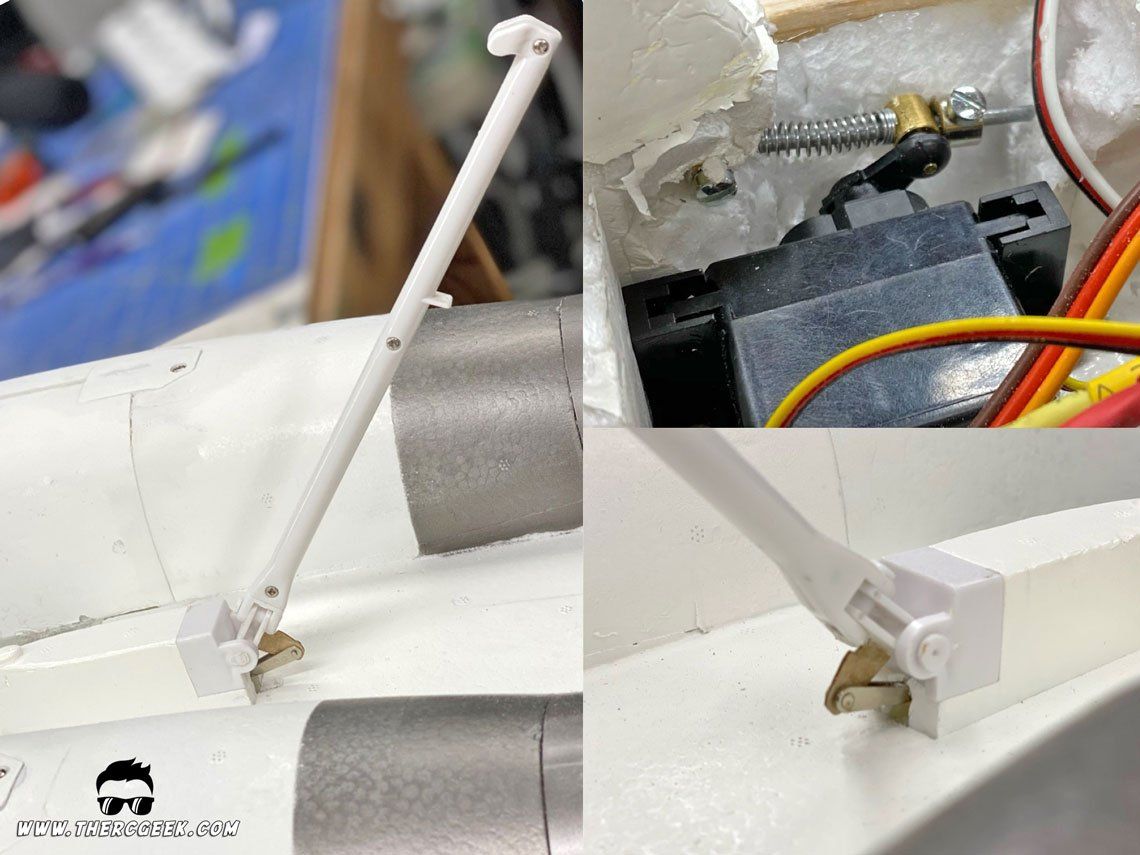
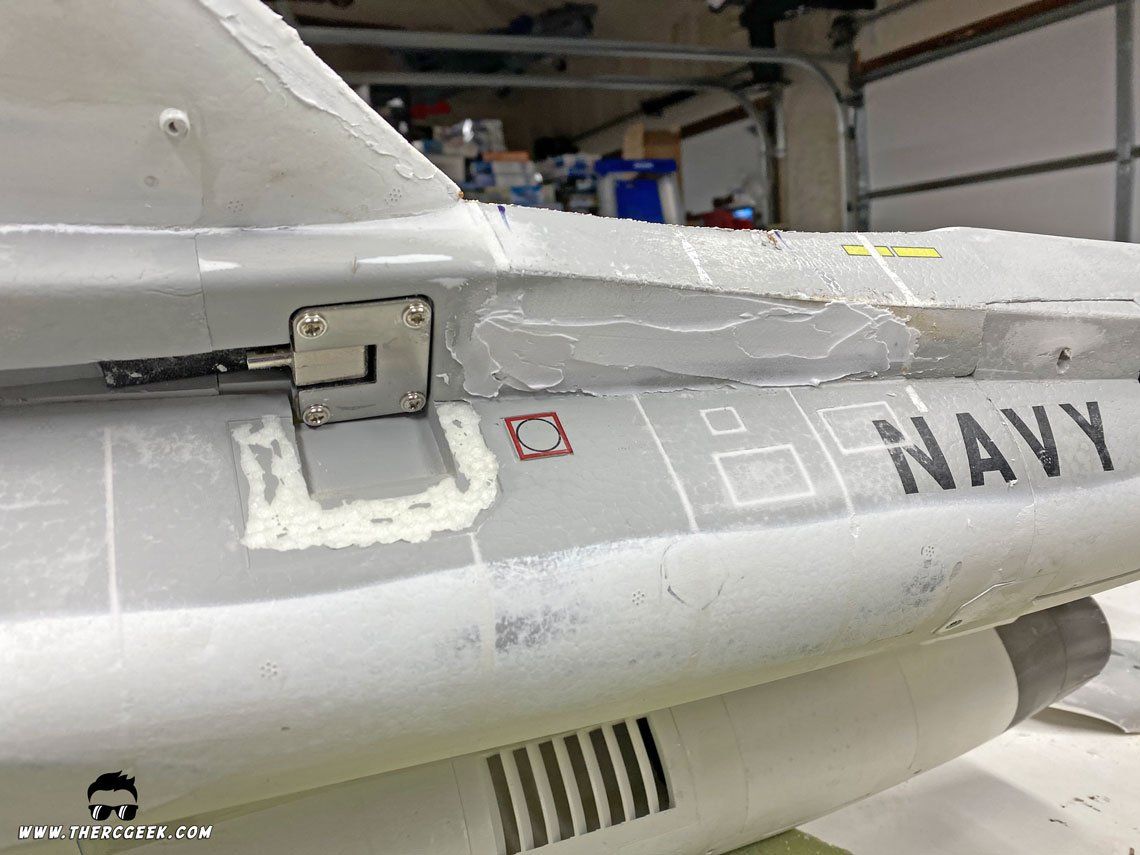
MOVEABLE TAILHOOK
I was able to locate a 10ch Spektrum receiver for this refinish which meant that I had an extra channel available. So, I figured a moveable tail hook would be a good option and something easy to do since nary a channel can be left unused! It's important for something like a tail hook that could strike the ground on landing for it to be spring loaded to save the servo. To actuate the stock hook, a pushrod was made with a solder clevis on one end (the hook itself is easily made movable once the glue joint is popped free at the fuselage near the hook end). A control horn was made out of 1/32" plywood and glued to the base of the hook on the upper surface which the clevis was then connected to. For the servo, a Hitec Hs-82 servo was used with a Dubro EZ-Connector installed on the servo arm (was installed into the foam at the aft of the belly hatch area). A 1/16" wheel collar was installed onto the pushrod followed by a ball point pen spring and then the pushrod was pushed through the EZ connector. To capture it in place, a wheel collar was installed on the exposed push rod end on the other side of the EZ connector. Adjustment of the tension of the spring, is achieved by simply adjusting the location of the wheel collar keeping the spring in place.
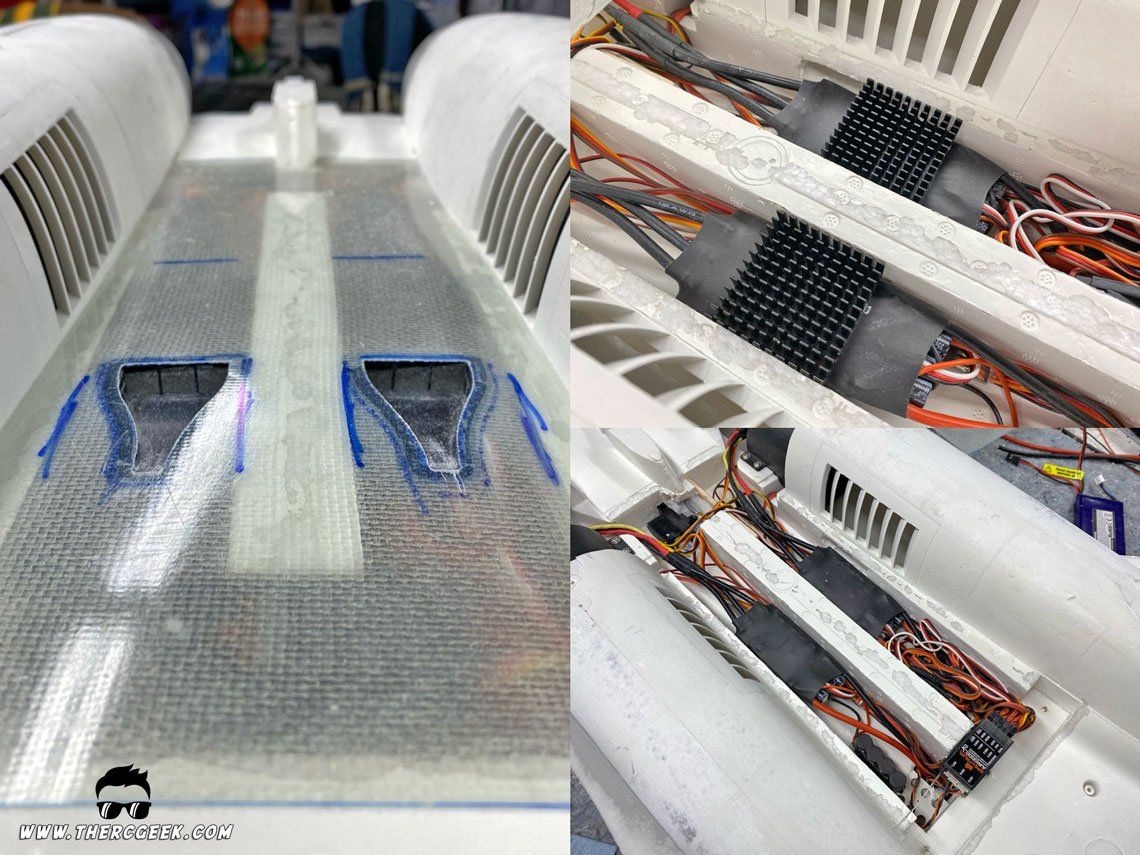
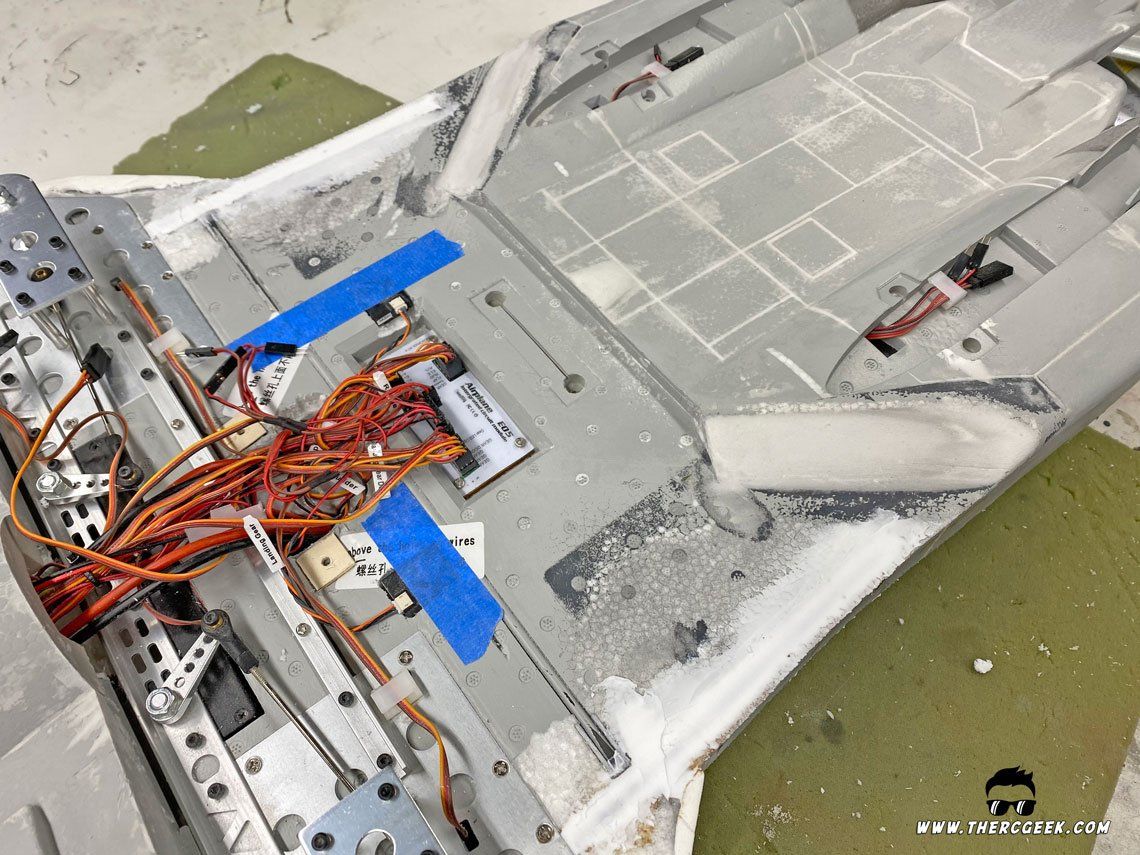
ESC AREA COVER AND COOLING
I was never happy with the stock perforated cover in the area between the engine nacelles/inlets where the ESCs resided. So, to rectify that, I laid up a piece of fiberglass sheet (showed that in a live stream when I first started the project) and inserted a pair of NACA inlets. Additionally, heat sinks were placed on each of the ESCs with a small hole cut into the inlet near the fan face to help draw air over the cooling fins. The fiberglass cover itself was simply tack glued in place to allow easy enough access when needed (the receiver resides in the forward section of the area).
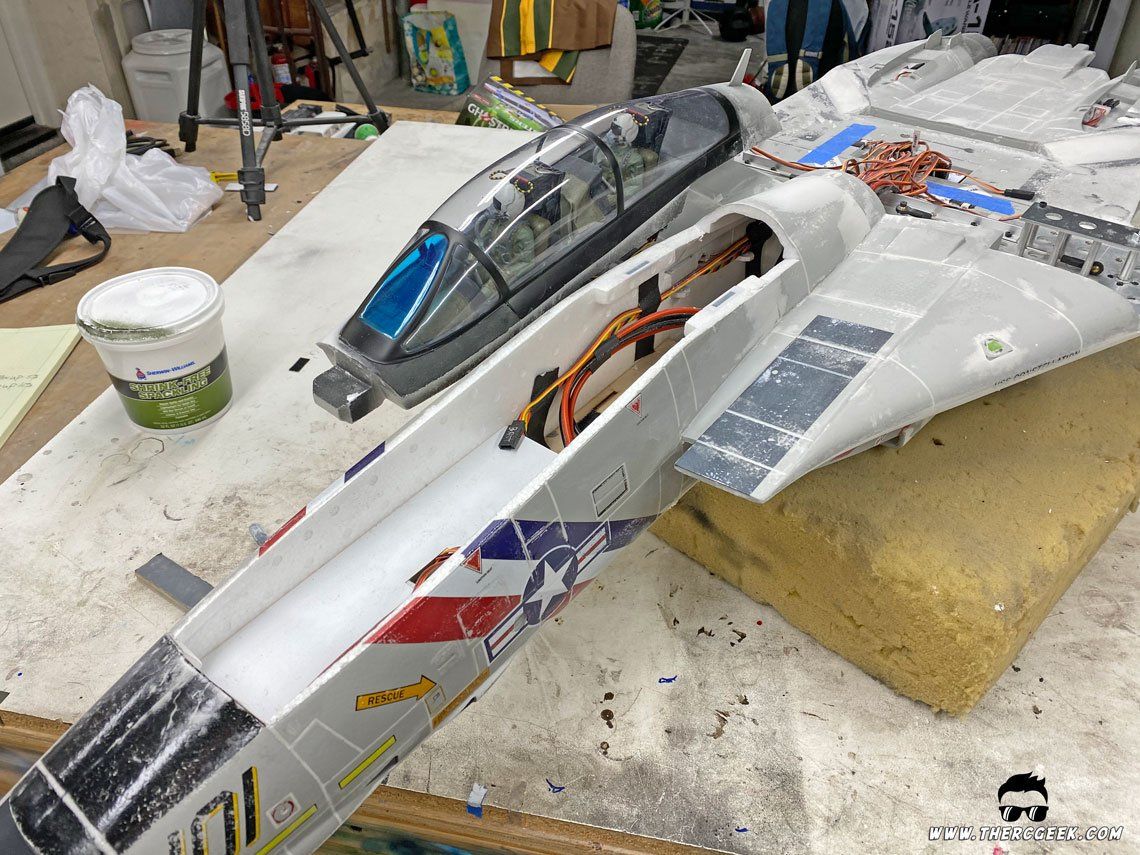
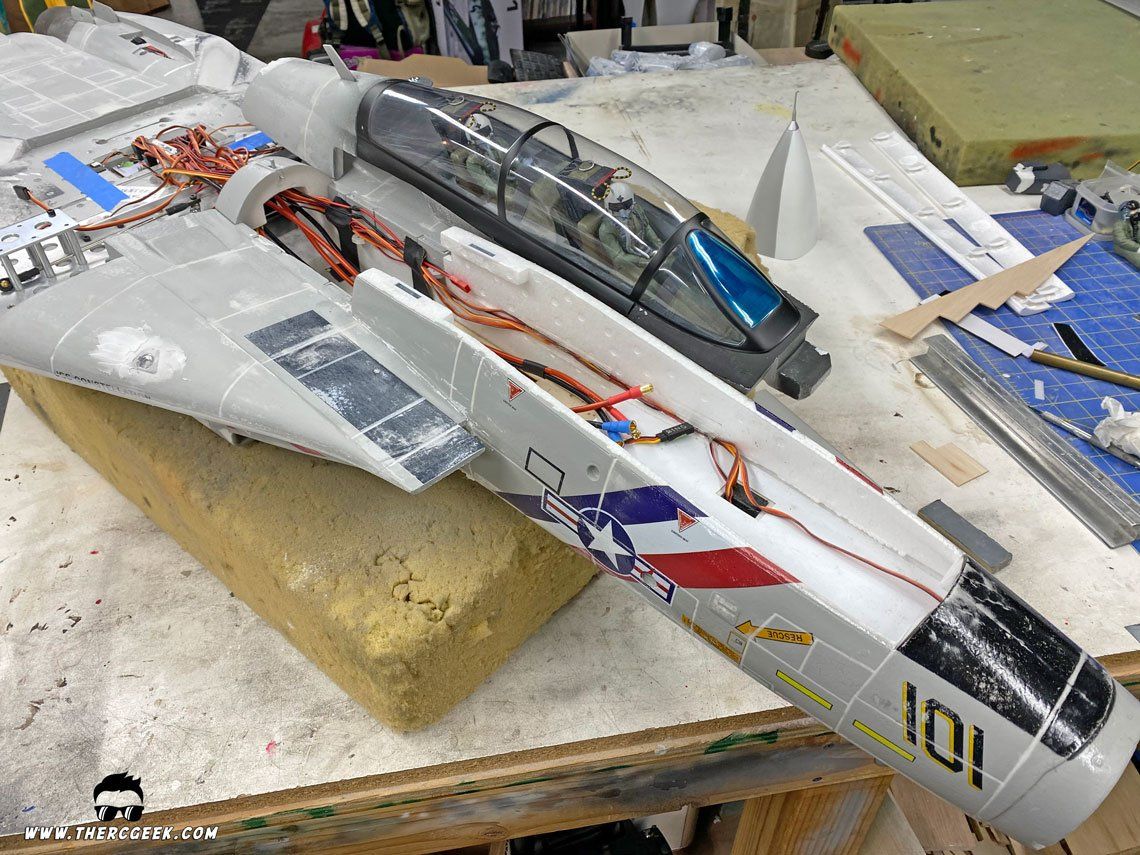
CANOPY HATCH CLEANUP AND RECONFIGURING
Another area I was never keen on was the forward canopy/battery hatch and the associated fit. While it provided a good amount of access for the dual 6s batteries, the fit was pretty poor. So, to solve that, the large rear section of the hatch was glued in place with CA and a new hatch line was cut in with an Xacto knife. The canopy lines were followed to keep a consistent look and the vertical cut was placed along a panel line in the fuselage. Filler was used to blend any unsightly seams and it was then sanded smooth. The result is a significantly better fitting and looking hatch that still provides plenty of access. Please note that the battery fit was checked prior to making this mod. I'm using Roaring Top 6250 mah packs which require being pushed as far back as feasible. Foam was cleared as necessary to be able to push the packs all the way to the carry through spar.
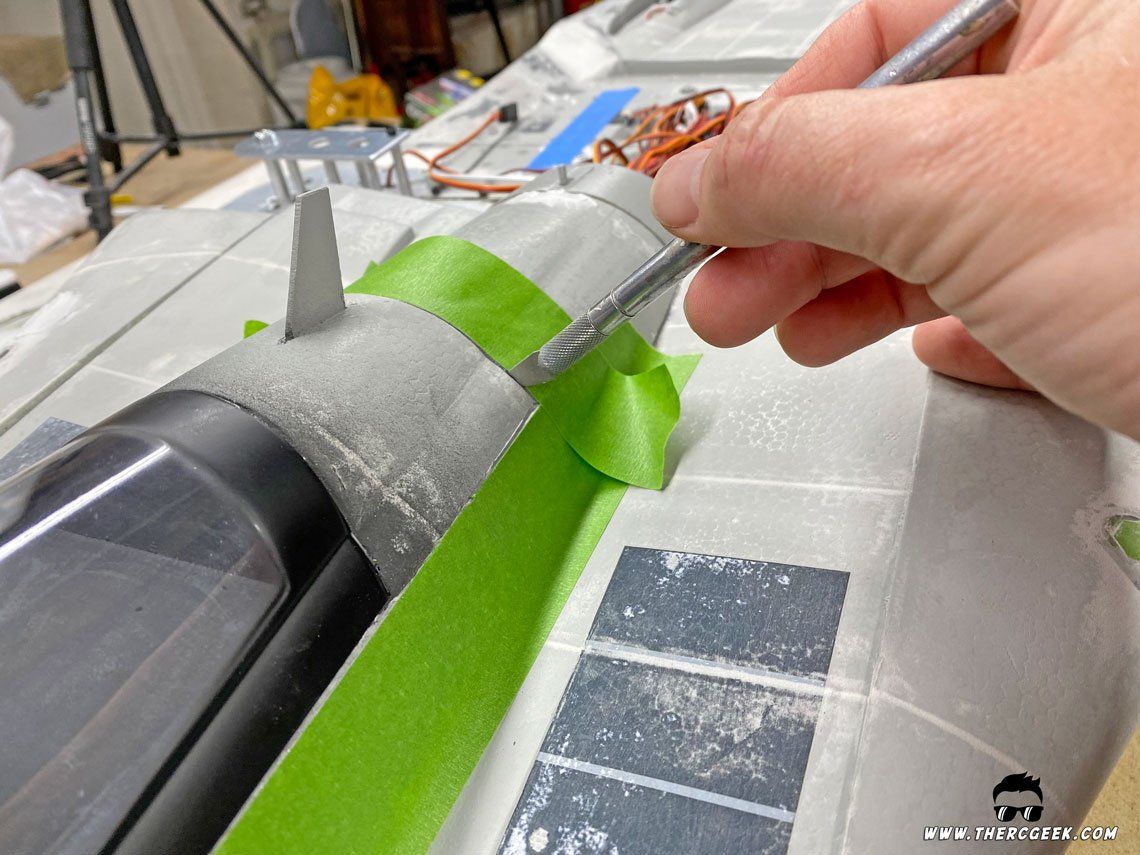
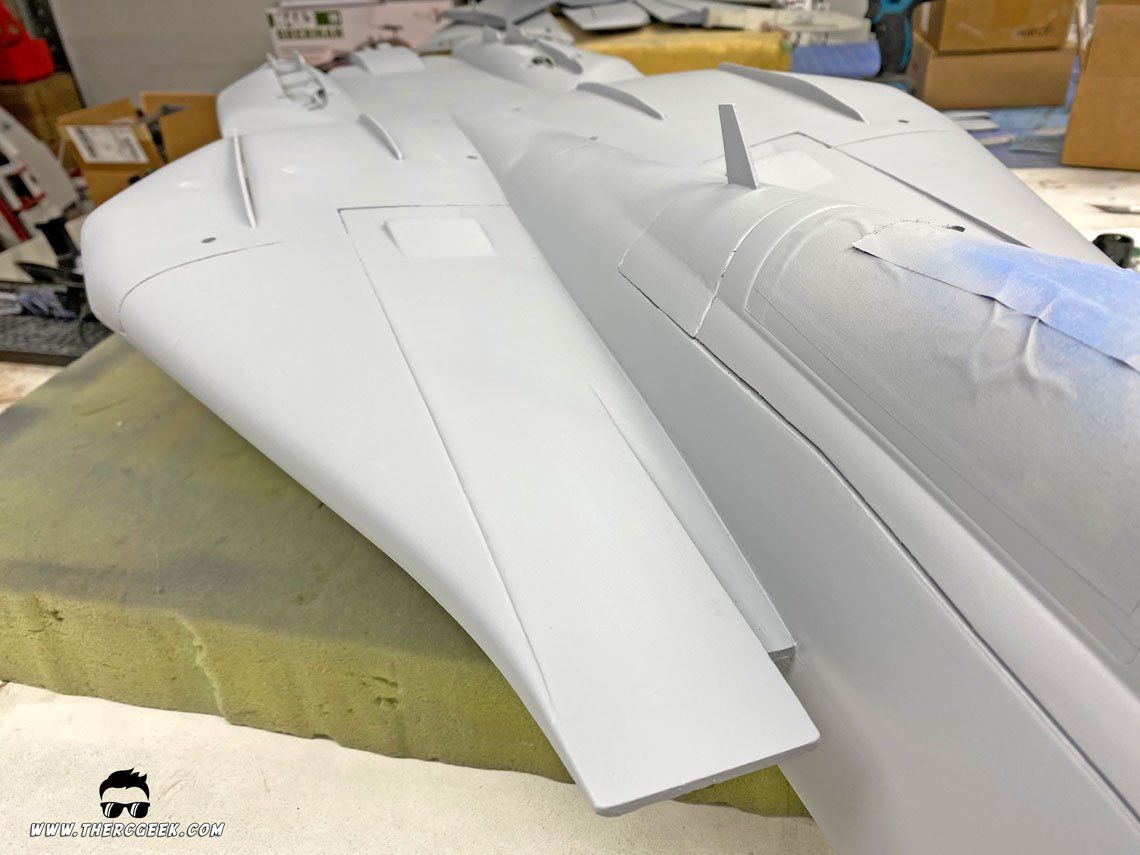
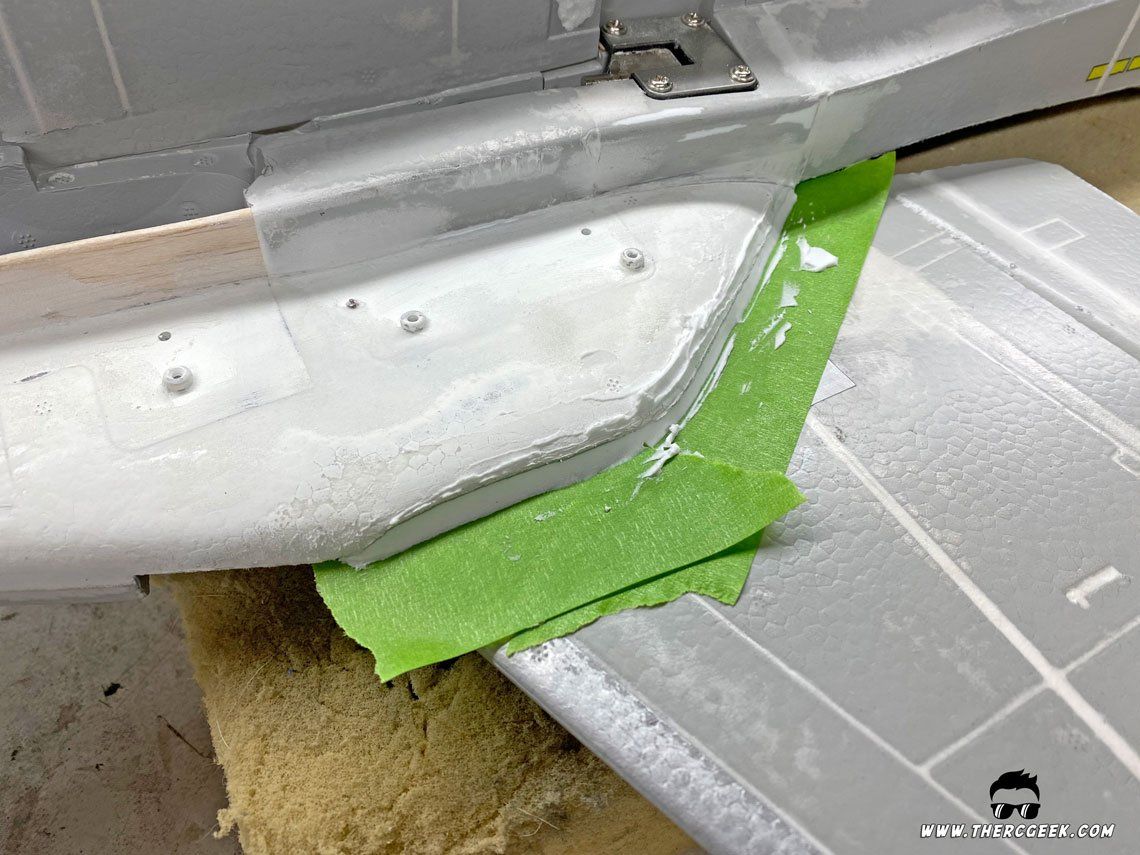
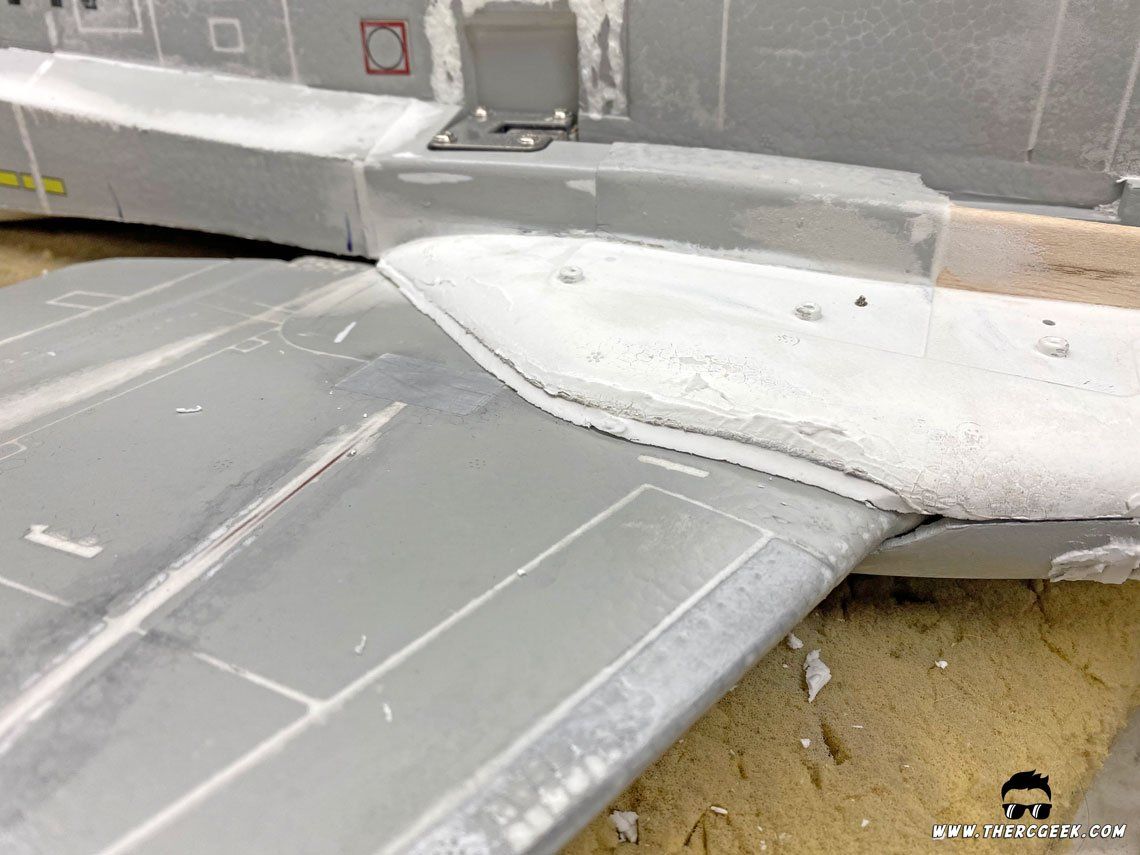
OVERWING HATCH & WING GLOVE FIT
On the subject of fit, since we're cleaning things up, it was work cleaning up the overwing hatch and wing interfaces for a cleaner fit. To accomplish this, frog tape was place at the interfacing locations between the fuselage fairings and the wings (extended position) and the filler was placed to fill the gaps and then sanded smooth once dry. The filler won't stick to the frog tape, so you can lift up the hatch and the wings after it's dry. The result really cleans up the wing glove area around the wings with the wings extended.

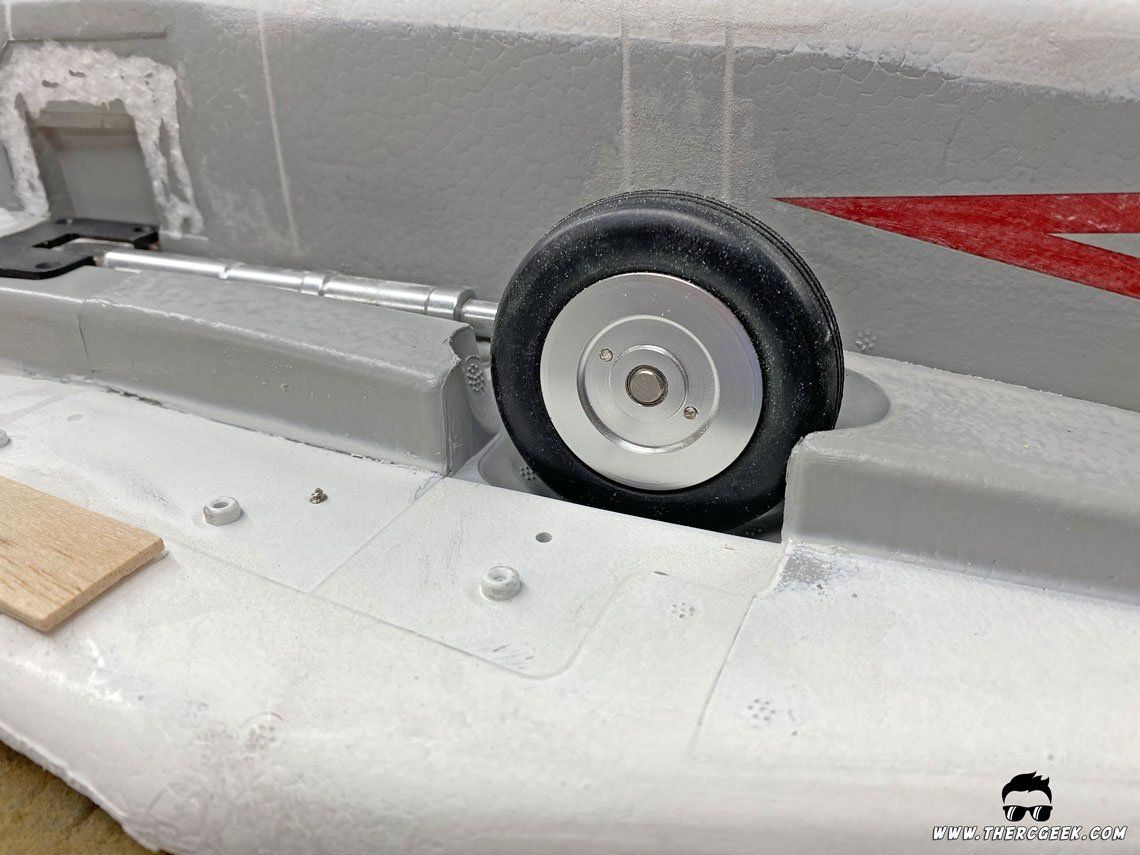
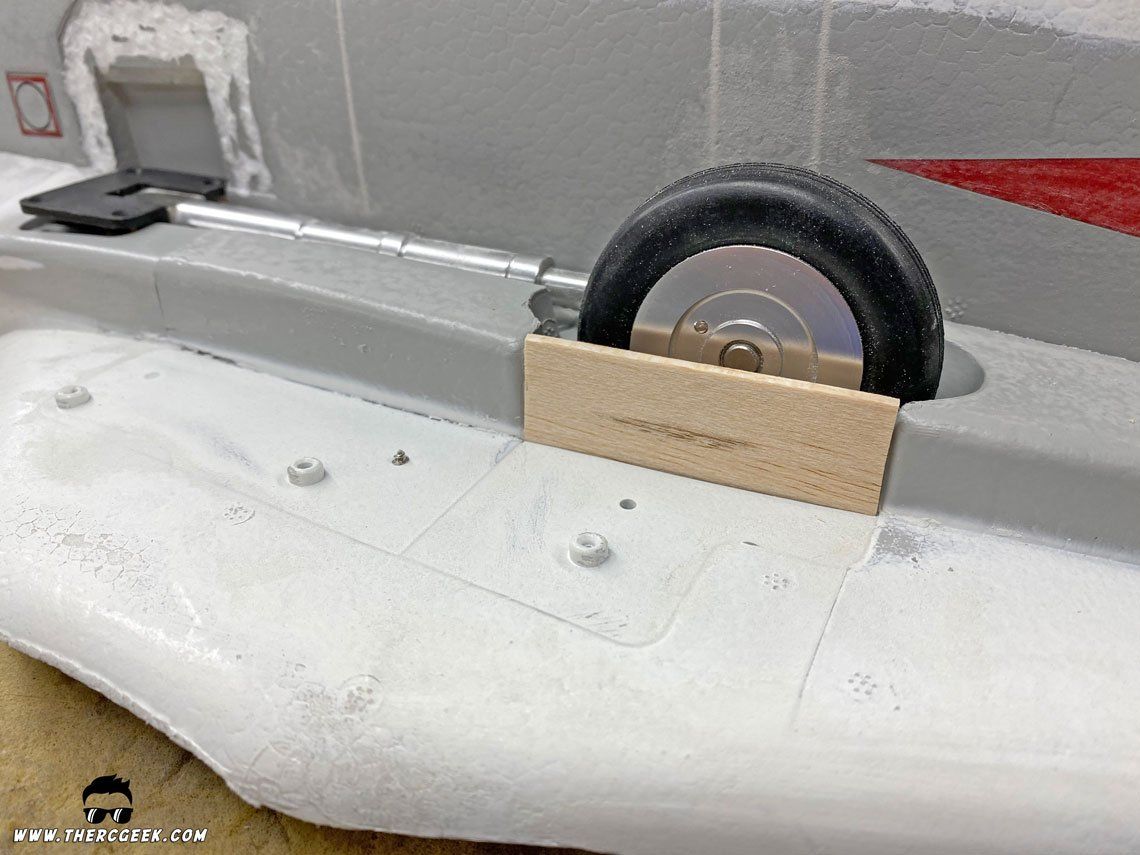
MAIN WHEEL COVERS
I was really avoiding doing a full reconfiguring of the landing gear to rotating mains with gear doors (more work than I wanted to spend), so I covered the opening where the main gear tuck up into the fuselage with a piece of 1/16" balsa wood and smoothed out the intersections with filler. While it doesn't cover the gear completely, it does help hide a portion of the tire. The hope is that this combined with the wing glove pylons will help hide the tires in most angles.

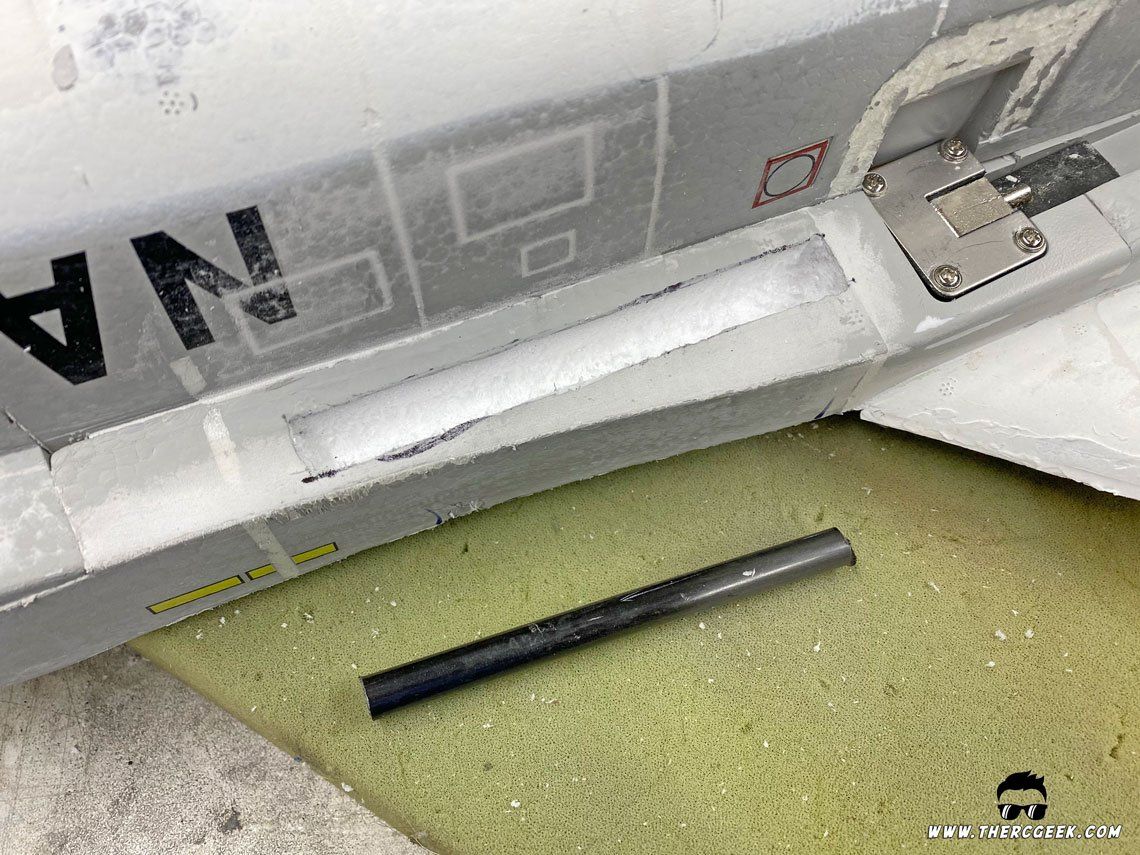
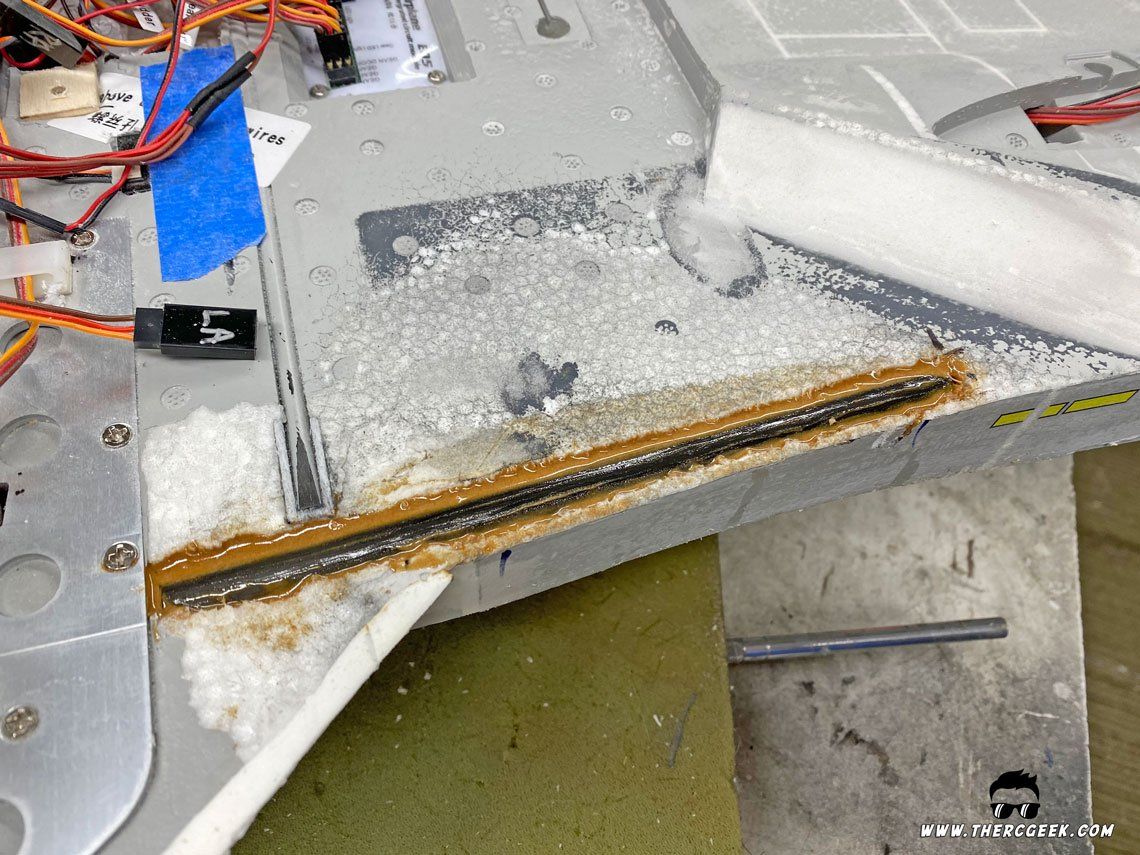
LANDING GEAR REINFORCEMENTS
The final item of business was to beef up the landing gear a bit. There's not much structure around the main landing gear mounts and so over time, the foam can start go get soft which results in free play on the gear. So, I embedded a 3/8" diameter carbon tube above and behind the main gear mounts. A trough was cut into the foam and the tubes were then epoxied into place with 5 minute epoxy and micro-balloons. Note that the upper tube was placed from the rear of the wing carry through spar to a about 4 inches past the gear mounts while the lower tube was placed at the aft edge of the mount to about 4-6 inches aft. This was easy to do and really increase the structural rigidity of the gear.


FINAL THOUGHTS
The beauty in something like this as it allows you to fix things you may not otherwise be happy with. Plus, the refinish process completely changes a model giving it a more realistic look which really makes it worth it. In the process of all of this, I actually built a whole new cockpit, so in our next refinish installment, we'll talk about that including making 3d printed pilots with moveable heads. Until then, I'll see you at the field!
The RC Geek Blog is your place to learn about all aspects of the RC hobby. Learn to build, design, drive or fly that RC project you’ve always wanted to build, but have been intimidated to try. This blog is here to help you on your journey and provide tips and tricks as you go! My hope is to inspire builders both experienced and new! So, welcome, please look around, it’s an exciting beginning! I’m currently documenting my latest competition scale RC jet build, a Mark Frankel F4D Skyray, along with some other fun tips and videos. If you can’t find what you’re looking for on this front page, click on any of the categories to the right and it will show just posts related to those categories. Please feel free to add comments and/or contact me directly if you have questions, I’m here to help! And don’t forget to check out my YouTube Channel, I post new videos every week!
Subscribe To Our Blog Now