The RC Geek Blog
By: Chris Wolfe
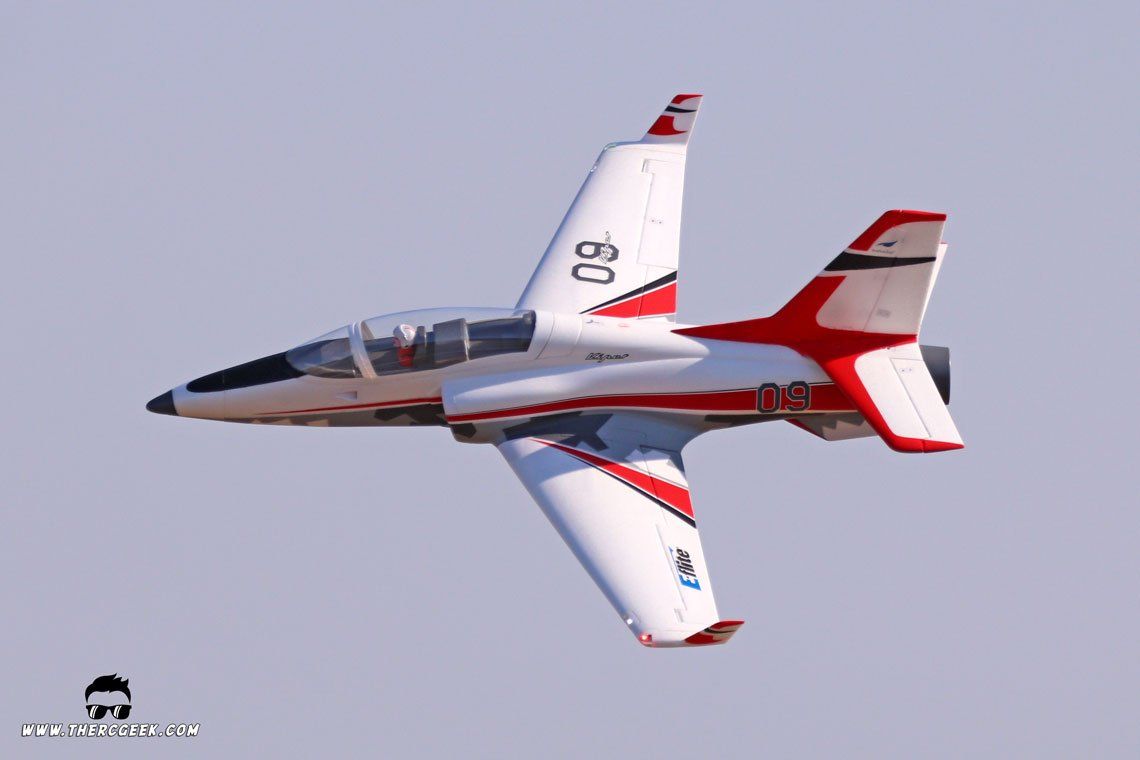
If the E-flite Viper 70mm EDF is great, then the E-flite Viper 90mm EDF is even greater-er!
The Viper Jet as a design is about as a perfectly proportioned jet for a model as one can get. It flies well on the wing giving it a really wide speed envelope while also having a nicely sized empennage that helps keep it stable and responsive on the controls. So, it's no surprise that it's been a popular subject within the jet community for a while as they are great flying models and the E-flite Viper 90mm EDF is no exception! I can only imagine how nicely the full scale Viper Jet flies!
The E-flite Viper 90mm EDF stems from the lineage of the E-flite Viper 70mm EDF which has been my go to recommendation as a first jet since first flying it a few years ago. The primary differences are of course size, but also some additional accoutrements in the form of lights, shock absorbing landing gear, gear doors, and full Smart telemetry. In terms of performance, they both offer a similar flight envelope while the 90mm flies bigger and heavier having overall more speed and vertical performance.
AIRCRAFT ASSEMBLY NOTES
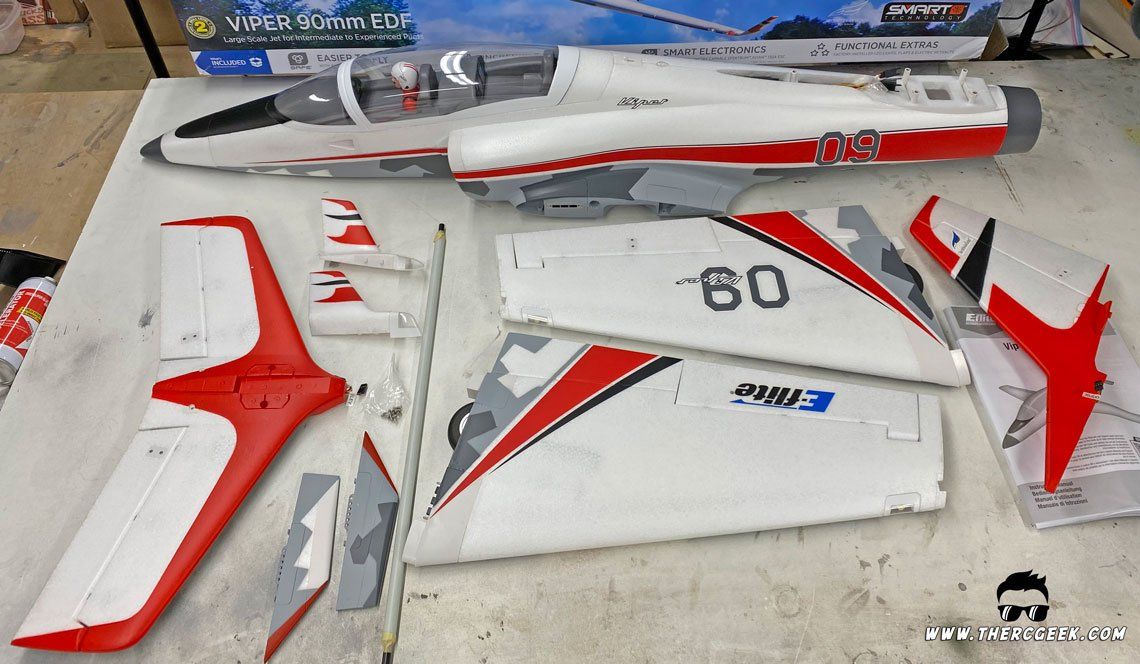
The E-Flite Viper 90mm is a good sized model that comes well packed and assembles quickly. Assembly begins with installation of the horizontal tail which is held in place by two screws. From there, the wings slide into place over two carbon spars and are held with two screws in each wing. The ventral fins are clipped into place, the model rolled over and the vertical tail installed being held with three screws. Once together, the winglets are clipped onto the wing tips which completes the assembly. The fit of all of the parts was great and the assembly was a breeze.
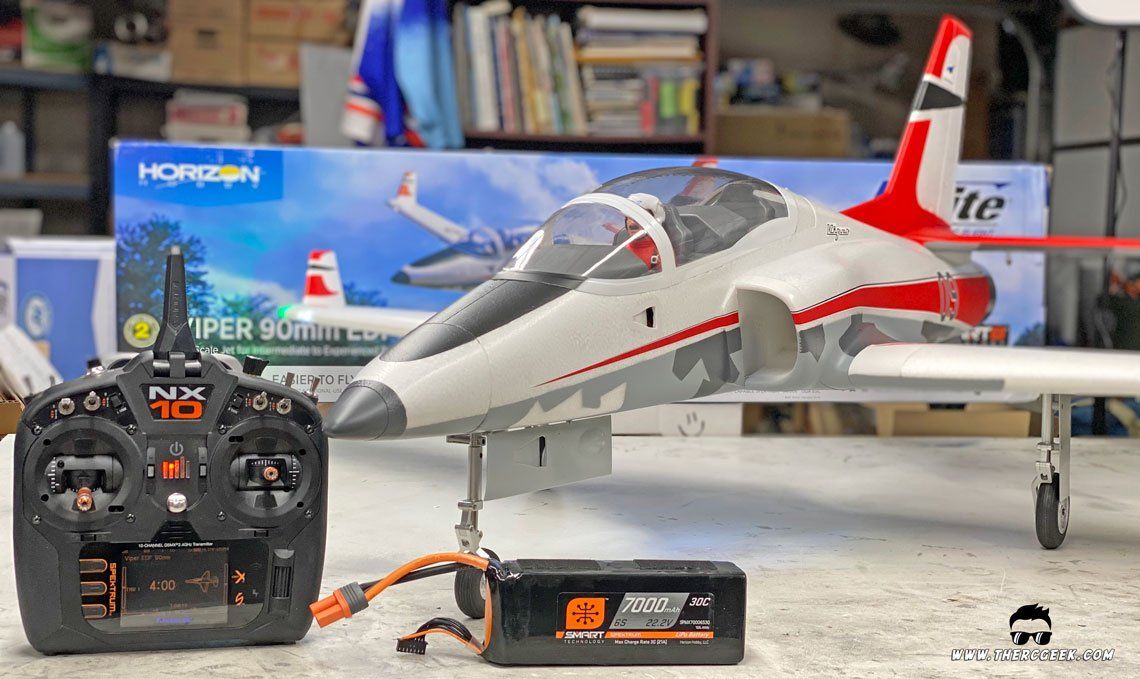
With the airplane together on the bench, it is a very nice looking model and the size of it really becomes apparent once together. The paint scheme is a red version of the 70mm which looks good and is well executed as well. There is a nice large canopy hatch with significant space for an assortment of batteries. With the size of the aircraft and the battery space available, Spektrum 6s 7000mah Smart batteries are a no brainer for flight time and performance. :) Lastly, yhe design features a nice clean inlet system which means no auxiliary air grates in the fuselage and translates into greater efficiency in flight.


AIRCRAFT SETUP & CG
For the aircraft setup, this is the bind and fly version of which means that it includes SAFE select as well as the full Smart telemetry. If you’re using some of the newer NX radios , setting up SAFE can be simplified through assigning it in the forward programming menus. It requires selecting the desired channel to SAFE and then going into the channel assign menus and assigning that channel to your desired switch for SAFE. This really makes things easy and also allows you to turn on and off AS3X even should you choose.
For the control surface setup, I found that I preferred my mid rates all around which equate to the following deflections:
- Elevator – 12mm up/down with 12% Expo
- Aileron – 12mm up/down with 5% expo
- Rudder – 22mm left/right with 25% Expo
- Flaps – 25mm mid, 45mm full, no elevator mix required
As previously mentioned, E-flite Viper 90mm EDF has a nice large battery area in the forward fuselage which allows for higher capacity batteries to be used for good flight times. While smaller capacity packs can be used, I prefer to fly the model with Spektrum Smart 6s 7000 mah batteries. This easily provides 4+ minute flight times and the model handles the weight easily.
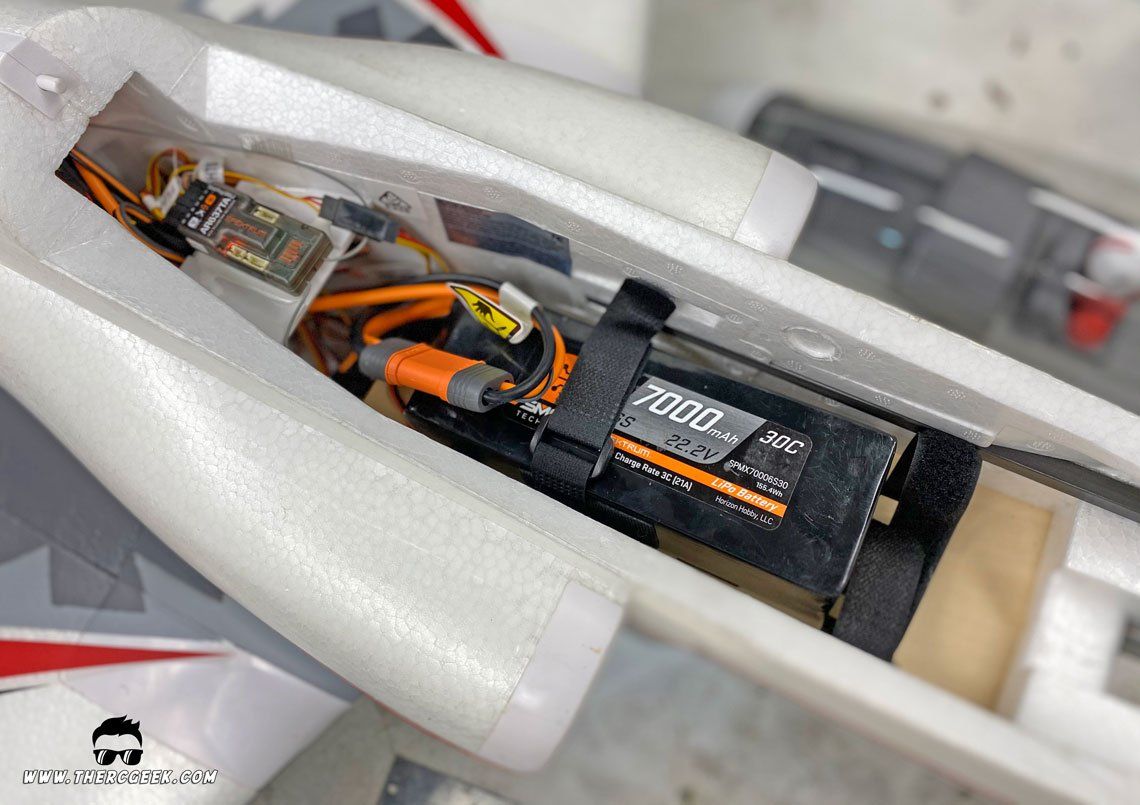
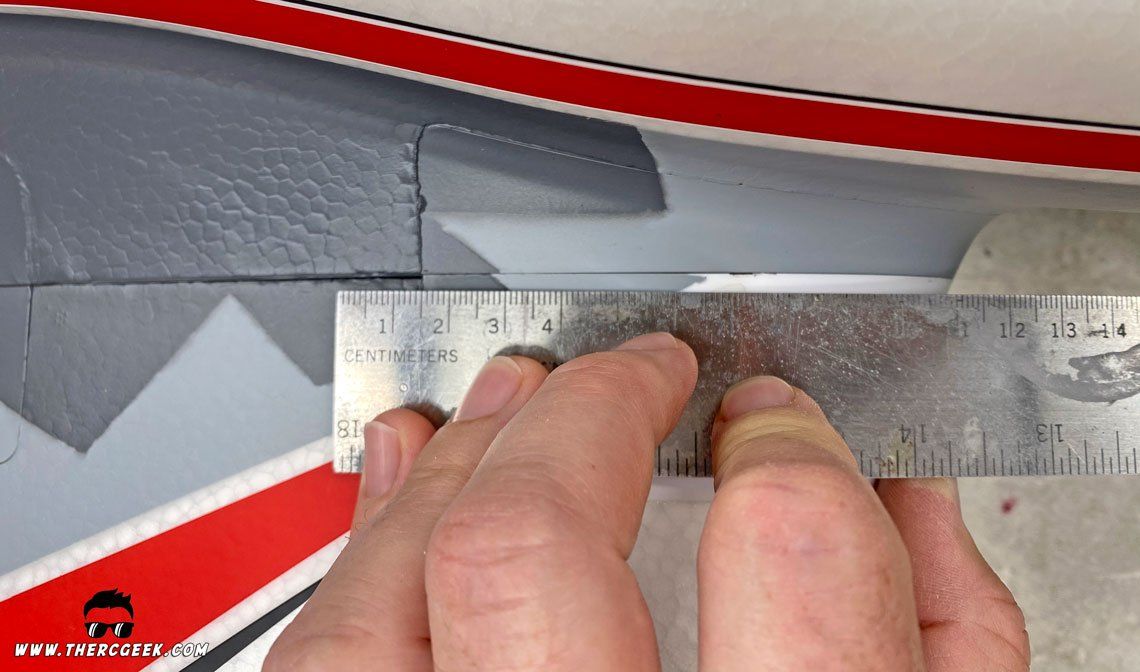
In terms of the CG, I started with the recommended location is a good place to start. I ultimately moved the CG back a touch which equates to 115mm as measured from the wing root leading edge aft. At this location, the 7000mah battery resides about 1.5″ forward of the receiver mounting plate in the battery area. Note that I’m just CGing the airplane with my fingertips right side up with the gear down and it works easily.
A LITTLE REVERSE THRUST
The Spektrum Smart Avian ESCs have the option to set reverse thrust within them if using a Spektrum radio. This is a fun feature on the Viper 90mm and also helps shorten the landings when you need in the place of wheel brakes. To set reverse thrust within the ESC, with the model powered up, scroll the telemetry screens all the way to the right and follow the instructions to enter the ESC menu. Once in the ESC menu, set the brake type to “reverse” and brake force to “7” and set the thrust rev channel accordingly. See image below for the full procedure:
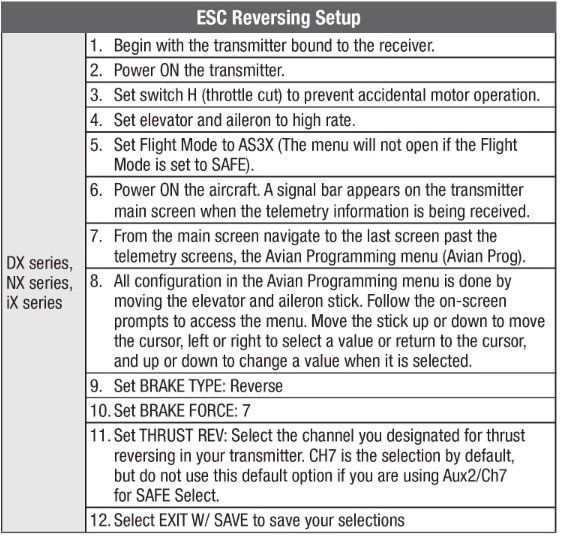
Once the ESC settings have been updated, enter into the digital switch assignments and set the desired thrust reversing switch for the appropriate channel assigned to the ESC and the throttle parameters to -100% (forward side) and 100% (reverse side).
FLYING THE E-FLITE Viper 90mm EDF
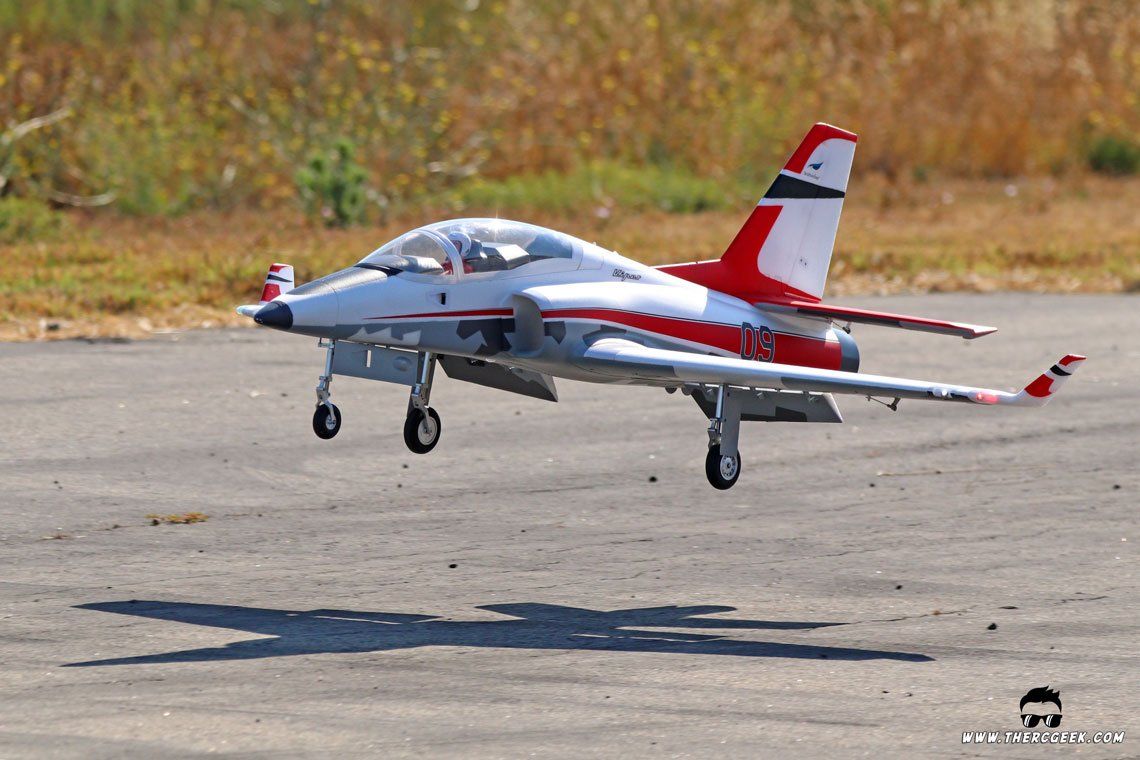
It’s really no surprise that the E-flite Viper 90mm EDF is an incredible flying jet! The performance envelope is very wide having good speed at full throttle while also slowing down wonderfully with the flaps down. The vertical performance is excellent and the model will even pull straight up basically directly from takeoff. Add to that, the model is nicely responsive on the controls, maneuvers extremely easily and locks in very true through all maneuvers. If you’re up for it, the model will even do a very quick and almost violent snap roll, it’s quite fun! Note that the model has a really wide gear stance too which helps the ground handling on takeoff and also has a slotted flap which really helps in the landings (oh, and the reverse thrust is a fun touch!).


In comparison to the E-flite Viper 70mm ED F, the Viper 90mm flies quite similarly and has much the same overall performance and flight characteristics. It’s a larger and heavier model which means that it’s faster, flies bigger (larger verticals and feels like a larger model in flight) and also handles atmospherics better as well. The one difference that I did notice was that the Viper 90mm tended to land a bit nicer and could give some quite short landing ground rolls which comes from the larger size mostly. Do keep the speed up a touch in the flare as you will otherwise scrape a wing tipe getting it too slow in the flare (don’t ask how I know! :p). Based on these similarities, if one were proficient with the Viper 70mm, I’d expect they would be able to jump into the Viper 90mm and handle it well with minimal issues.
FINAL THOUGHTS
There we have the E-flite Viper 90mm EDF. This is an extremely impressive flying EDF that has great performance, maneuvers well, and with the Smart 6s 7000mah battery, provides good flight times. You also have the options for SAFE as well as the Smart telemetry as well if those are things you're looking for. For me, I want a great flying airplane and this truly is. Until next time, I'll see you at the field!
The post E-flite Viper 90mm EDF Jet Assembly & Flight Review appeared first on The RC Geek.
The RC Geek Blog is your place to learn about all aspects of the RC hobby. Learn to build, design, drive or fly that RC project you’ve always wanted to build, but have been intimidated to try. This blog is here to help you on your journey and provide tips and tricks as you go! My hope is to inspire builders both experienced and new! So, welcome, please look around, it’s an exciting beginning! I’m currently documenting my latest competition scale RC jet build, a Mark Frankel F4D Skyray, along with some other fun tips and videos. If you can’t find what you’re looking for on this front page, click on any of the categories to the right and it will show just posts related to those categories. Please feel free to add comments and/or contact me directly if you have questions, I’m here to help! And don’t forget to check out my YouTube Channel, I post new videos every week!
Subscribe To Our Blog Now