The RC Geek Blog
By: Chris Wolfe
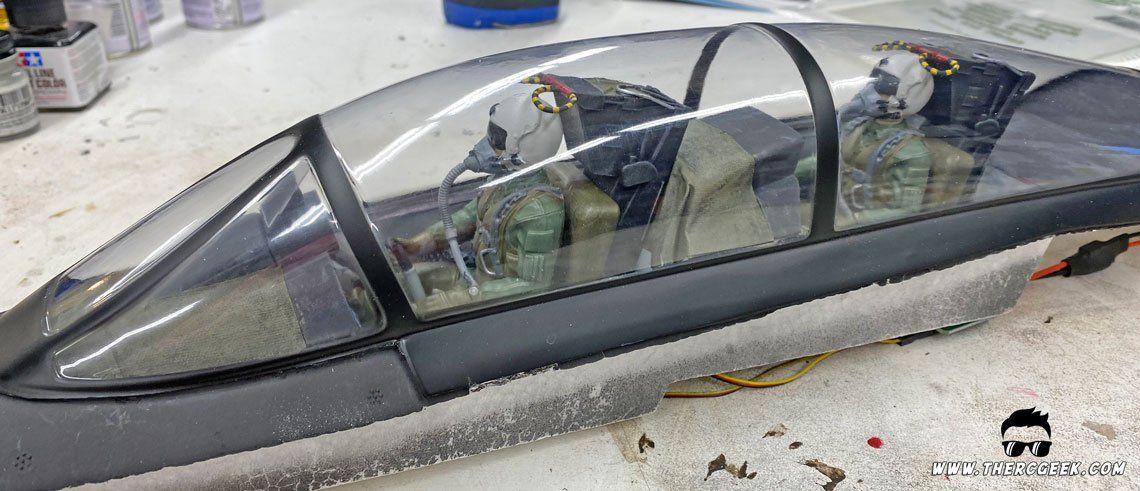
Refinish A Foam Jet Ep 2 - Freewing F-14 Tomcat Cockpit 3D Printing, Painting and Moving Pilots
Are you looking at me?!
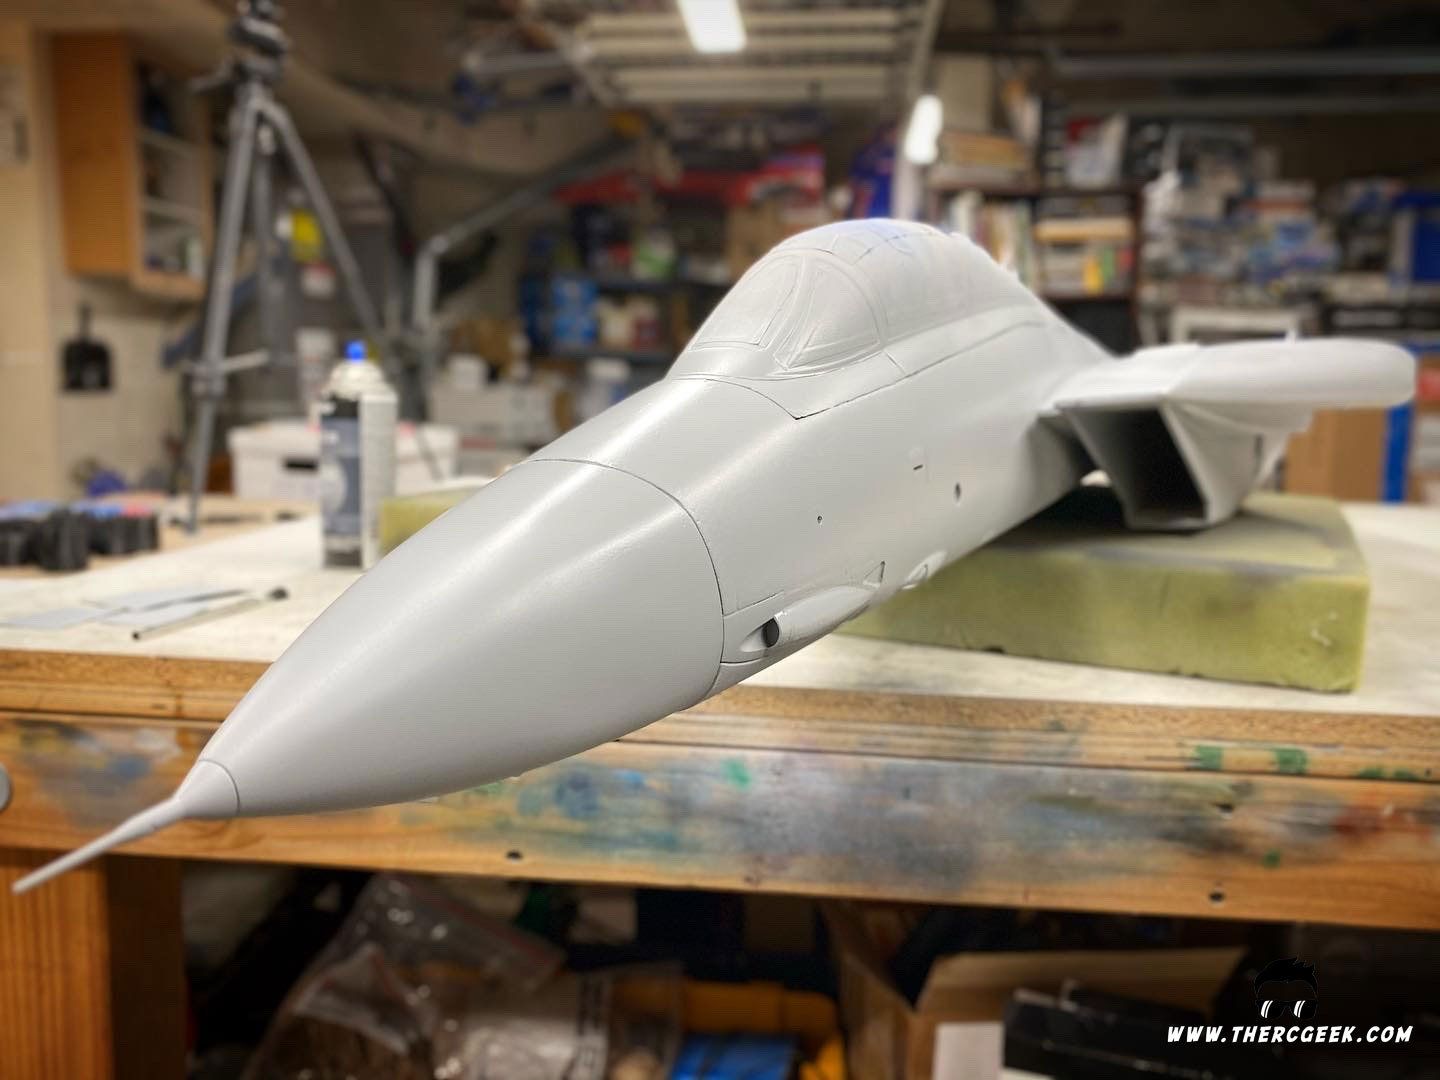
In the process of getting the Freewing F-14 ready for paint, a full cockpit had to be built. I had peeled off the canopy while working on the preparation and realized that it was the primary structural member for the hatch. So, since the canopy was off, it was the perfect time to build a nice cockpit for this refinished Tomcat. I designed up a few parts in CAD, 3d printed and painted them and then installed it all into the stock cockpit tub. The result completely changed the look of the cockpit and once painted really added to the realism considerably. Oh, and I figured it would be a good chance to show making pilots with movable heads also. :)
A nice cockpit is something that really changes the looks of a scale model. For me, it's part of the build process I've always enjoyed, though I don't always go to the extent of completely redoing a cockpit. Even just some simple additions and a little painting is all that is needed. But, if there's nothing out there available for the subject you're working on, then it's time to scratch build it. I've been leveraging 3D printing more and more for that which is the process I took for the F-14 cockpit including the pilots.

A nice cockpit is something that really changes the looks of a scale model. For me, it's part of the build process I've always enjoyed, though I don't always go to the extent of completely redoing a cockpit. Even just some simple additions and a little painting is all that is needed. But, if there's nothing out there available for the subject you're working on, then it's time to scratch build it. I've been leveraging 3D printing more and more for that which is the process I took for the F-14 cockpit including the pilots.
A LITTLE CAD DESIGN & 3D PRINTING
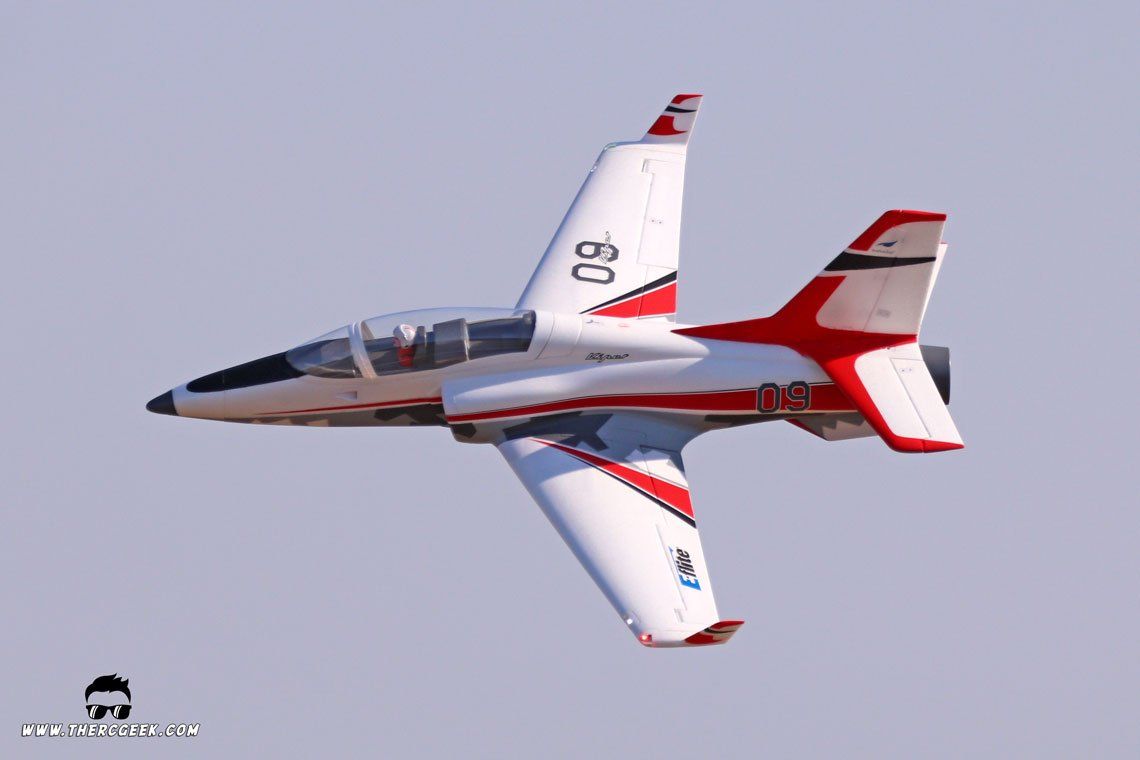
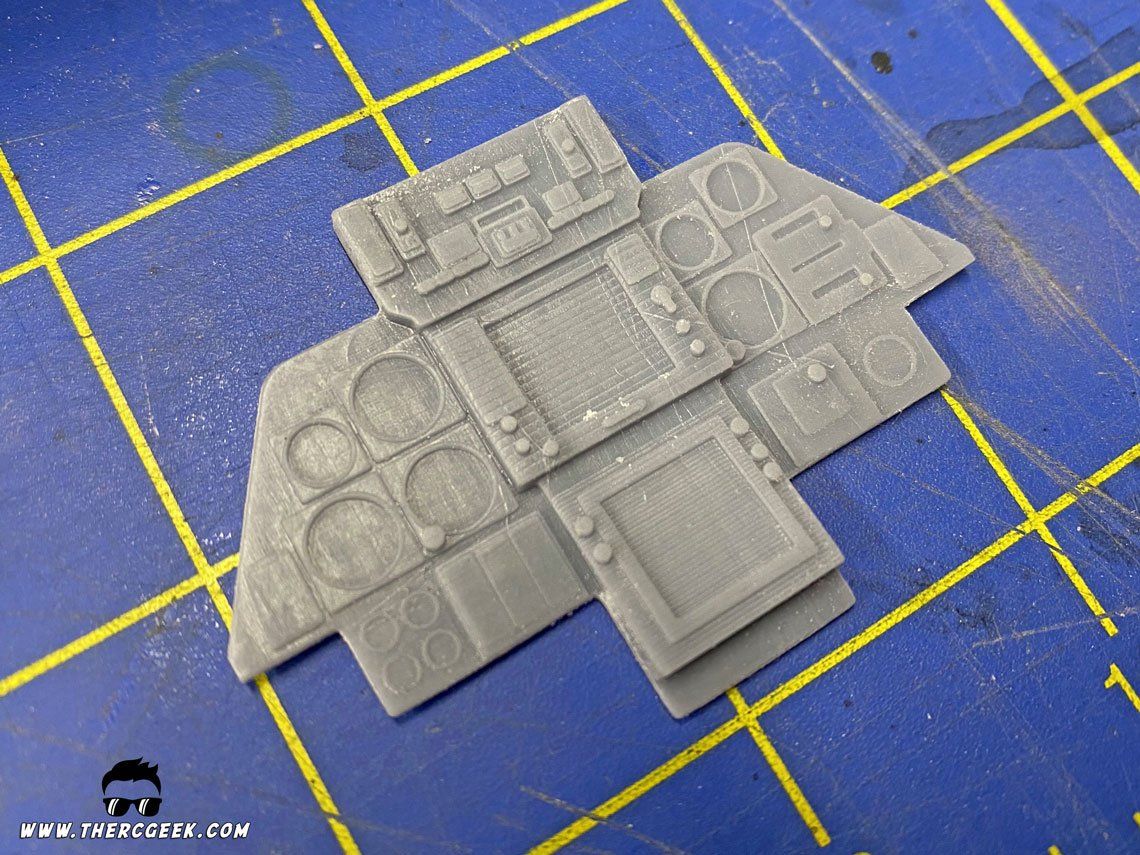
Generally, the cockpit is an area that tends to get glossed over on most foam aircraft and the Freewing F-14 is no exception. Mostly, it's a lack of detail and the tendency to reuse the same pilots that may or may not be the correct scale to the airplane. So, to rectify that, I designed in CAD some detailed instrument panels and seats more representative of the full scale airplane and downloaded a new pilot model from CG Trader to use as well.
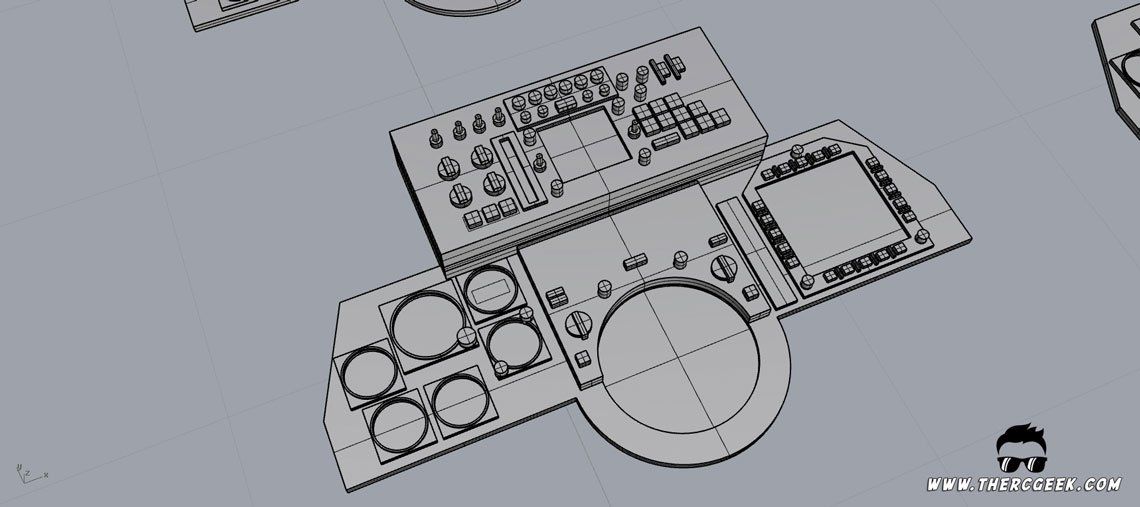
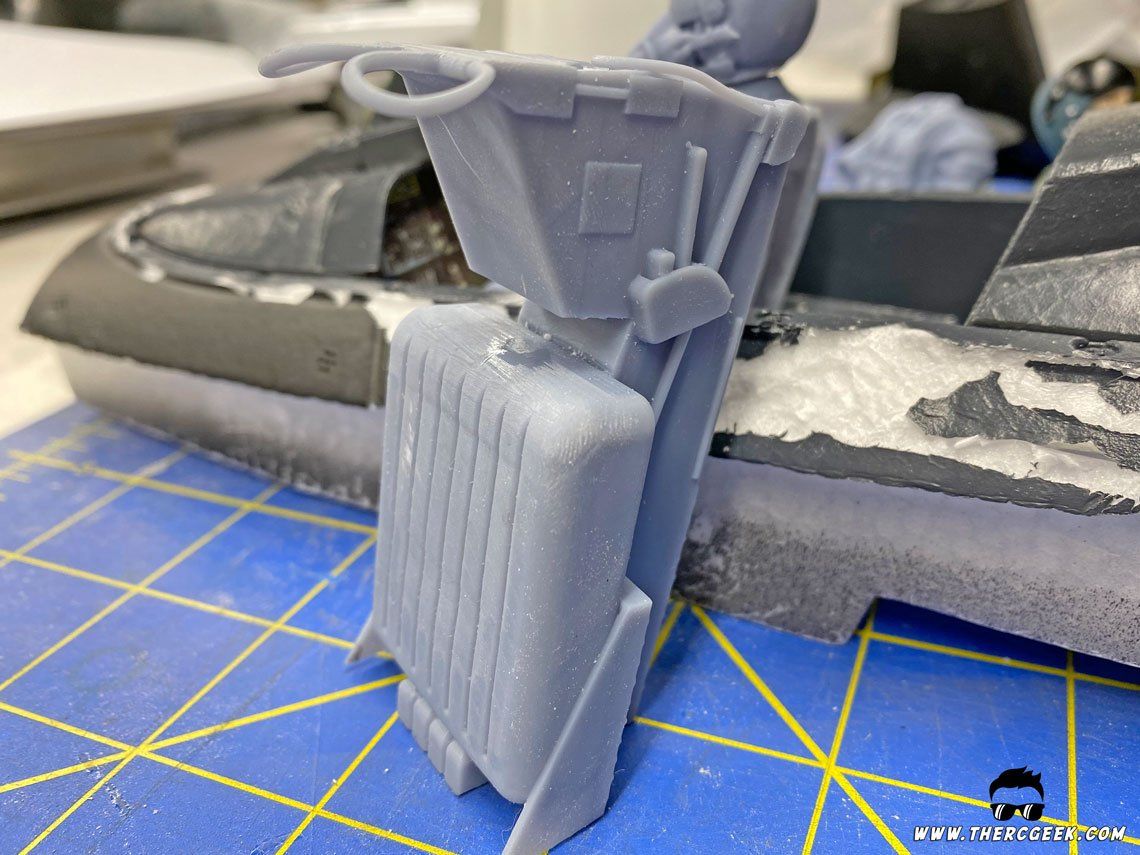
CAD design is most definitely a process and sometimes, just physically crafting/scratch-building something is easier. However, in the case of the F-14, I had already outlined some cockpit profiles resulting from the Jet Hangar twin 70mm F-14 I helped with which helped shortcut the design process. This gave me the basic 2D profiles to then create the 3D models from. I like to use Rhino 3D and so I used a series of extrusion and sweep functions to create each of the objects as necessary to create the final assemblies for the seat and instrument panels.

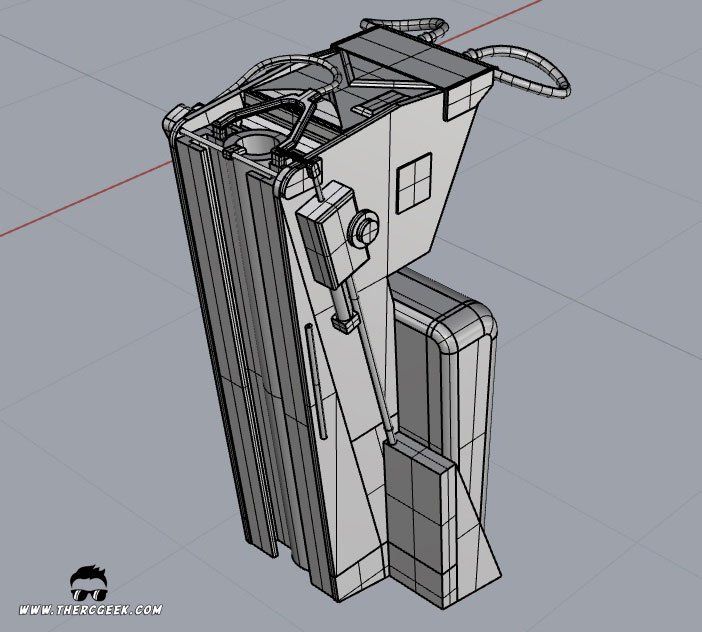

The final CAD models were 3D Printed on an Anycubic Mono X SLA printer which uses a liquid resin that is cured by UV light. This type of printer is capable of extremely fine resolution prints that result in high detail parts that look on the order of a plastic model. It is a messy and smelly process compared to the typical FDM type prints, but the results are quite incredible when it's all setup correctly. So, two seats, the forward and aft clusters as well as two pilots were printed out of SLA resin.
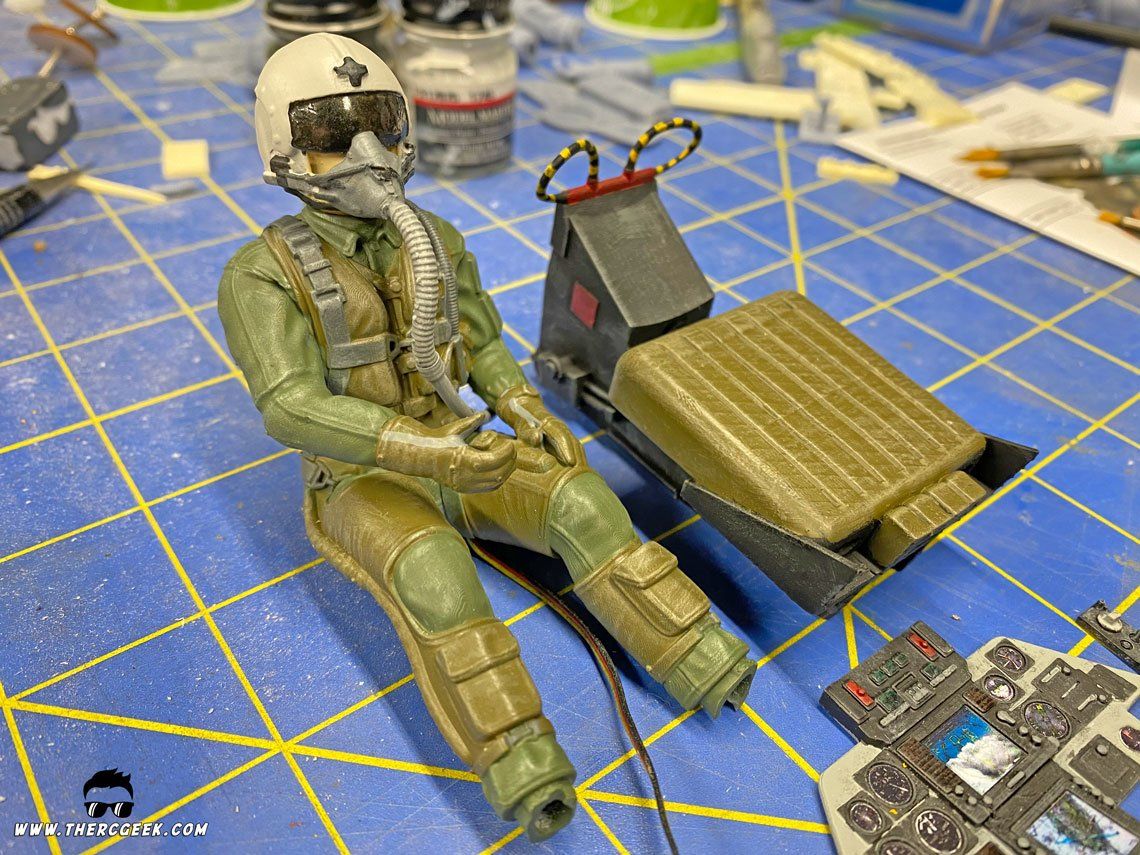
MAKING A MOVING PILOT
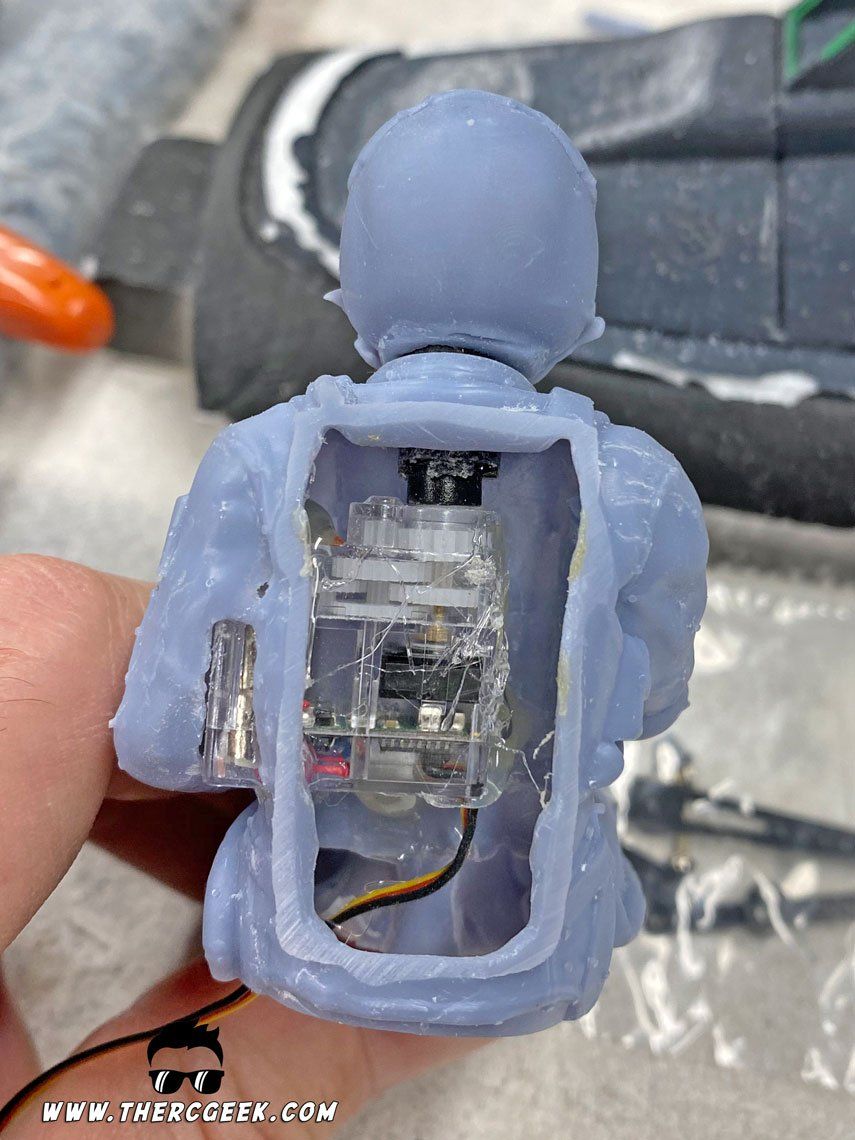
Going through the effort, I thought it would be fun to add moving heads to the 3D printed pilots. The pilot design had a parachute on the back, so it was first required to dremel that off just to get the pilot to fit into the stock cockpit. This worked out well because having the back open allowed for ease of access to install a micro servo that would actuate the head. After clearing additional space within the pilot body to fit the servo (used a dremel here also), an HS-40 micro servo was tack glued into place into the pilot body with medium CA. A servo arm was glued onto the end of a carbon arrow shaft which was used to align the servo in the body such that the arrow shaft was centered within the pilots neck. Once aligned, hot glue was used to fill in any space around the servo to ensure it is secured in place. To finish it all up, the arrow shaft was trimmed as needed and the pilot head was glued onto the arrow shaft allowing just a small gap between the head and the body so that the head can freely rotate with the servo. It's not a hard process, but allow time to ensure everything is in good alignment so that there's no binding anywhere. Once pilots were all painted, the heads were placed onto the bodies and then placed into the cockpit.
COCKPIT DETAIL PAINTING
PILOT PAINTING
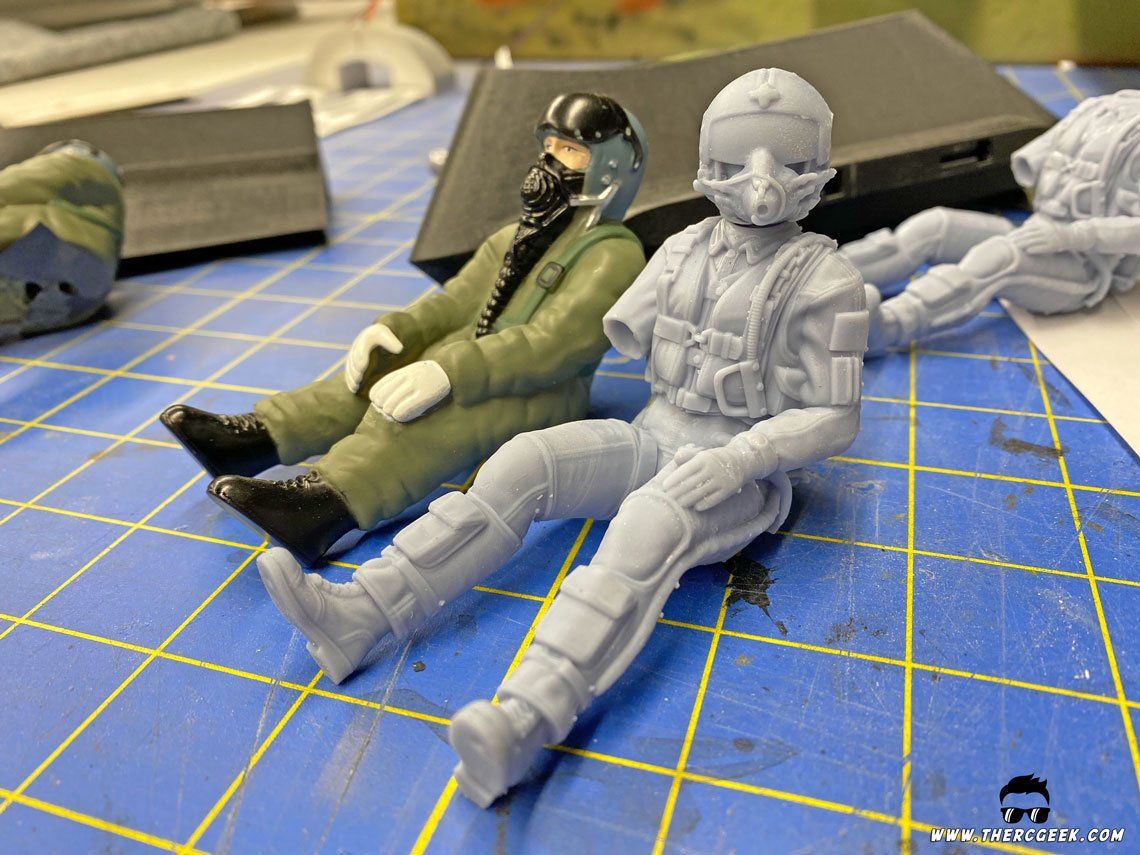
The final step of course is painting (my favorite part!). Being the lazy painter that I am, I like to leverage spray paints whenever I can and so the base colors on all of the parts were spray painted first. The instrument panels were spray painted AS-11 medium sea gray, the seats were spray painted flat black, the pilot bodies AS-14 Olive Green, and the helmets AS-20, insignia white. From there, all of the detail colors were brush painted. On the pilot, the details were painted with a combination of Olive Drab for the g-suit and dark gray for the straps.
Once all of the primary painting is done some dry brushing was done on the pilot suit and details which really helped add a some extra dimension and realism to the pilot. If you're not familiar with dry brushing as a technique, it is the act of taking a brush that has had most of the paint wiped off of it with a paper towel and then brushing it over a model. What it does is leave a small amount of residual paint over highlighted areas and gives the illusion of added depth to details. For pilot painting, I like to use a little bit of the base color that was used for painting onto the back of a paper cup, mix in a little white, and then use that lightened color to dry brush over that base color that I used on the pilot. That lightens all of the highlights on the pilot and really makes it look notably better. Experiment with different colors and/or mix ratios to get the desired look. Dry brushing is a very handy technique to have in your arsenal and is something you can use quite a bit. There are additional things you can do to add even more realism to pilots like oil paint washes and such, but that's not something I've played with much. There are some good tutorials on that over at Aces of Iron.
EJECTION SEATS & INSTRUMENT PANELS
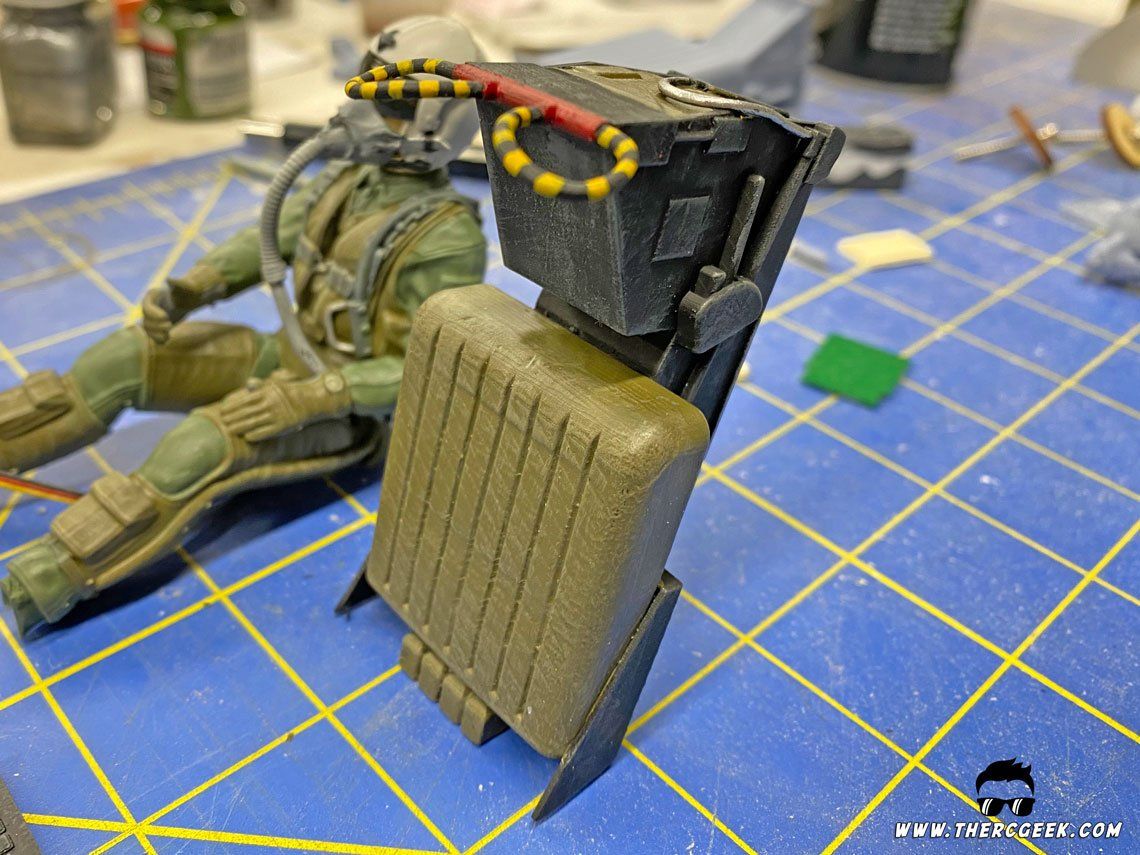
The ejections seats were painted much the same as the pilots spraying a base color of black and then brush painting all of the remaining colors. The seat cushions were painted olive drab and strips of yellow were painted on the ejection pull handles to get the barber pole stripe look. To finish it up, dry brushing was used to bring out the printed details.
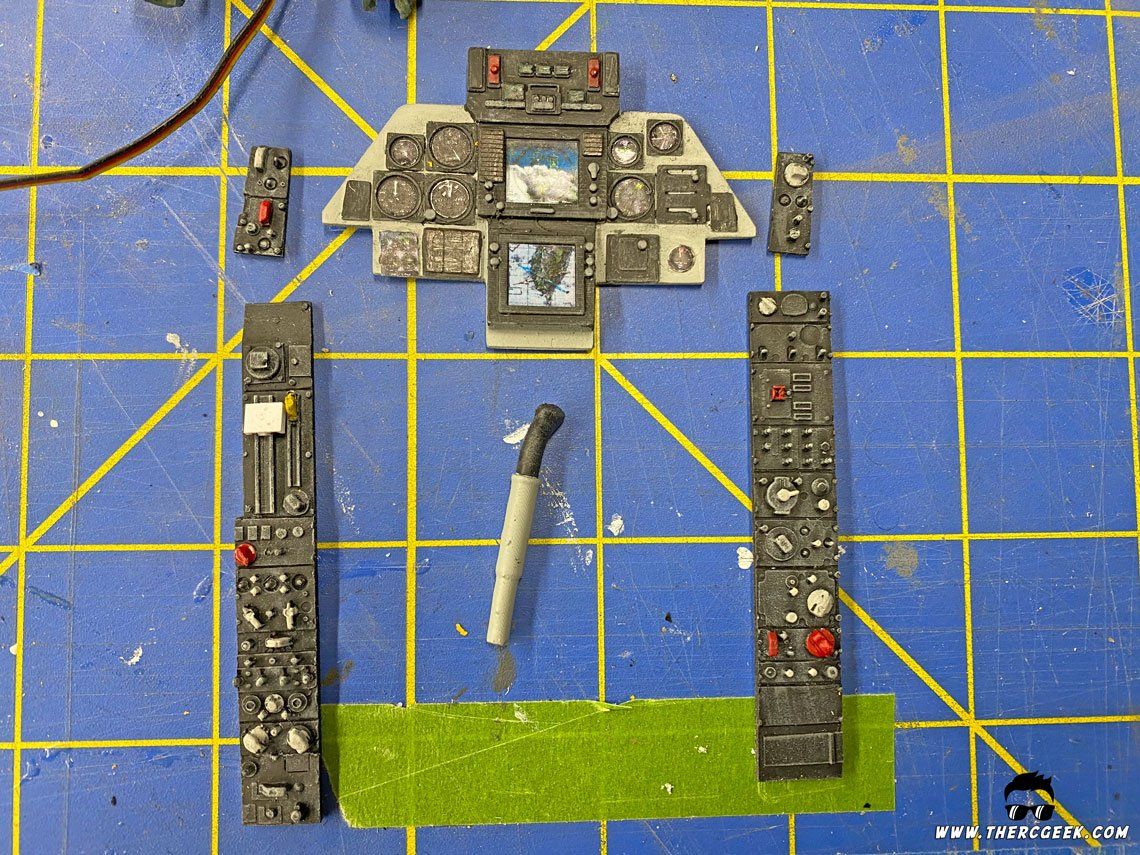
The instrument panels were spray painted a base gray color and then all of the instrument bezels and such were brush painted flat black per reference pictures. To make the instruments, a drawing found on the web was used and scaled to the size of the model and printed onto some laser printable white vinyl. Each of the instruments were individually cut out using sharpened brass tubes or a sharp Xacto knife and straight edge as necessary. Once cut, the backing was peeled off and the instruments were carefully placed one at a time. Placing them on the tip of an Xacto knife allowed minimal contact for placement versus trying to use just your fingers. The drawing used was full color which add some nice dimension to the look though I can't attest to the accuracy of some of it.
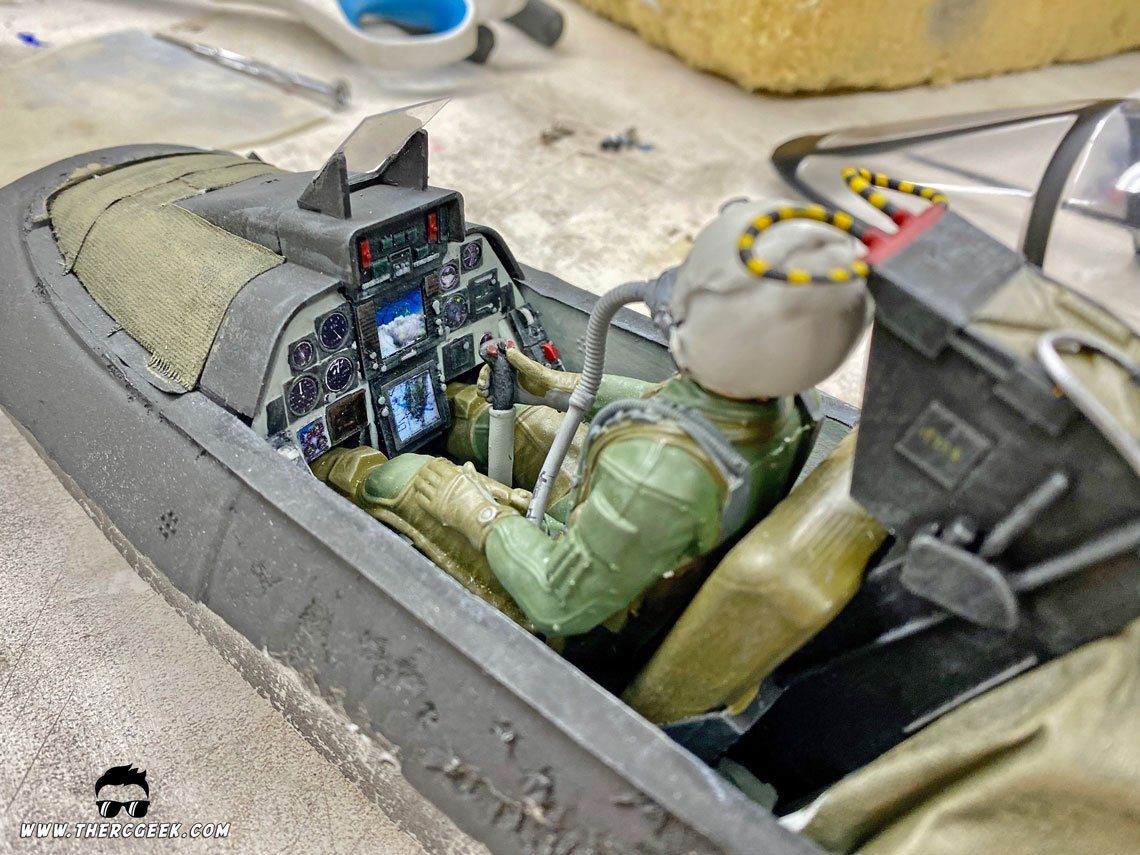
PUTTING IT ALL TOGETHER
With all of the individual parts painted, it's a matter of putting it all together into the cockpit tub. The tub was first painted and dry brushed and then some Gaffer's tape was cut, painted Olive Drab and placed over the instrument panel hoods to simulate the canvas coverings in the full scale airplane. From there, each of the pieces were glued into place with CA starting with the instrument panels and seat backs and finishing up with the pilots. For added assurance, a screw was used to help hold each of the pilots firmly in place through the seat bottom. Note that slots were necessary to feed the servo wires through and then a Random Servo Motion Generator was used to move each of the pilot heads randomly. The final touch was to add clear HUD glass on the front panel using some clear sheet styrene.


FINAL THOUGHTS
The nice thing about this hobby is that it can be as much or as little as we want it to be. For me, I love modeling all of the intricate details and making things look as real as I can. However, it doesn't require going to the extent here to get good results for a cockpit refresh. A little paint work and maybe a pilot upgrade can do wonders and doesn’t require all that much work. However far you decide to go, have fun and enjoy the process as the work is always worth the end result. Until next time when we paint, I'll see you at the field!
The post Refinish A Foam Jet Ep 1 – Freewing F-14 Tomcat Assembly Mods & Paint Prep appeared first on The RC Geek.
The RC Geek Blog is your place to learn about all aspects of the RC hobby. Learn to build, design, drive or fly that RC project you’ve always wanted to build, but have been intimidated to try. This blog is here to help you on your journey and provide tips and tricks as you go! My hope is to inspire builders both experienced and new! So, welcome, please look around, it’s an exciting beginning! I’m currently documenting my latest competition scale RC jet build, a Mark Frankel F4D Skyray, along with some other fun tips and videos. If you can’t find what you’re looking for on this front page, click on any of the categories to the right and it will show just posts related to those categories. Please feel free to add comments and/or contact me directly if you have questions, I’m here to help! And don’t forget to check out my YouTube Channel, I post new videos every week!
Subscribe To Our Blog Now