The RC Geek Blog
By: Chris Wolfe
The Ta 152H, Kurt Tank's high-altitude fighter-interceptor!
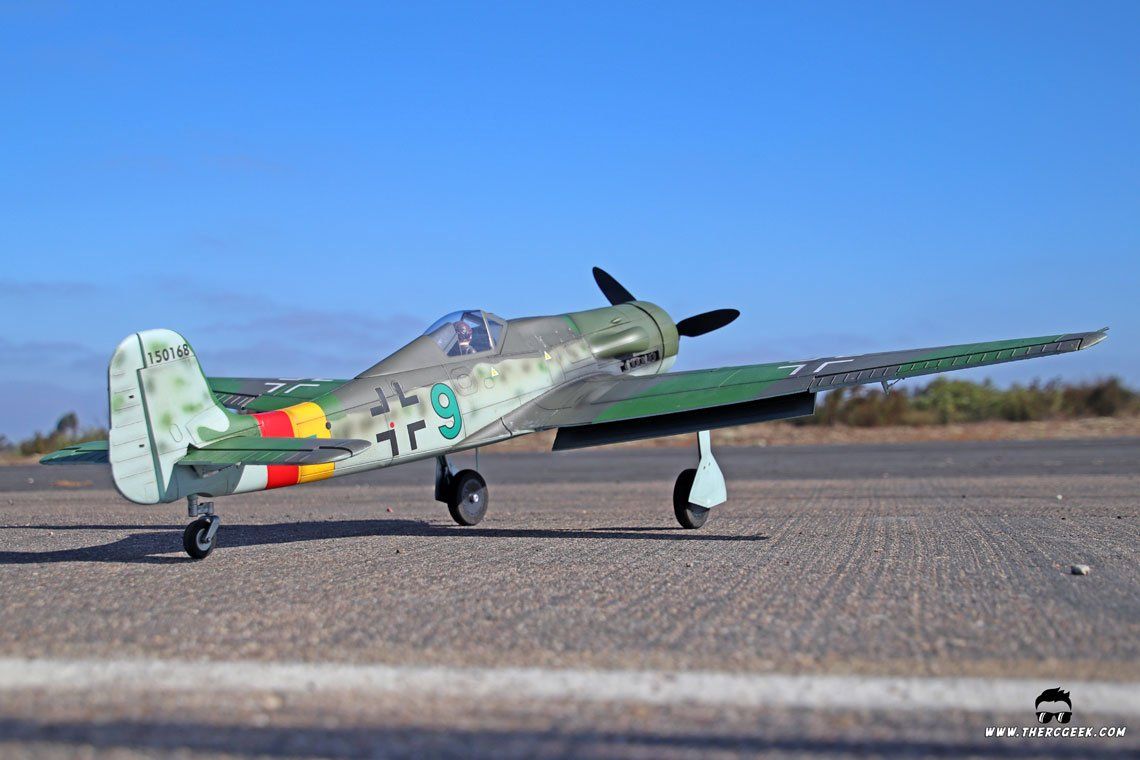
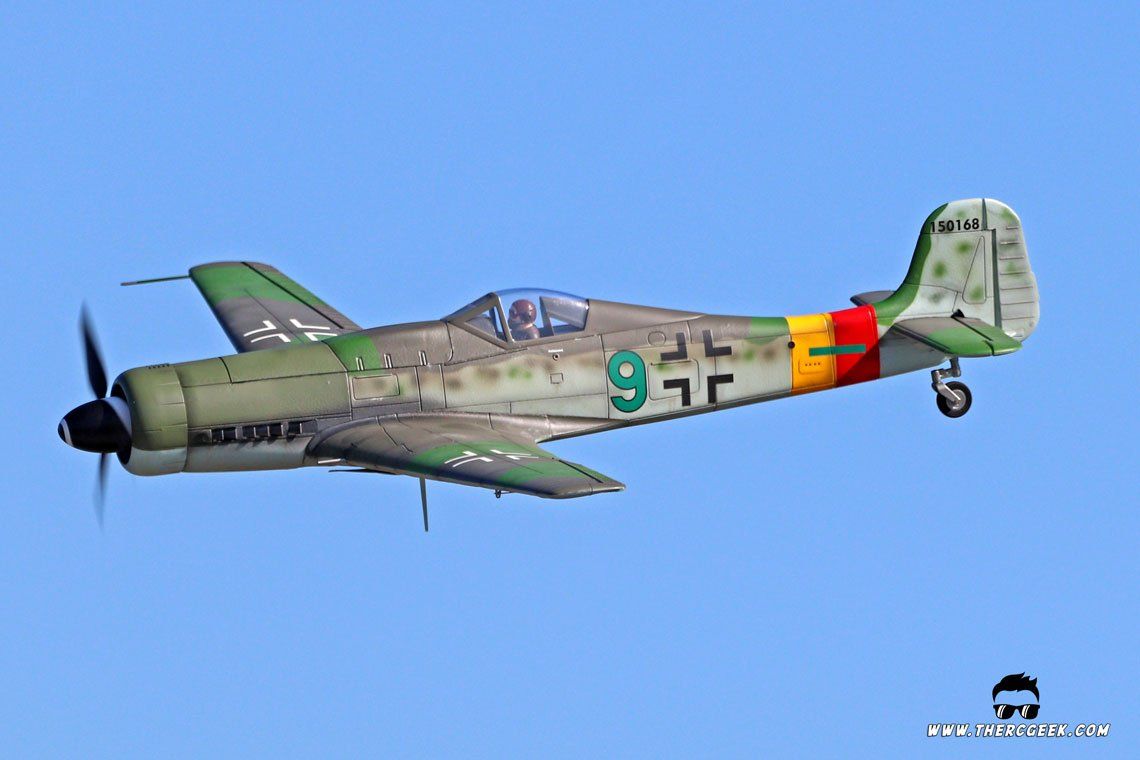
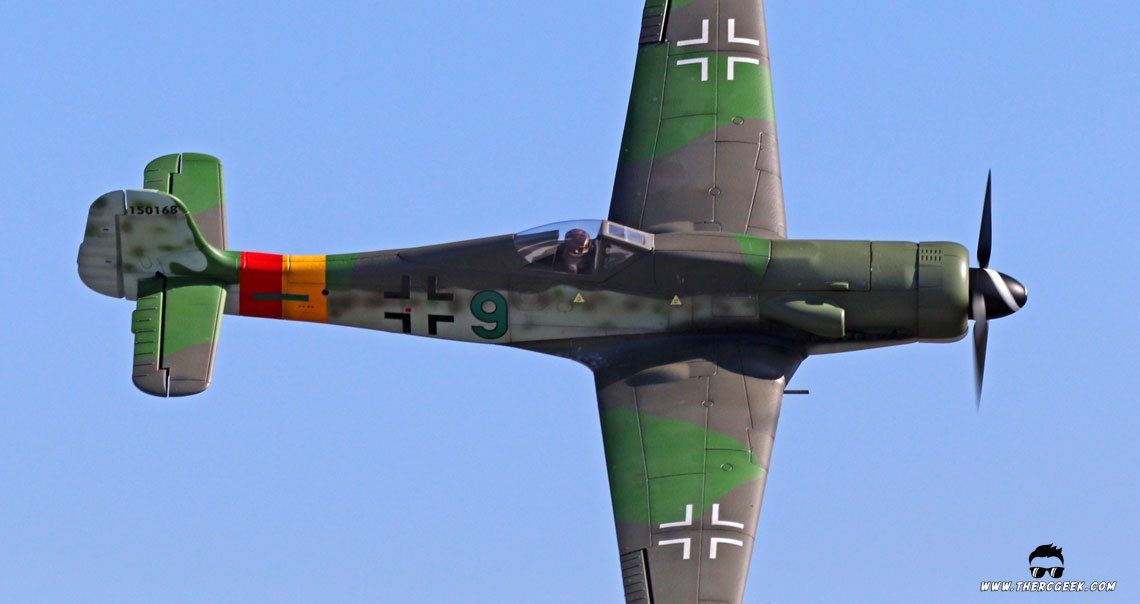
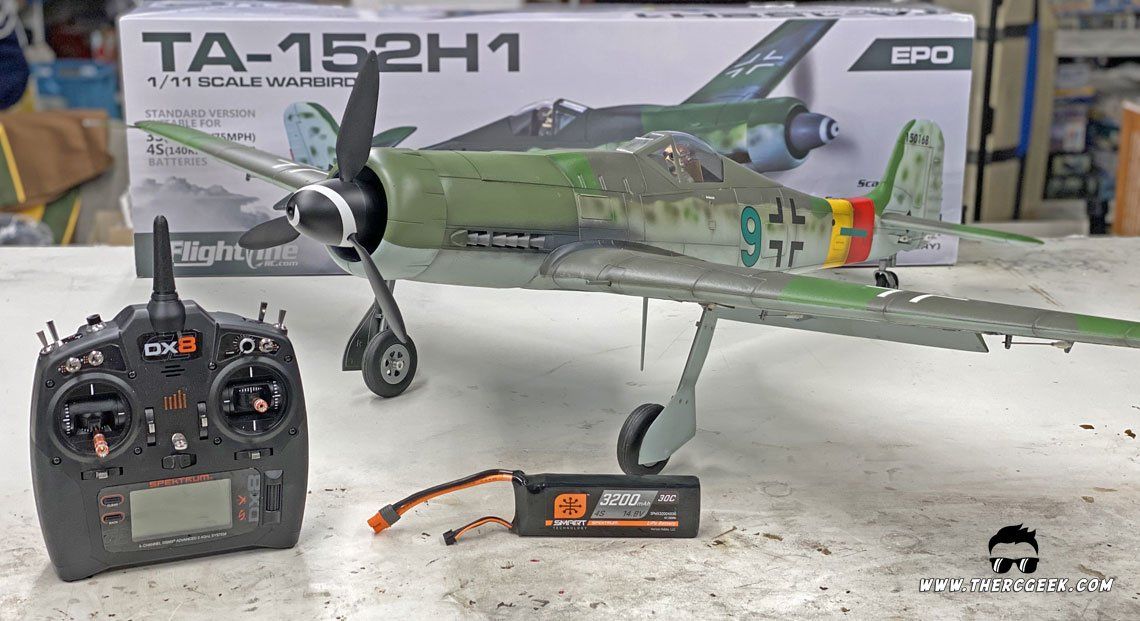
The Ta 152H as a design is an extremely unique looking aircraft and is one that I have always been fascinated with. So, when I saw the FlightLineRC Ta152H 1300mm, I was excited to see it! So, I finally picked one up late last year for a rainy day and the model really captures the unique lines of the airplane well with accurate colors and paint in a really nice flying airframe.
Of the German Focke-Wulf designs from WWII, I have always liked the looks of the long nose 190s, especially the D9. There were so many evolutions of the design including the very capable high altitude Ta 152H, which featured a lengthened fuselage and rudder, high aspect ratio wing and pressurized cockpit. Being one of the fastest propeller driven aircraft of the war and capable of intercepting the high altitude B-29 bomber, it ultimately came too late to make an appreciable impact as only about 25 or so were built.
AIRCRAFT ASSEMBLY NOTES
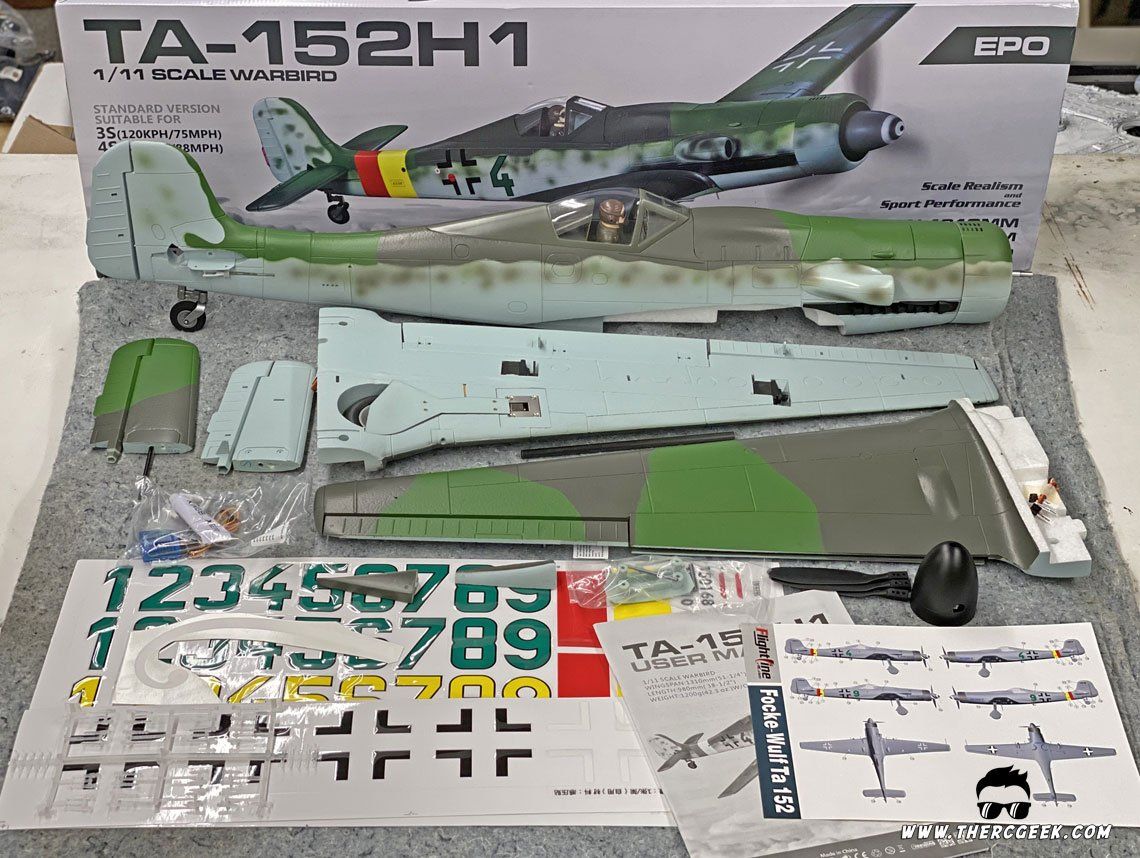
The FlightLineRC Ta 152H was well packed and assembled quite simply only requiring just a few steps and a few fasteners. The long wing comes in two pieces, which is glued together first over the wing spar. Once joined, the plastic mounting joiners were glued as well and the wing was then mounted to the fuselage. From there the tails were installed and fastened into place and those were the primary assembly steps. The kit does include a number of detail parts which are a nice touch and include the wing pitot tube and guns along with the lower wing antenna and fuselage foot step.
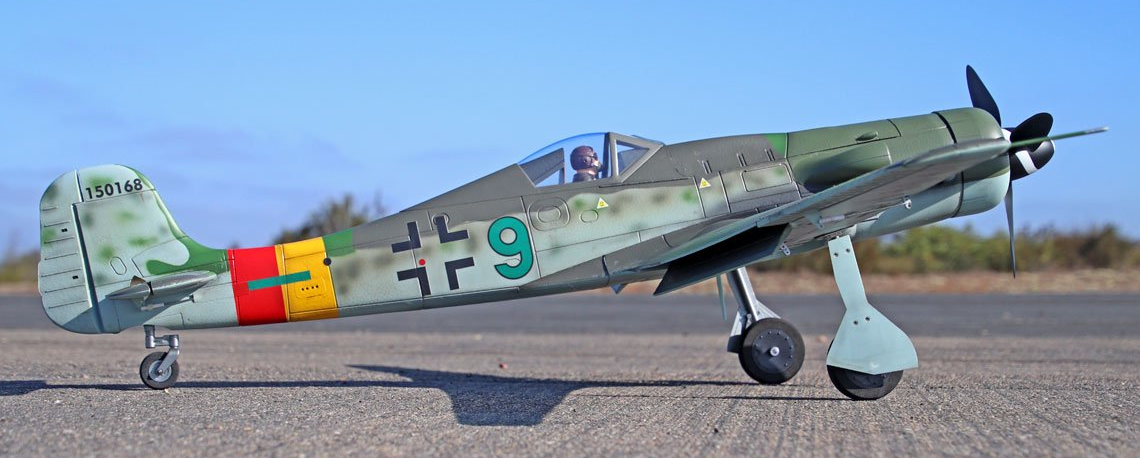
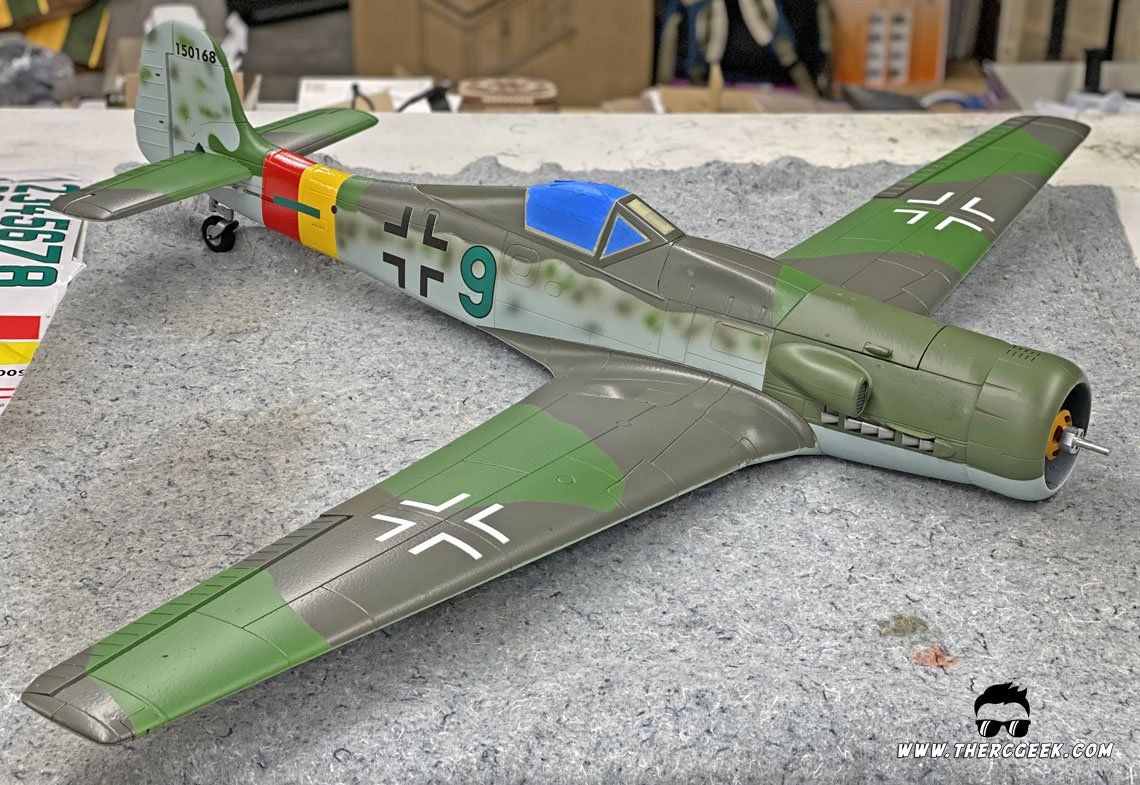
With the airplane assembled, it really looks fantastic and characterizes the shape of the Ta 152H beautifully. The finish is quite smooth and the stock paint work is really nice having seemingly accurate colors as well. The kit includes a huge assortment of markings, so you can customize and make the model whatever you choose which is really nice. I did do some additional modifications (paint and landing gear) along with some weathering which really transformed the model even more!
SCALE LANDING GEAR MOD
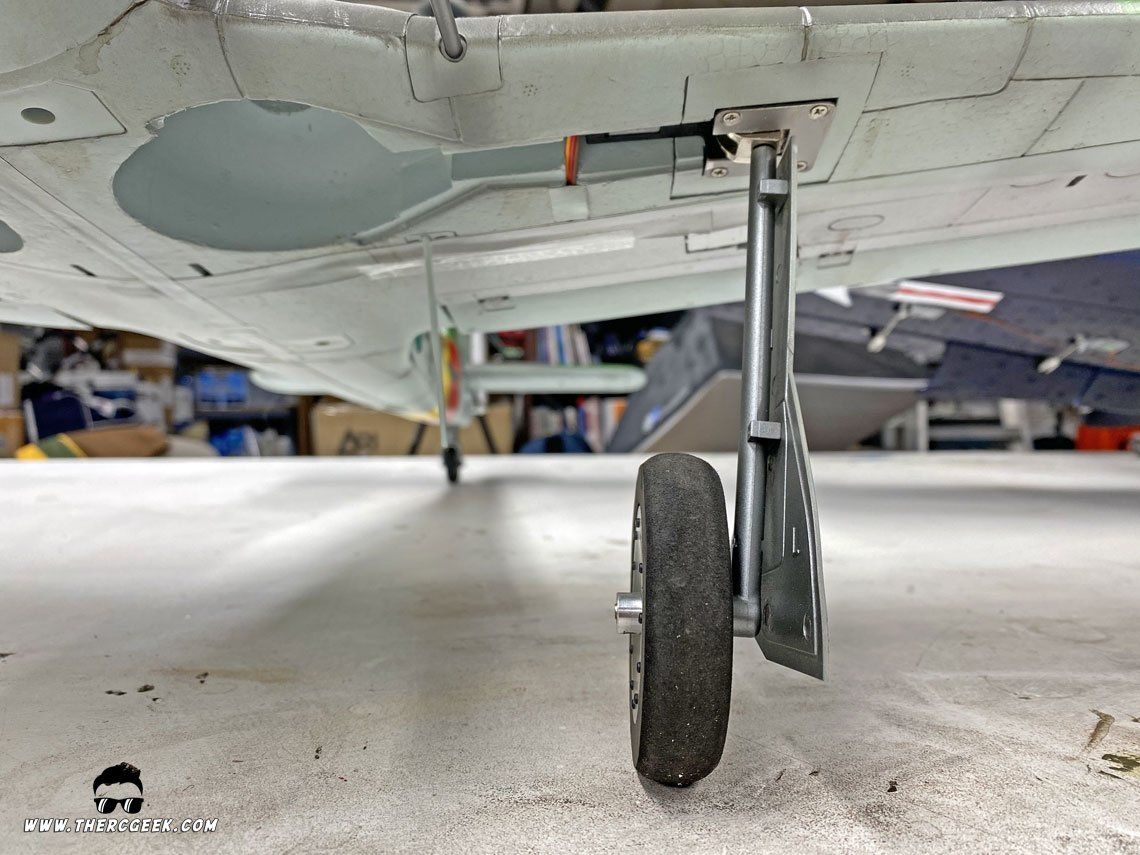
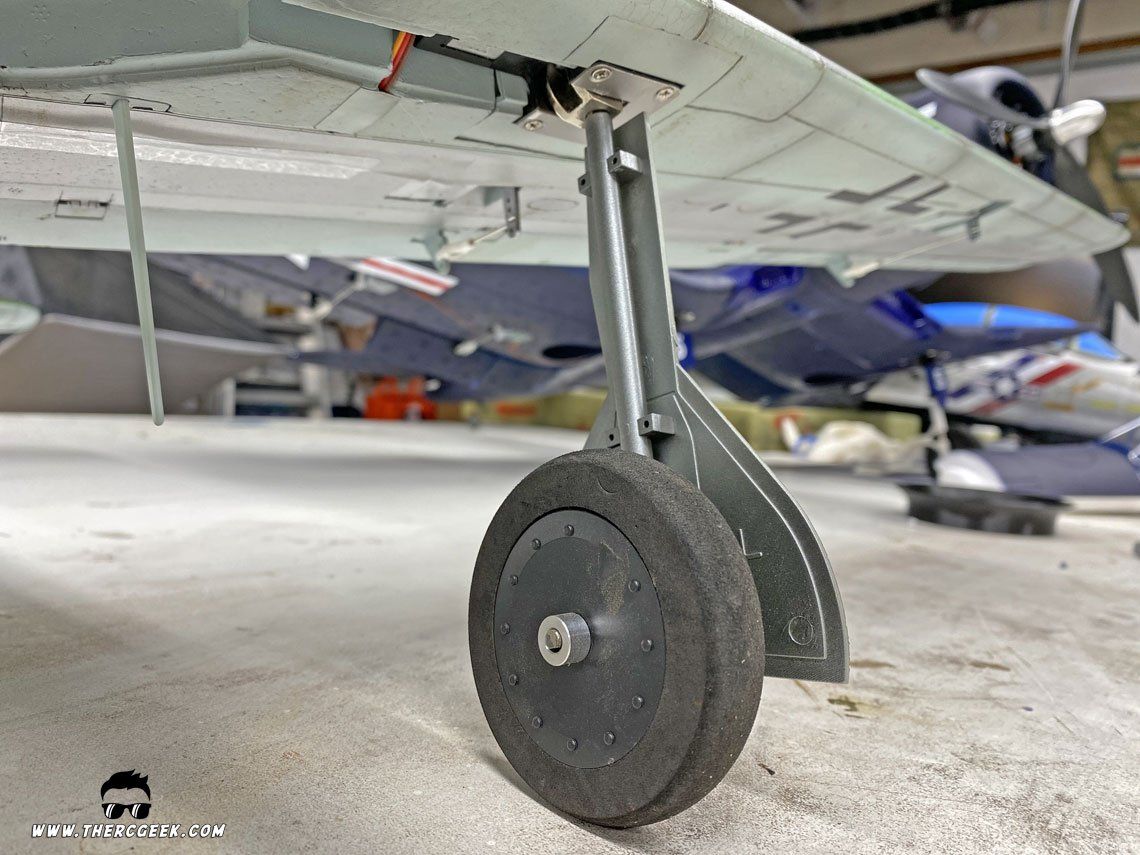
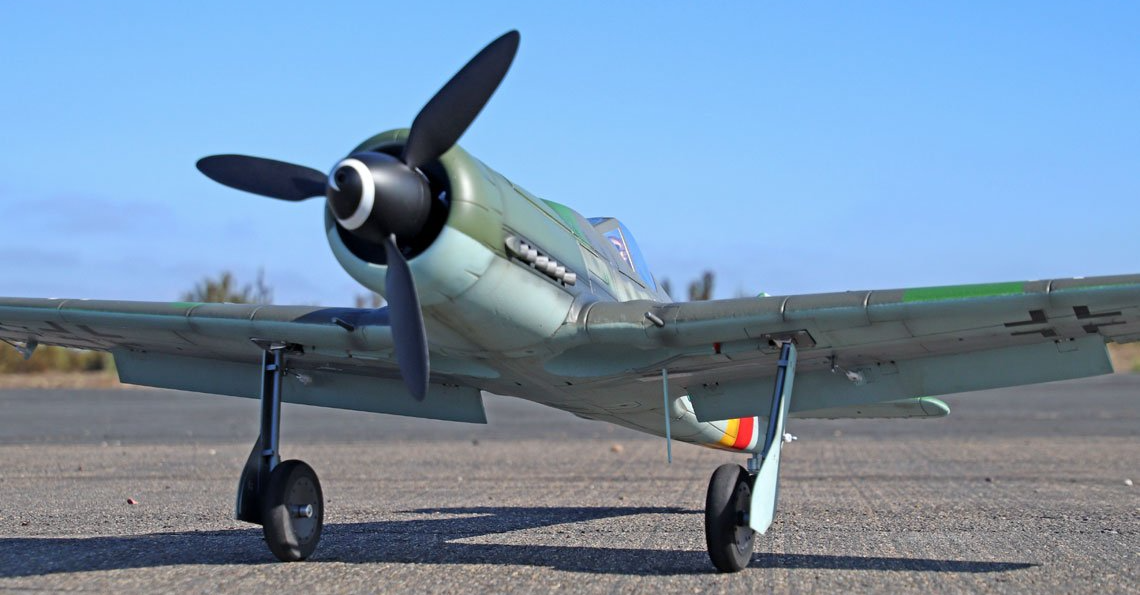
I knew from the onset when I bought the Ta 152H that I wanted to look at modifying the landing gear to make them appear more scale. Out of the box, the landing gear hang over 90 degrees in the down position which isn't right for any warbird quite frankly. The full scale Focke-Wulf's had a very distinctive inward cant angle on the gear in the down position and so to achieve that look, it ended up being rather simple. Instead of angling the gear mounts or bending the strut wire, I simply glued a 1/32" plywood shim to the landing gear frame positioned such that when the gear extends, it limits the travel of the pivot block forcing them to stop at the desired angle (this also got rid of any slop in the retract with the gear down). With the angle sorted, I then I removed the tires and bent the axles with some plyers to get the correct tire angle. To finish off the look, my friend gifted me a set of ParkZone FW 190 tires which provided the perfect icing on the cake as they have a scale hub and are a more accurate (larger) diameter.
LATE WAR PAINT AND WEATHERING
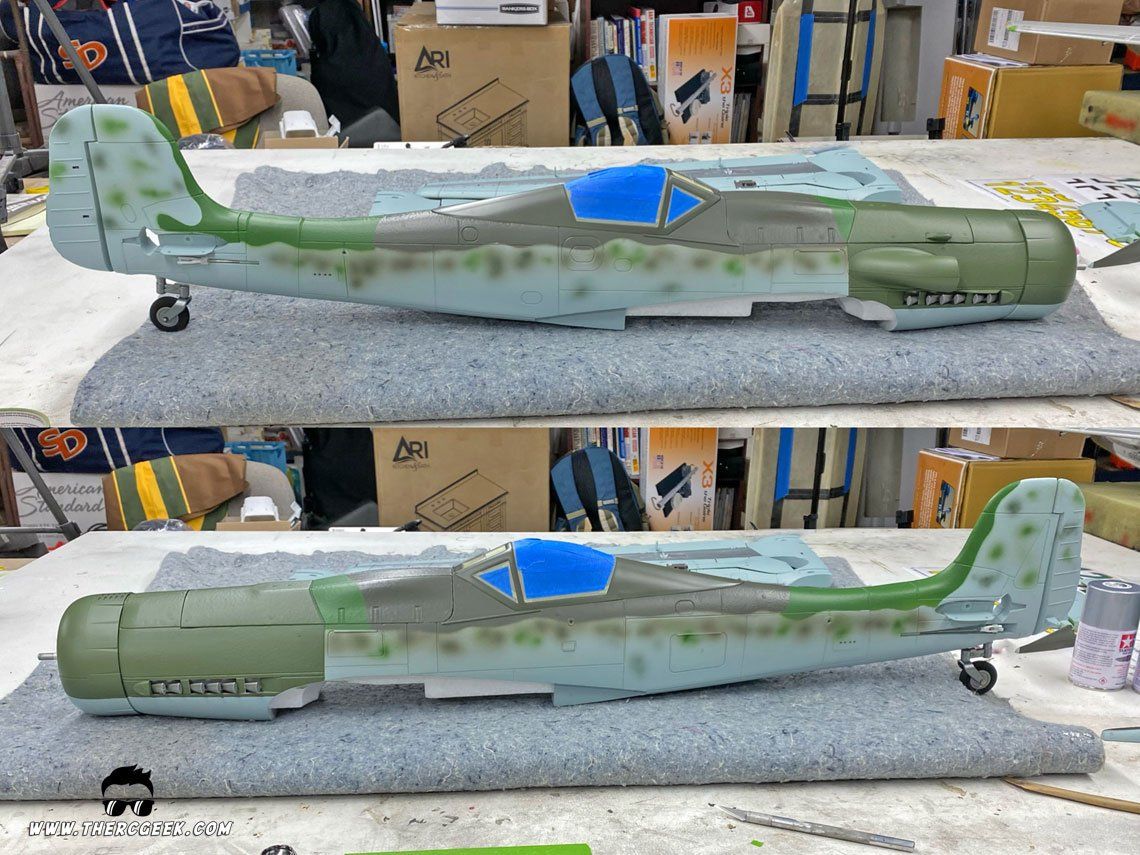
In the process of assembly, I couldn't help but add a few late war paint modifications. As the war was coming to a close, aircraft were being pushed off the assembly line with mixed and unpainted parts. I wanted to model "Green 9" which, in all of the profiles I've seen of the airplane, has a solid colored engine cowl and in some cases has a large unpainted panels on the underside.
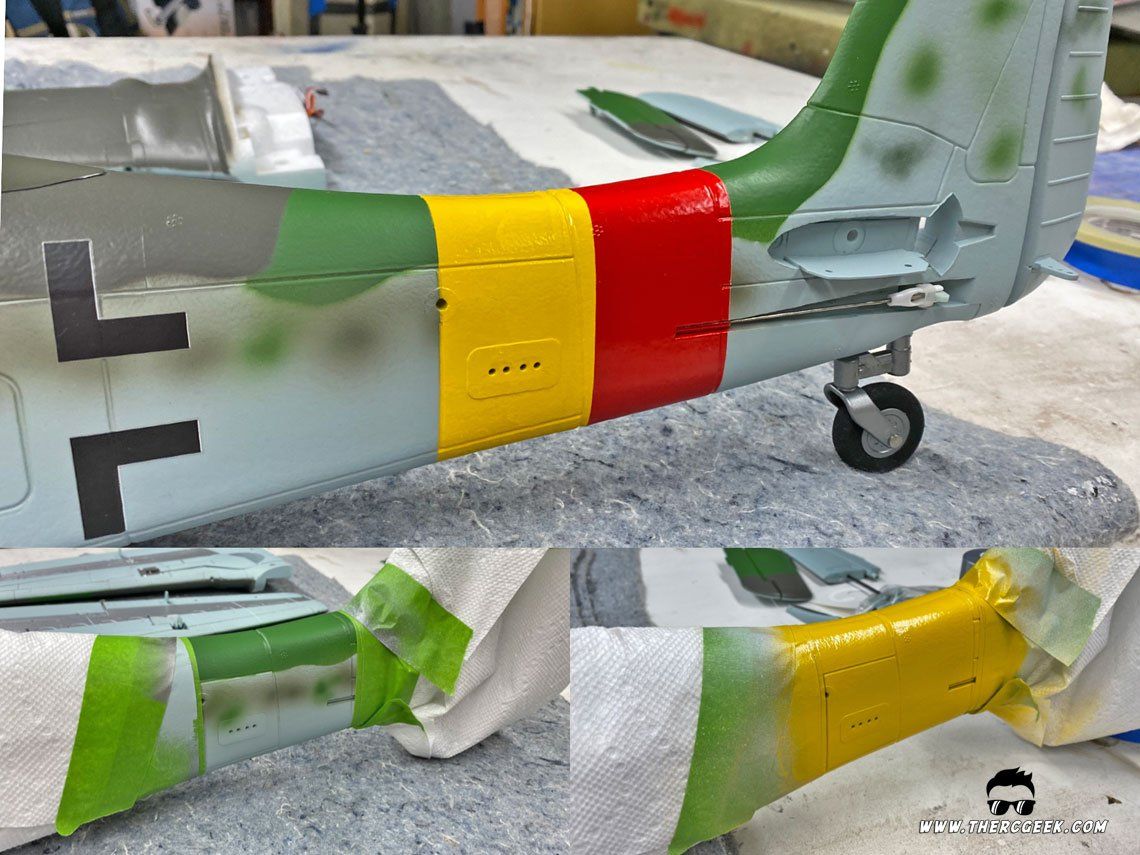
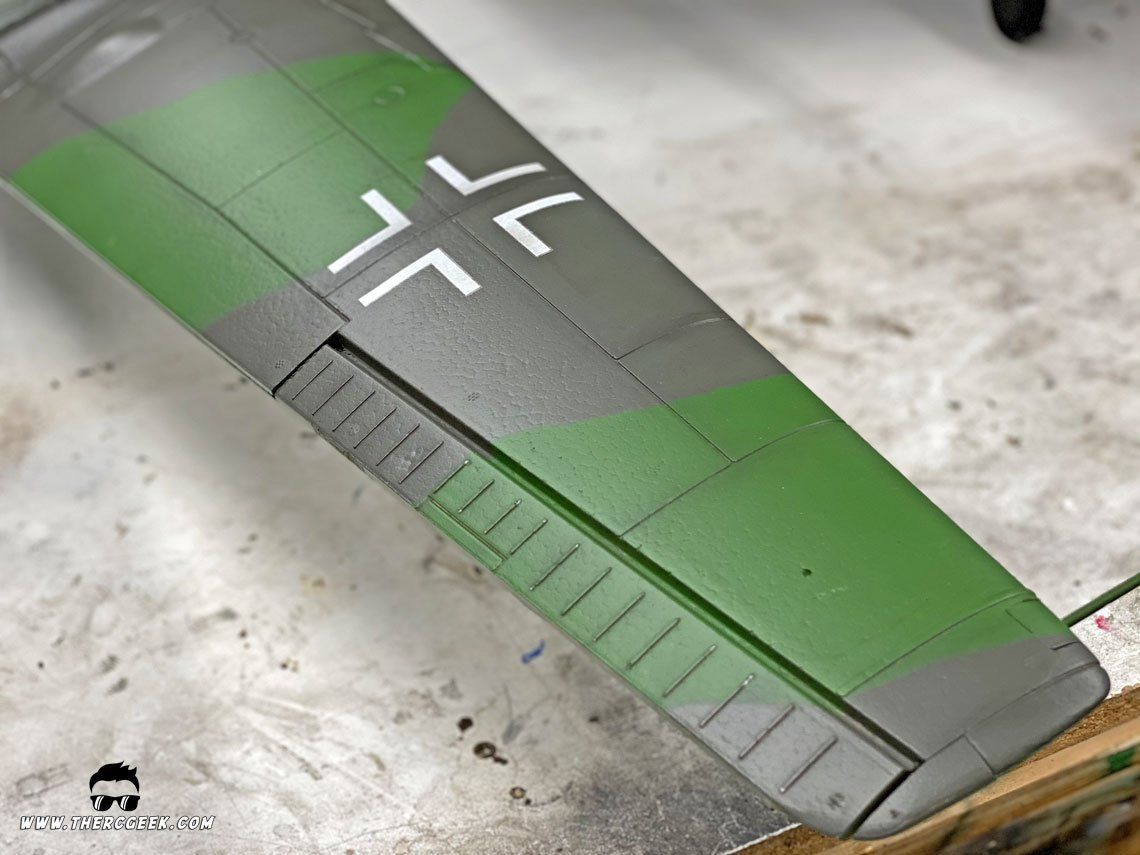
First things first, I masked off the cowl area with frog tape and spray painted it with Tamiya AS-14 Olive Green. The unpainted panel on the wing underside was masked and painted with Tamiya AS-12 Bare Metal Silver. In addition, the mottling of the paint wasn't as pronounced as I would have liked (especially on the dorsal), so I used Tamiya AS-23 Light Green and Tamiya AS-24 Dark Green to add some additional mottling (note Tamiya AS-5 Light Blue is a good match to the underside color also). This was done by spraying an amount of the individual colors into a paper cup and then spraying it through an airbrush onto the model. It was only just a light amount, but it was an improvement. Lastly, the red and yellow tail band was masked and painted using 2x Rustoleum Yellow and 2x Rustoleum Red.New Paragraph
With the paint work done, the markings on, and the airplane all together, it was time for some weathering. The finish is quite smooth on the airplane and although the panel lines are a bit on the large side, the model takes weathering very well. I followed the steps presented in my warbird weathering video (below) applying streaks and stains, shading, and paint chipping with one addition: since the panel lines weren't filled in on this model, I started out the process applying a thin acrylic wash over the entire model to dirty all of the panel lines. FolkArt Raw Umber was thinned with a combination of Windex and water to a very thin consistency. This was then sprayed over the entire model (attacking sections at a time) and then wiped off in the direction of the airflow on the flying surfaces and vertically on the fuselage. Tamiya Acrylic thinner was soaked into the paper towel as needed to clean any undesired excess on the surface. The result was dirty panel lines over the entire model providing the base for the rest of the process. Once that was done, the Raw Umber acrylic was applied in specific areas with a paint brush and wiped off with my finger in the direction of the airflow to simulate oil stains and streaks. For larger streaks, more acrylic was applied and it was streaked back with the use of a paper towel. To finish it all up, very thin black paint (consistency of dirty thinner) was used to lightly shade over all of the panel lines and apply exhaust stains. To blend all of the work together, then model was burnished down with a scotchbrite pad and paint chipping was added to complete the look. Lastly, the protect and blend the finish, a matte clear coat was applied over the entire model (clear canopy was masked off first) using the 2x Rustoleum Matte Clear and violas, a late war fighter is born! ;)
AIRCRAFT SETUP & CG
The aircraft setup was straight forward, but there are a couple notes to mention before talking through the controls. First of all, a Spektrum AR620 receiver was used in the airframe and it was programed on a Dx8 Gen2. The model includes a "blue box" controller for the wing functions, but seeing as that is another potential failure point, I bypassed that and used y-harnesses to tie each of the individual functions together which then went to the receiver. The airplane is pretty light and does get bumped around a bit in winds, so I could see some slight gyro stabilization could be beneficial.
Also, in the process of the radio setup, I burned up the flap servos and so replaced them with Hitec HS-5070s which fit perfectly. The stock flap servos aren't the strongest, so even just light pressure in the up flap position will eventually burn them out which was the issue here.
For the control surface setup, I found the recommended high rates were quite sensitive and ultimately landed on lower rates than recommended. Through flying the airplane I landed on a mid rate elevator (with expo) and low rate aileron. This equates to the following rates:
- Elevator - 8mm with 10% Expo
- Aileron - 7mm with 5% Expo
- Rudder - 15mm with No Expo
- Flaps - 10mm half and 25 full with no elevator mix at all
The CG location recommended in the manual is 72mm as measured from the wing leading edge root aft and that CG felt about perfect from the get go. I recommend when CG'ing the airframe, pick up the airplane at the location (upside down is the easiest way, with gear down) and the airplane should be about level or slightly nose down.
For the battery, I'm using an Spektrum Smart 4s 3200 mah pack which provides excellent power and flight times. With the battery installed, the forward edge of the battery is aligned with the forward edge of the plywood battery tray. The transmitter timer is set for 5 minutes and the airplane could easily fly longer as it's quite an efficient flyer.
FLYING THE FLIGHTLINERC TA 152H
Having had some previous flying experience with a similar sized composite Ta 152H, I knew that the configuration flies great, but the long high aspect ratio wing design can have some unique characteristics at slow speeds. Well, I'm happy to report that FlightLineRC Ta 152H is extremely forgiving and hasn't exhibited in any bad habits in the air and tracks beautifully and true. With the paint and weathering, I love the looks of it in the air! The model has great overall performance on 4 cells which provides nice large verticals and good speed at full throttle. With the flaps down, the airplane slows wonderfully for landings and is quite forgiving on the touchdown usually sticking even those not so perfect landings. It is worth noting that during the landing ground roll, to be prepared to input up elevator as the airplane rolls to a stop as the tail does reaming flying at quite low speeds and so holding up elevator will avoid a potential nose over.
One thing to be aware of on the takeoffs is to avoid holding excess elevator during the acceleration to liftoff. The airplane is quite light and can become airborne sooner than expected which will cause it to tip stall. So, my recommendation is to keep the elevator at neutral, slowly apply the throttle and read and react to the airplane as needed. The tail will lift off quite early which looks awesome on those long scale main gear. Also, the airplane will pull to the left, so anticipating with some right rudder doesn't hurt.
FINAL THOUGHTS
Well, there we have the FlightLineRC Ta 152H. This is a great flying little airplane that looks great out of the box and even better with some simple weathering and paint touches. The airplane loves 4s for flight time and performance and is extremely fun with that power. The shape of the Ta 152H really is a sight to see in the air, the silhouette is quite unique! Now, if we can just get a nice sized FW 190 D9. ;) Until next time, I'll see you at the field!
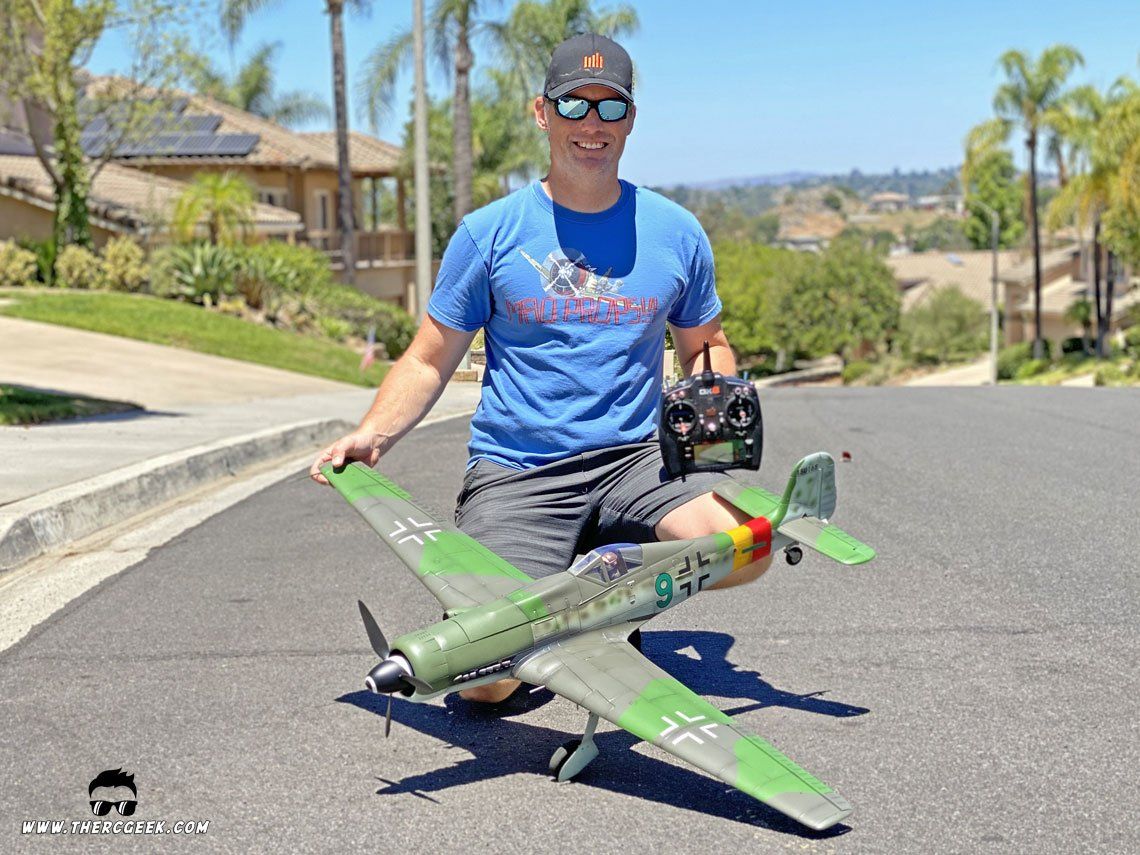
The RC Geek Blog is your place to learn about all aspects of the RC hobby. Learn to build, design, drive or fly that RC project you’ve always wanted to build, but have been intimidated to try. This blog is here to help you on your journey and provide tips and tricks as you go! My hope is to inspire builders both experienced and new! So, welcome, please look around, it’s an exciting beginning! I’m currently documenting my latest competition scale RC jet build, a Mark Frankel F4D Skyray, along with some other fun tips and videos. If you can’t find what you’re looking for on this front page, click on any of the categories to the right and it will show just posts related to those categories. Please feel free to add comments and/or contact me directly if you have questions, I’m here to help! And don’t forget to check out my YouTube Channel, I post new videos every week!
Subscribe To Our Blog Now
Thank you for subscribing to our blog!
Please try again later.
