The RC Geek Blog
By: Chris Wolfe
Oh, Sonny Boy, the sky, the sky is calling...
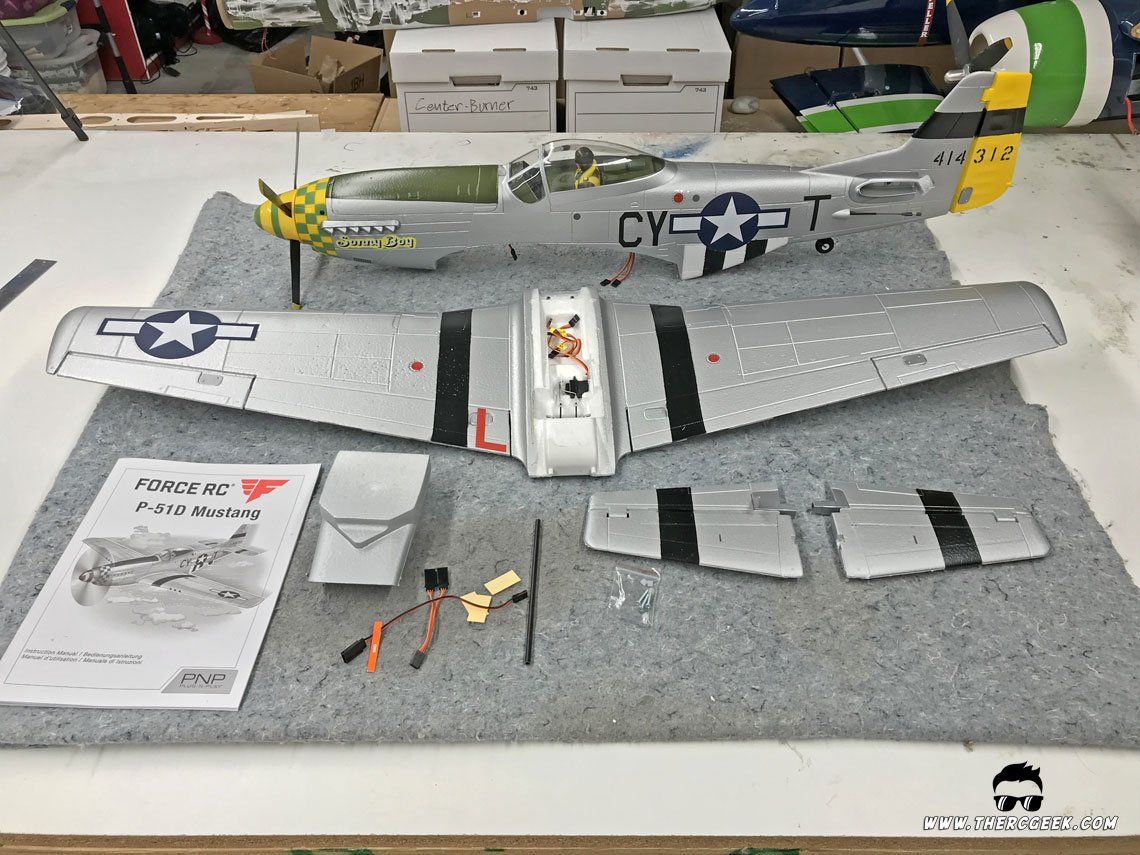
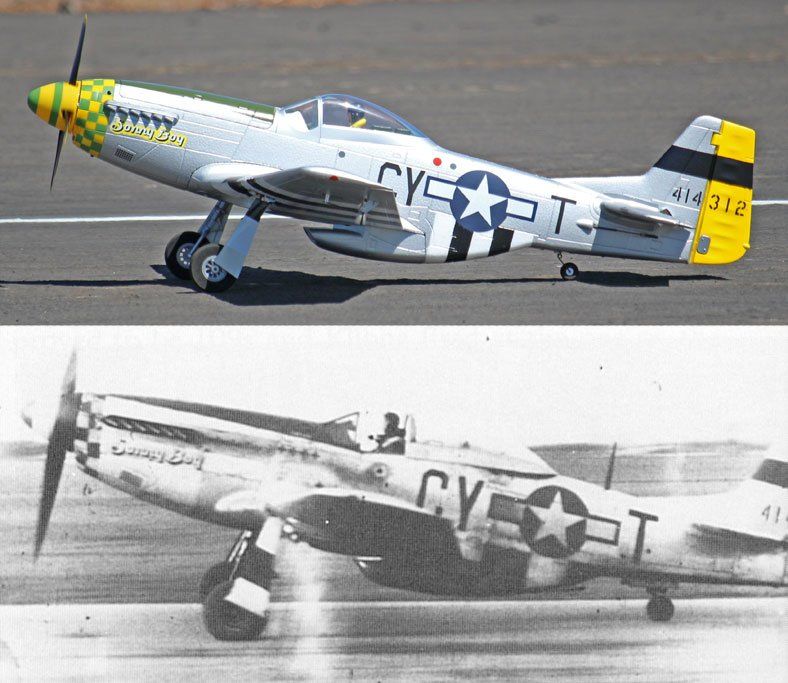
The P-51 truly is unmistakable in it's design and, needless to say, is quite popular in the RC warbird circles. Well, this week, we're featuring the Force RC P-51 Mustang available from Horizon Hobby. This is a kit that's been available for some time and at 1100 mm wingspan, is just a cute little model. The airplane carries the moniker of "Sonny Boy" with green and yellow checkboards on the nose which is pretty unique and different compared to the typical red and yellow checkers you see represented.
Doing a little research, I found that the full sized "Sonny Boy" was actually flown by Lt. Ted E. Hoffman as a part of the 343rd Fighter Squadron, 55th Fighter Group during World War II from 1944-1945. Lt Hoffman scored four air victories in the airplane in fact, though they're not actually represented on the model. Even so, I found it a great tribute to a notable airplane and pilot from WWII!
AIRCRAFT ASSEMBLY NOTES
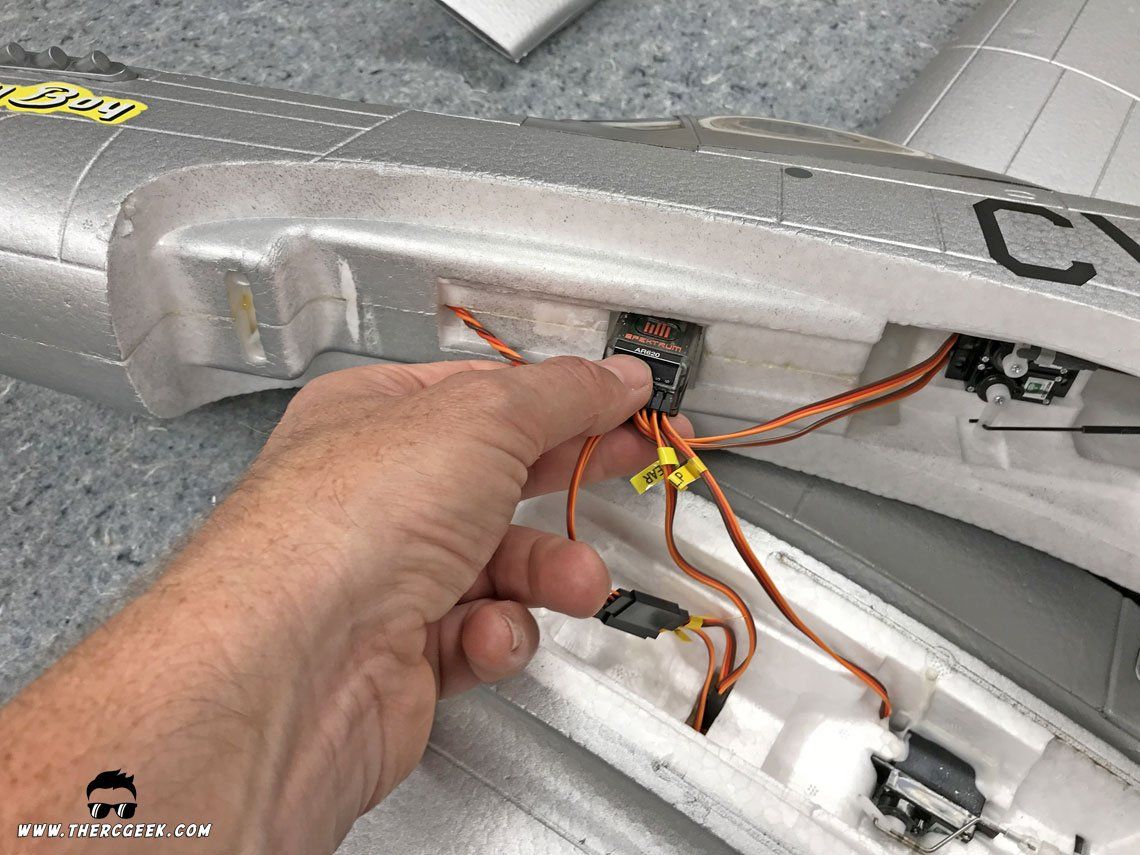
Tearing into the kit, there's primarily just 4 main pieces in assembling the airplane. The first item is to get the receiver installed into the fuselage and start connecting all of the servos to it. I wanted to try out one of the new antenna-less spektrum receivers, so picked up an AR620 which fit about perfectly into the cutout in the fuselage and worked fantastically! So, with everything hooked up, the wing was bolted on, the scale radiator scoop glued to the bottom and the horizontal tails added. What's interesting is that the tails are actually just held in place with tape here but it certainly works well enough (throwback to the old Parkzone T-28 tail install)! That really was the extent of the assembly, it was extremely quick and easy.
In terms of the assembled airplane, it looks good and the finish is pretty nice. It's a smaller model, but still has all those scale features that I'm looking for with the flaps and retracts. I like the paint scheme too as it looks good on the airplane and it represents a cool piece of WWII history. One of the cooler features I found was the model has a hidden hatch latch setup. No tape or magnets but rather a spring loaded latch that has a single button just in front of the canopy. Easy and effective and pretty sanitary to look at.
AIRCRAFT SETUP & CG
Setting up the airplane was quite simple. I always like to start with an existing program if I can and then go from there. So, I copied over another warbird program into a new model on the transmitter and then modified the rates as needed. The instructions recommended 100% and 70% for the dual rates which I found good with no reason to change. I had triple rates, so added an in between setting in the process. Through flying the airplane I found that the mid to max rates felt pretty good for my style of flying. Here's what I'm using for throws.
- Elevator - 1/2" with 15% expo
- Aileron - 3/8" with 10% Expo
- Rudder - 1" with 25% expo to desensitize the steering
- Flaps - 1/2"mid, 1-1/2" full with about a 6% down elevator mix which is only about 1/16" in physical elevator
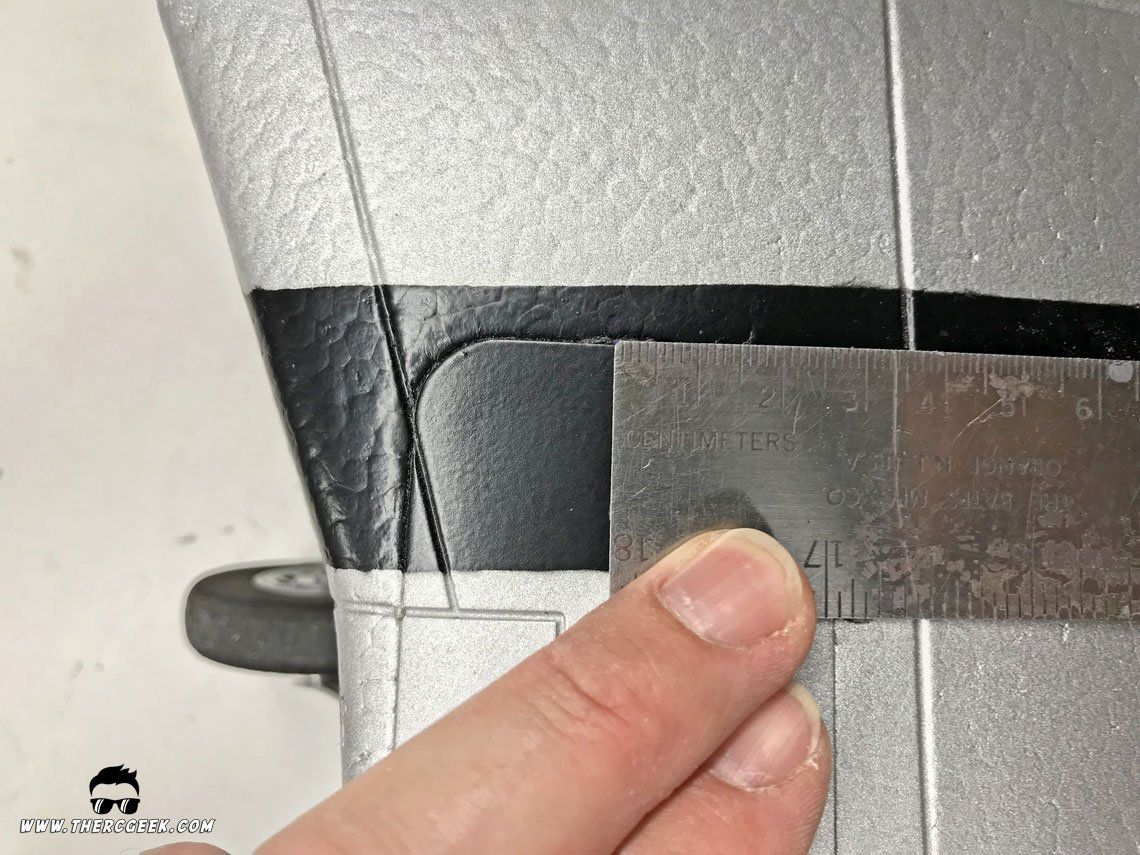
The CG location recommended in the manual is 37mm as measured from one of the main wing panel lines forward. It's hard to explain which one, so please reference the picture to the left. This is about perfect, but when you CG the airplane to be level when CGing it. I had CG'd the airplane slightly nose down for the first flight and certainly felt it being nose heavy in the air. I'm using a 35c 2200 mah pack and through flying the airplane, I ended up moving the battery almost to the rearmost location possible in the battery area and found with it there the airplane was much better for flying. This ended up being right at the 37mm mark, but with the airplane perfectly level when checking the CG.
FLYING THE FORCE RC P-51 MUSTANG
Now this little P-51 is just a sweetheart in the air. It flies extremely easily and light which really makes it forgiving but still has great maneuverability making it ideal for confined airspace operations. The airplane isn't necessarily fast, but it has good power. With the right battery in there, you should be able to just climb straight up at a fairly low airspeed. I didn't notice any bad habits in the air and found that in spite of the light weight and lack of AS3X that it handled winds quite well. With the flaps, landings are super nice and the airplane settles in really well. I love the flap down slow passes too, it'll just fly so slow over the runway. On a calm day, this thing will low pass all day long at just inches from the ground, it's pretty fun.
Here's a short flight video of the airplane in action. The winds were starting to pick up at this point during the day, but the airplane really handled it like a champ! As a whole, this Mustang is extremely forgiving and user friendly to fly.
FINAL THOUGHTS
There we have the Force RC P-51 Mustang. This is a great flying little airplane that looks good. It's size and characteristics make it ideal for smaller field operations as it's pretty easy to keep within a confined space. So, if you want to get a quick couple flights in and you have a park or open space nearby, this will certainly get the job done well think. Until next time, I'll see you at the field!

The RC Geek Blog is your place to learn about all aspects of the RC hobby. Learn to build, design, drive or fly that RC project you’ve always wanted to build, but have been intimidated to try. This blog is here to help you on your journey and provide tips and tricks as you go! My hope is to inspire builders both experienced and new! So, welcome, please look around, it’s an exciting beginning! I’m currently documenting my latest competition scale RC jet build, a Mark Frankel F4D Skyray, along with some other fun tips and videos. If you can’t find what you’re looking for on this front page, click on any of the categories to the right and it will show just posts related to those categories. Please feel free to add comments and/or contact me directly if you have questions, I’m here to help! And don’t forget to check out my YouTube Channel, I post new videos every week!
Subscribe To Our Blog Now


