The RC Geek Blog
By: Chris Wolfe
The B-24 Liberator...4 Engines = 4x the fun!
I had really hoped to get this together much sooner, but life sure had other plans I think. Anyhow, I thought it would be worthwhile to provide all of the supplemental information specific to the assembly of the VQ Warbirds B-24 Liberator especially since the Model Airplane News review article that this was assembled for has now come and gone. Disclaimer up front, this is a pretty extensive assembly write-up, but I figured it best to put it all in one place for anyone who finds this article. The goal is to provide all the information you need to get this great looking and flying airplane in the air with as much ease as possible.
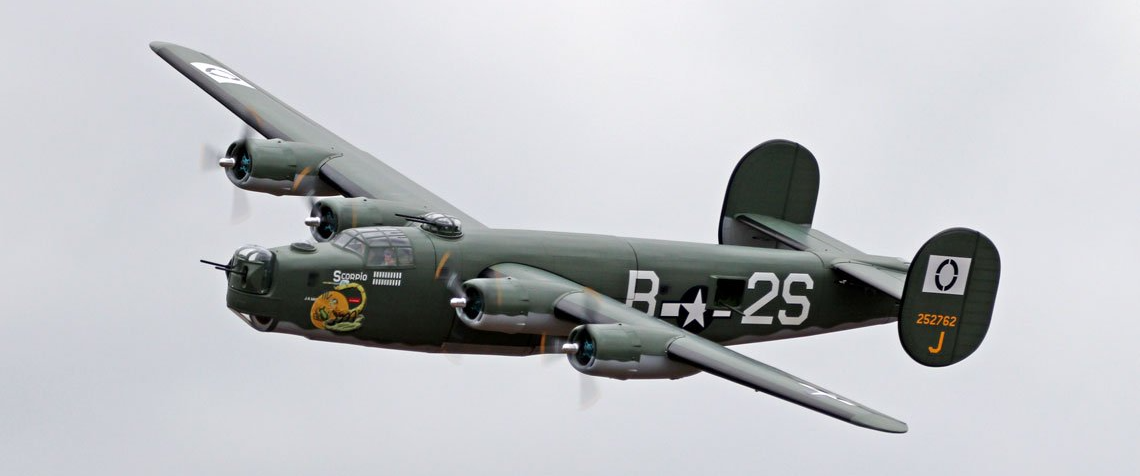
Now, as ARFs go, this B-24 Liberator definitely takes some work but you are rewarded with a beautiful looking and flying warbird that's a great size at 110" wingspan. As a whole, the assembly was fun and the model went together quite well. It's a 4 engine bomber, so the joy is getting to install anything propulsion related 4 times! Oh, and if you'd like a sneak peak at the flying, then here's my initial thoughts video that I did prior to the release of the MAN article. :) I'll be doing a separate flight review article and video here soon once our fields are open again.
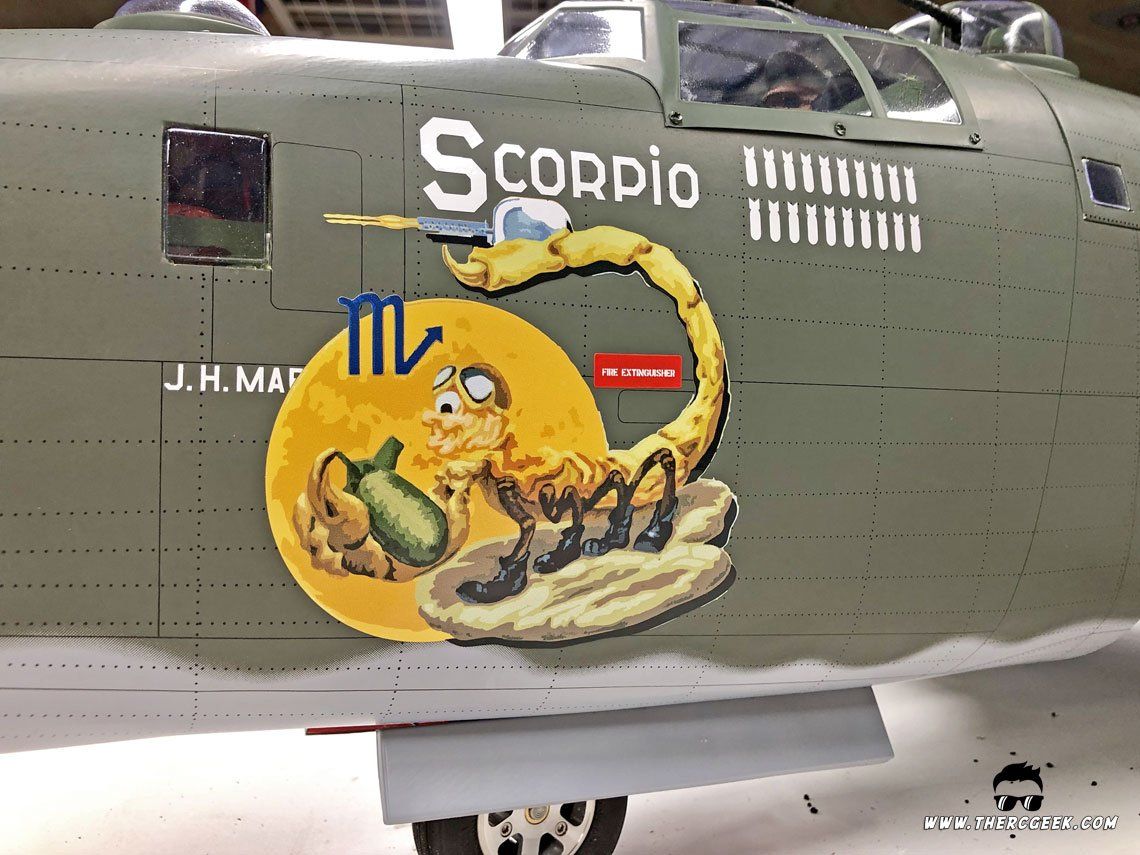
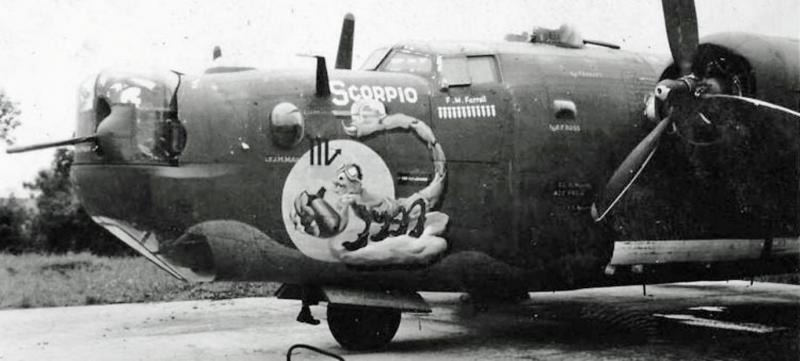
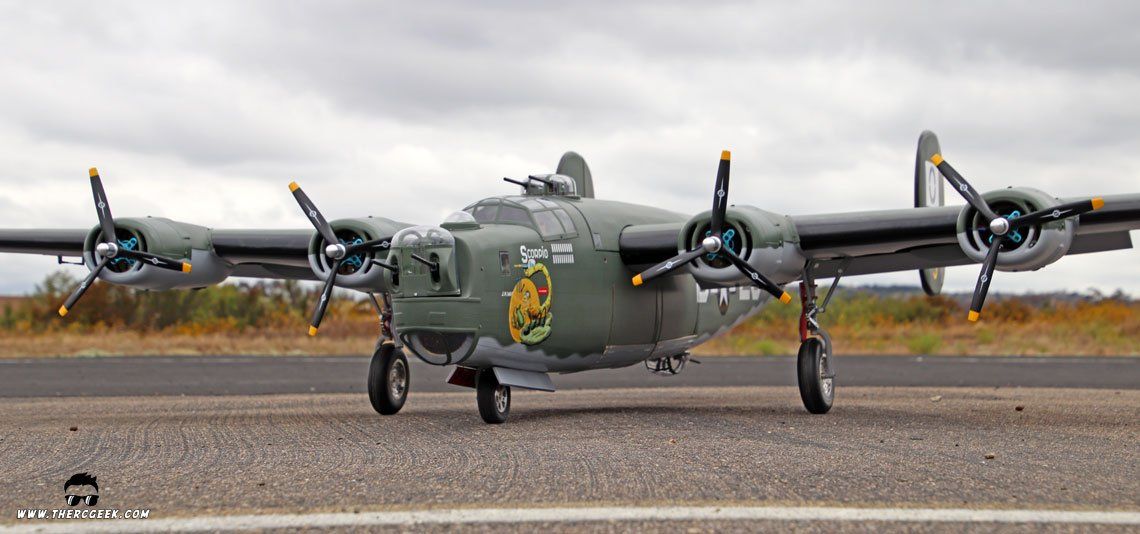
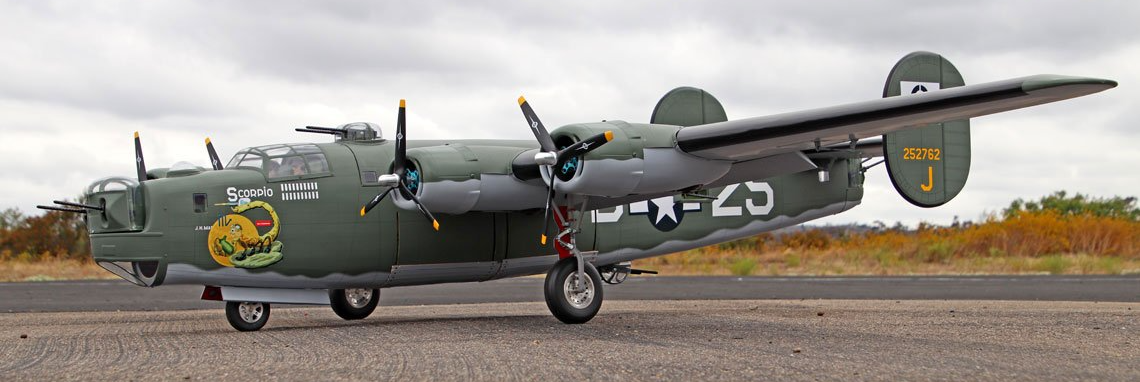
The airplane comes as a blank canvas without any kind of markings applied which provides some great opportunities for customization. Trying to find something out of the ordinary, I came across the B-24s from the 834th Bombardment Squadron, also known as the “Zodiacs Squadron.” The one that really drew my attention dawned the nose art of “Scorpio” having a caricature of a scorpion with an aviator helmet holding a bomb with a gun turret on its tail. CPL Phil Brinkman, a commercial artist assigned to the squadron, painted the nose art for each of the aircraft which were themed by the 12 signs of the zodiac. Interestingly, the "Scorpio" nose art was later adopted as the squadron logo.
I should note before we get started that if you've never assembled an ARF before, they are a great way to start out in getting an understanding of radio and propulsion system installation and setup if you've not done it before. The airframe is pre-built and the modeler then installs their own servos and propulsion system(s). Once you've done that once or twice, the next logical step is to just build your own model from plans or a kit of course! ;)
ASSEMBLY
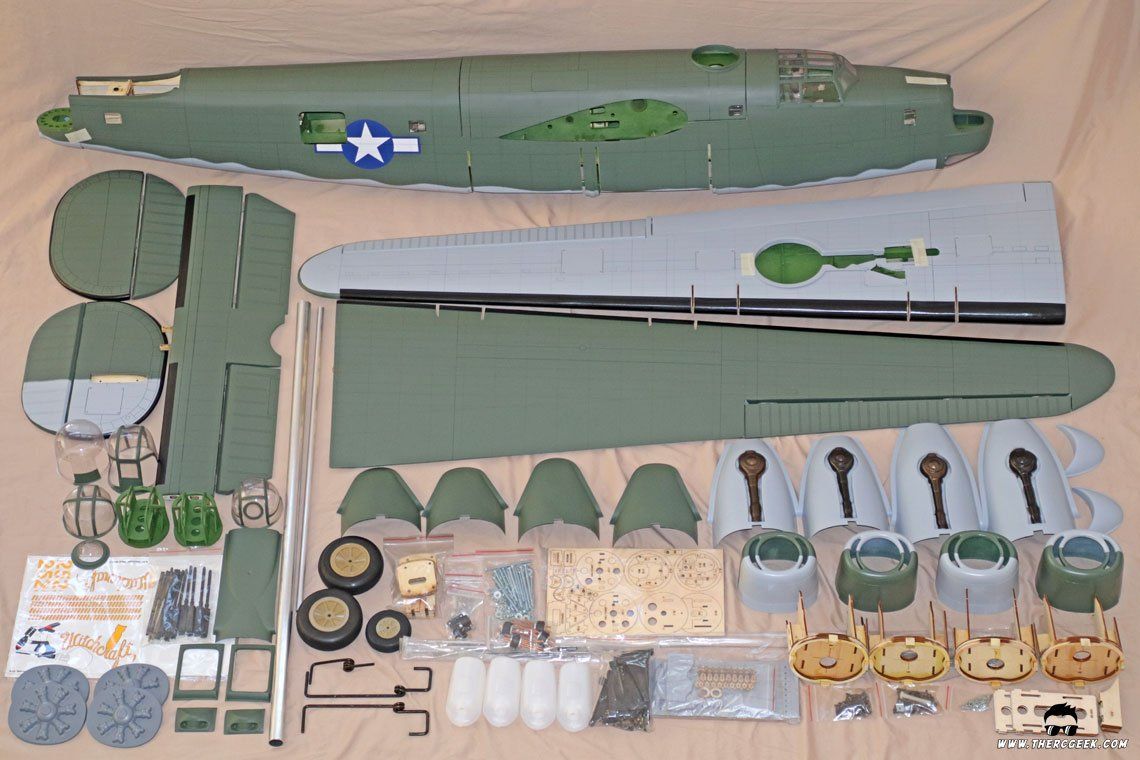
The model arrives well packed in a large, yet surprisingly compact box and of course, the first item of business is to empty that all out! Upon inspection, you are met with a nicely built and covered model of the B-24 Liberator. It's apparent as you unbox the airframe that great care was taken in building the model.
With it all unpacked and thoroughly drooled over, the first thing to tackle was gluing all of the hinges for the movable surfaces. This was done using wood glue to allow plenty of time to work with the parts before the glue sets. Once everything was glued, there was no holding back and the tails were started first. I should note, that when assembling an ARF, I generally prefer to use Du-Bro pushrod and clevis hardware vs the kit supplied hardware. This is mostly a personal preference as there's nothing wrong with the kit hardware, but the Du-Bro hardware is generally of better quality.
THE TAILS
Being small and easy to manage, the tails were the first item started. This consisted of installing the servos, control horns and push-rods onto the rudders. For servos Hitec D-85MGs were installed and the mounts did require a little custom fitting since the rails are pre-installed. This was handled pretty simply by cutting away with a razor saw what was needed to get the servos to fit within the mounts and align the servo arm with the opening in the mounting plate. Du-Bro 1/2A control horns with Du-Bro pushrods and clevises were used on each. The rudders screw onto each end of the horizontal tail, so once the servos were installed, the fins were attached to the horizontal stabilizer. VQ provides some additional touchup material, so I cut a couple circles with a sharpened brass tube to hide the screw openings. This completed the infamous "Tie Fighter Tail" of the B-24 Liberator…
THE WINGS
With the tails mostly complete, the wings were started next. The first thing completed was the aileron servo install and hook up. This was done in the exact same manner as the rudders. However, in this case, Hitec D-645MG servos were used and the servo mounts needed some slight shimming to get the control horn to align within the slot of the mounting plate.
Fowler Flaps
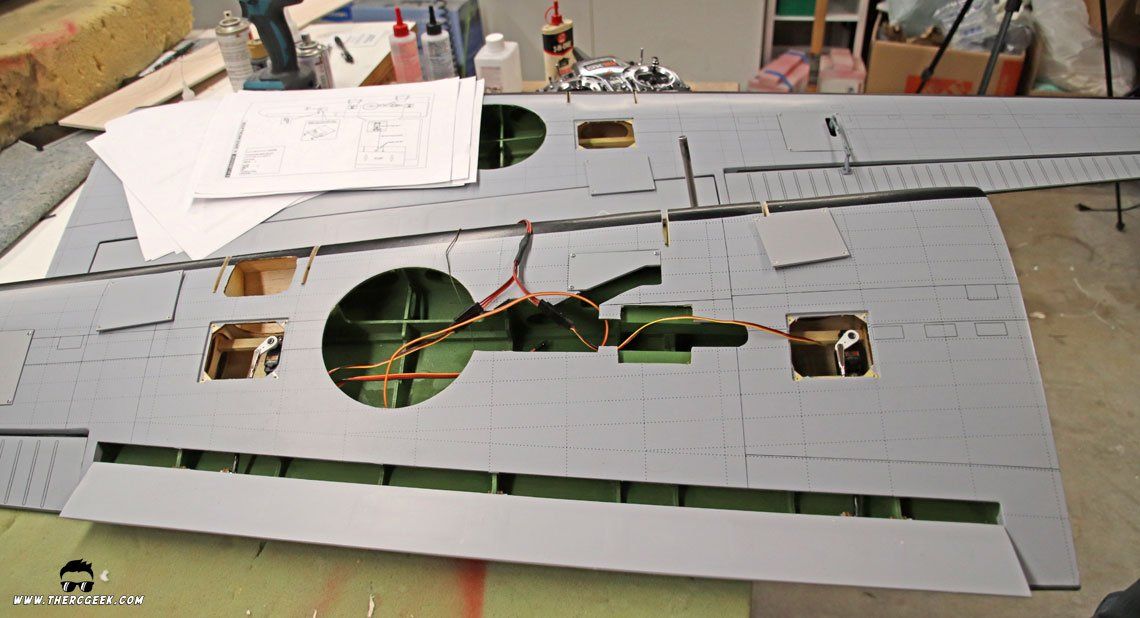
One nice feature of this kit is that it comes with a pre-assembled scale fowler flap system. They're actuated by two servos each (in this case, Hitec D-85MGs) and add camber and area just like the real B-24 Liberator. Vertical space is limited in the model in each of the servo areas, so once the servos were installed, I used the stock supplied pushrods and ball ends and used a Du-Bro solder link at the servo end. In this process, it is important to ensure that both servos are operating in sync and with similar geometry, so set them up congruently for each flap. Otherwise, if there's any kind of bias, the two servos will fight against each other and I can assure you there's a risk of burning up a servo (don’t' ask…I burned up 2 in the process…). The measure twice, cut once MO is best here and ensures that the flaps will work nice and smooth and reliably!
Propulsion Install
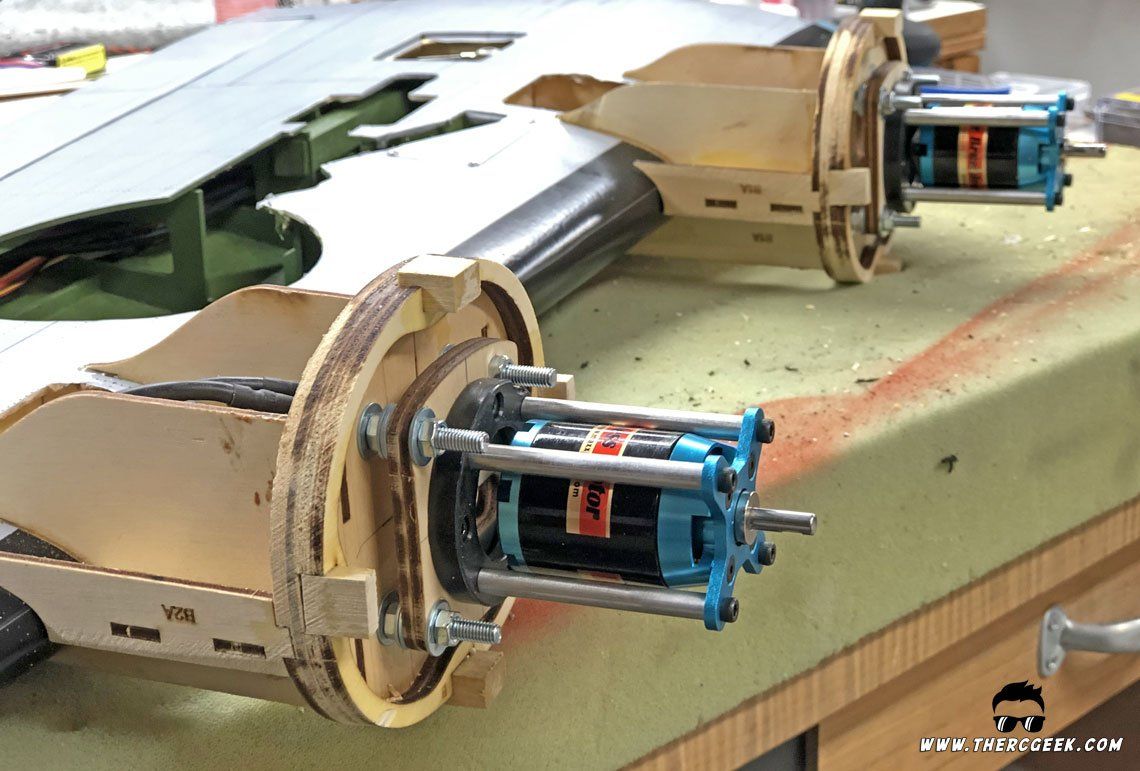
With the flaps install completed, it was on to the motor mounts and nacelles. The motor mounts come pre-assembled in the box, but they are glued into place in the wins by the modeler. It's important to note that there are left and right and inner and outer motor mounts, so take time to know where each one goes. They're not explicitly labeled, but the fit into each location is fairly unique (note the parts alignment to the wing leading edge sweep), so if you find that you're having to force the mount into place, it's likely not in the right location. Once this was all sorted, the motor mounts were epoxied into the wings using 30 minute epoxy to allow sufficient working time. A bead of epoxy was also placed along the glue joints on the firewalls as well for added assurance to the firewall glue joint integrity.
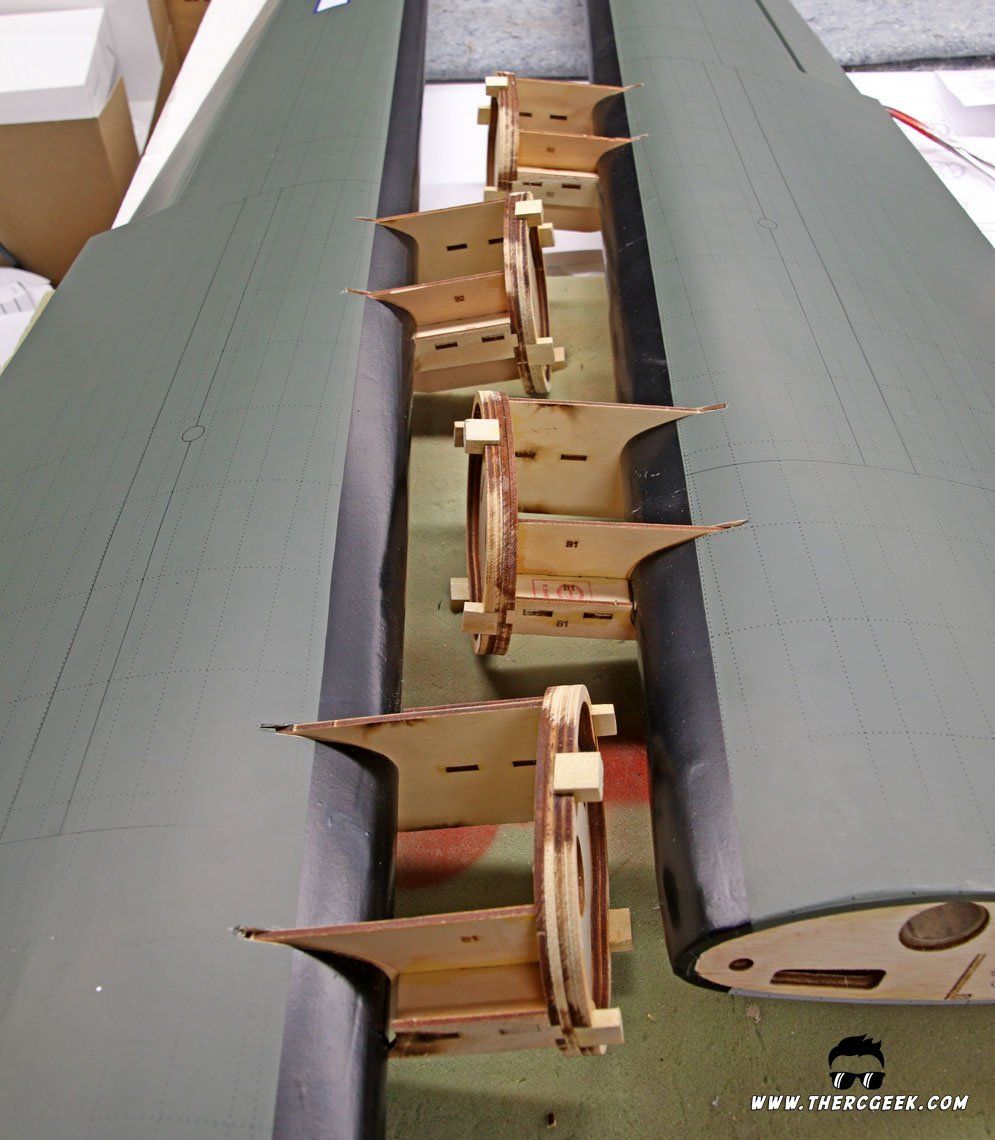
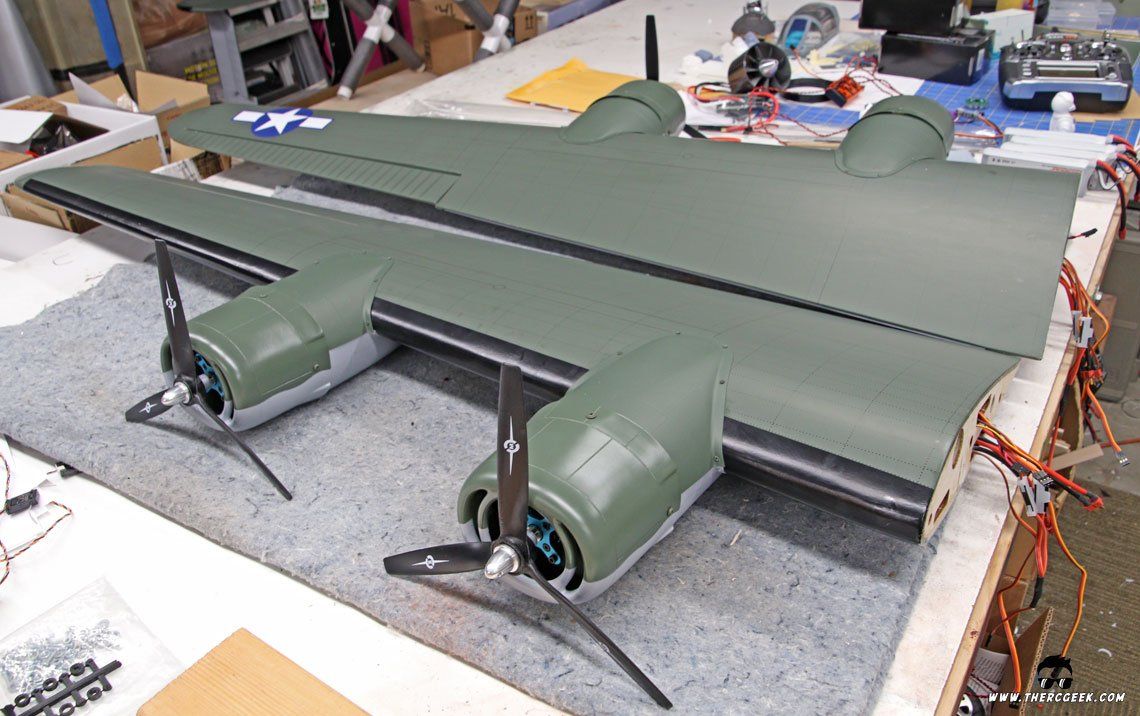
I decided straight away at the start of the project that this B-24 Liberator would be electric. This choice was for 2 reasons, 1) reliability and 2) to ensure the cowl integrity and avoid having to cut them up for engine cylinders. The motors being used are 4x HiMaxx HC3528-1000 motors and Castle Creations Talon 60 ESCs. Each of the HiMaxx motors come with their own motor mounts which were assembled first. From there, they were installed onto the kit provided firewalls.
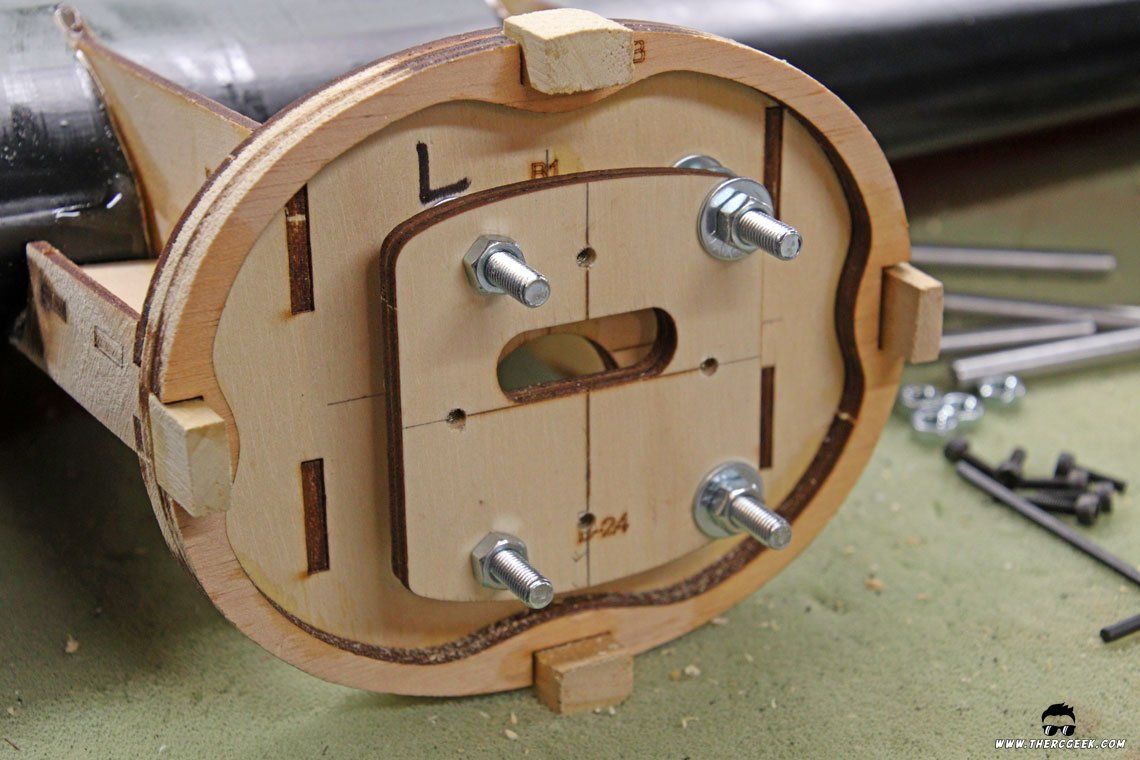
The motor mounts are installed onto the firewalls via 4 long bolts and a selection of washers and nuts which allows the motor installation to be adjustable to suit different motors. Based on the supplied HiMaxx motor mounts, very little spacing was necessary requiring only the mounting screw nuts and a couple washers to place the motors to the correct distance specified in the instructions. Once set, everything was tightened down for final installation.
With regards to the Talon 60 ESC installation, wire extensions were soldered in using some 12-13 guage wire so that the ESCs could be routed into the wing root. This was done to keep the battery leads short which is typically the desired choice when there is one to avoid voltage ripple that can occur as the batteries age.
To finish up the propulsion installation, the B-24 Liberator cowls and nacelle covers were installed using the supplied screws. The fit on all of the parts I found to be quite good. While installing the nacelles, take time to ensure that the props are centered appropriately and provide the desired spacing. It's definitely worth measuring twice and cutting once here! Note that the retracts were installed first (discussed below) prior to the nacelle completion.
Main Gear Retracts
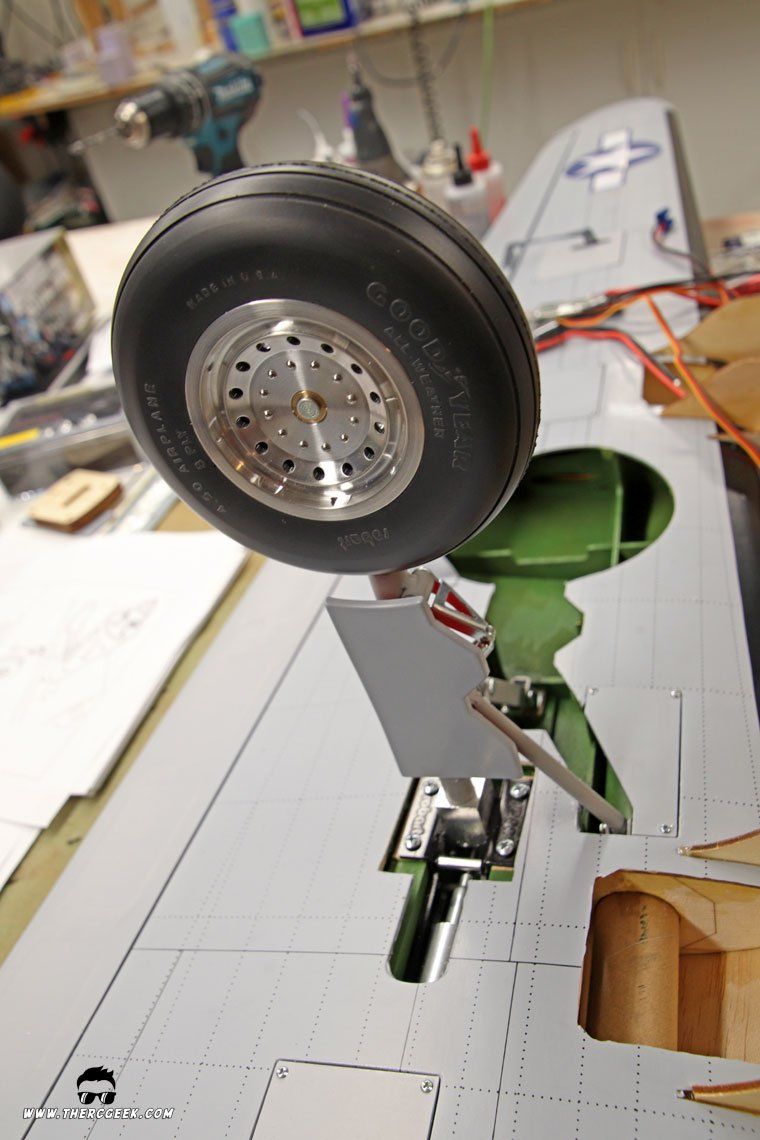
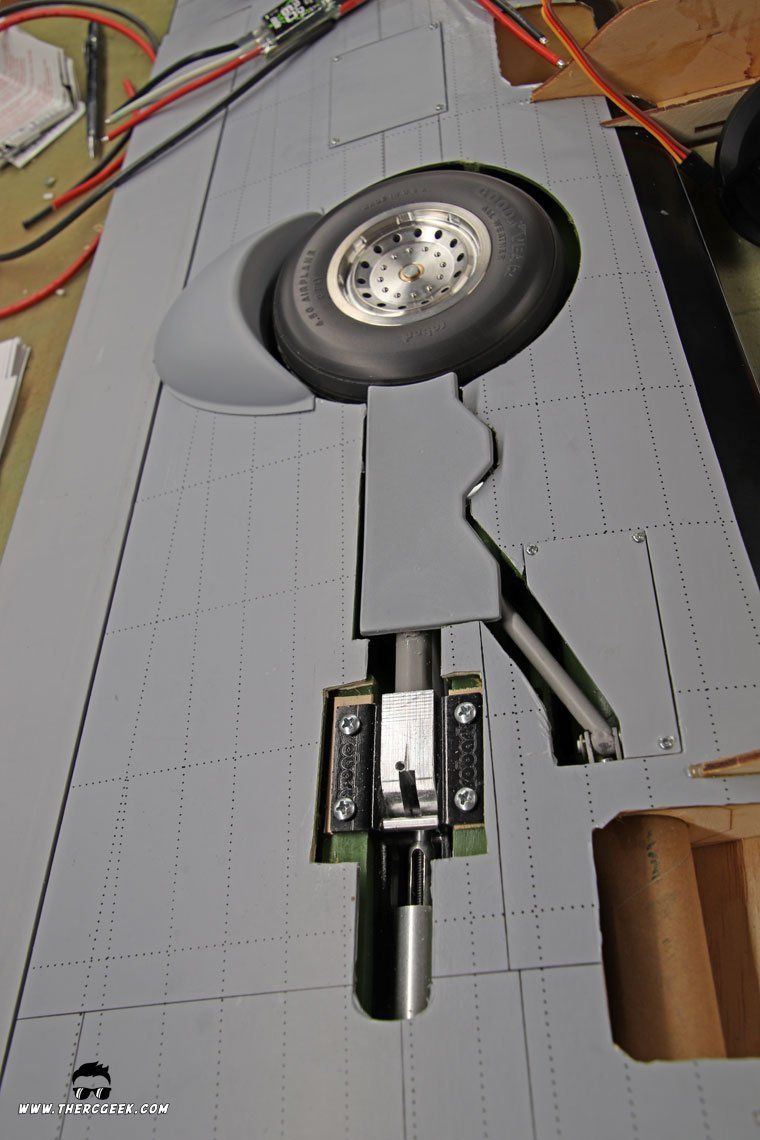
The recommended scale landing gear for the model are Robart electric retracts with scale wheels and struts which look great! Being electric certainly simplifies things, but the struts mimic the full scale with a 3point strut design. This looks great and is generally simple to install, but getting the geometry right is important so to ensure that, there are a couple things to keep in mind. The key to the installation I found for the main retracts is to set the folding side strut mount first in the wing using the supplied basswood blocks. These are glued centered to the retracts at the outboard most rib in the wheel well. Once in, the folding strut should be mounted in place as shown.
From there, mount the retract units themselves in the wing. When doing so, I recommend having the strut in the down and locked position and pull it inboard towards the root to set the folding brace as straight as possible to set the retract location. To finish up the install, simply mount the forward brace once the retracts are mounted. Proceeding in this manner helped things clear when retracted in the wheel well. Also note that I shimmed the retracts down 1/16" using some basswood to help clear the interfaces of everything when the gear are retracted.
To finish up the gear install, the last thing was the strut door which was simply hot glued in place. On the real airplane, the lower half is articulated to clear the tire, but I simply just scored and angled out the lower half. It sticks out when retracted, but it's not noticeable at all, especially since the gear retracts between the nacelles.
This completed the wing assembly which was a major milestone on the B-24 Liberator project as this is where a good amount of the work resides. Next up, finishing up the fuselage!
THE FUSELAGE
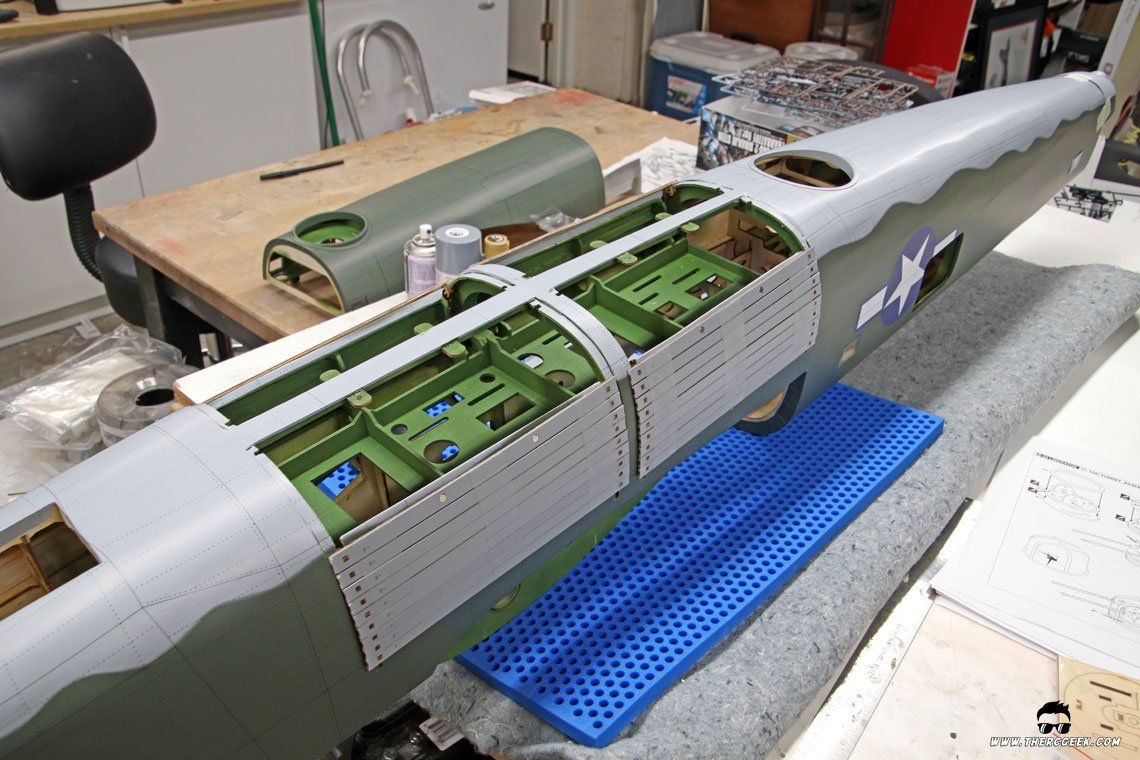
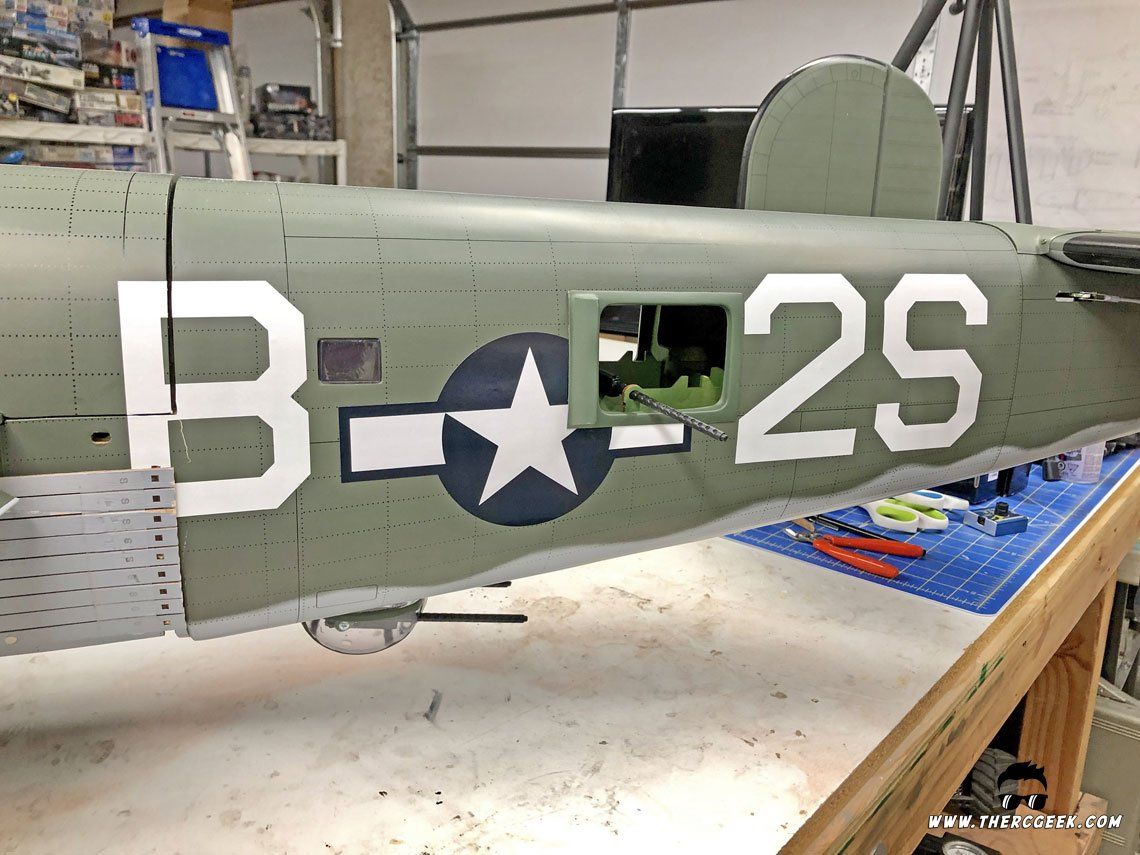
The first steps taken on the fuselage were to get the bomb bay doors installed. This was ultimately completed twice for a couple reasons. Initially I used the stock door slats and hinge tape to hold them together which was a mixed success. One of the difficulties was that the wood on one of the doors was warped pretty badly. However, actuation is left up to the modeler and I fully intend on actuating the bomb bay doors at some point. So, the warped slats worked for the initial flights, but long term would not work for when the B-24 Liberator bomb bay doors are eventually actuated.
So, to rectify the door situation, I drew up the door slats in CAD and had them laser cut out of 1/16" basswood. I set the door spacing with 1/16" basswood strips and used a piece of vinyl to hold them in place. The slats were then turned over and completely covered in vinyl (inside vinyl piece was then removed) and the vinyl was later airbrushed with Humbrol 127 once completed (not an exact match, but close enough). This provided a much better solution to the hinge tape I had previously used while also gave a more scale look as well since the doors are now full sealed. Additionally, the 1/16" basswood is thinner than the kit supplied balsa and so fit more flush in the grooves in the fuselage. Note that the kit supplied door slider parts were reused but in half the quantity. This did take a bit of extra time to get sorted out, but was definitely worth the result and will make actuating the doors easier when that time comes.
Turrets, turrets, and more turrets!
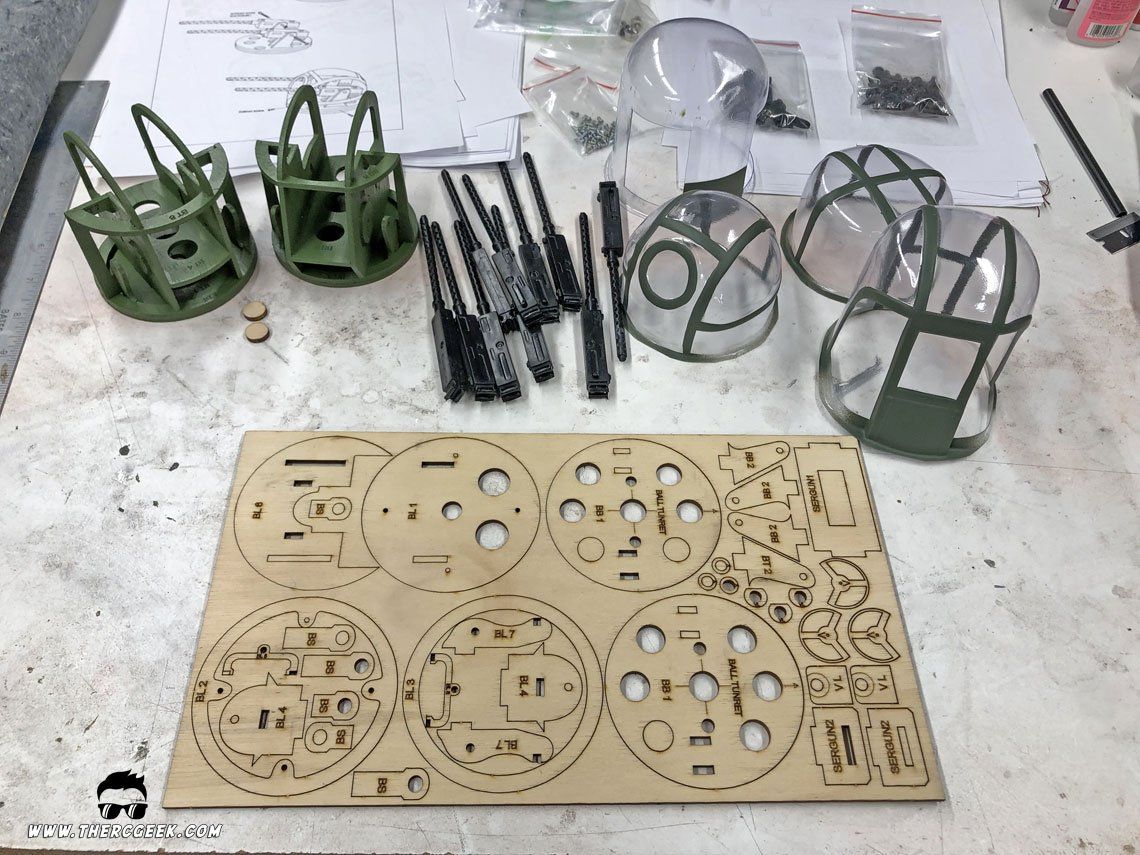
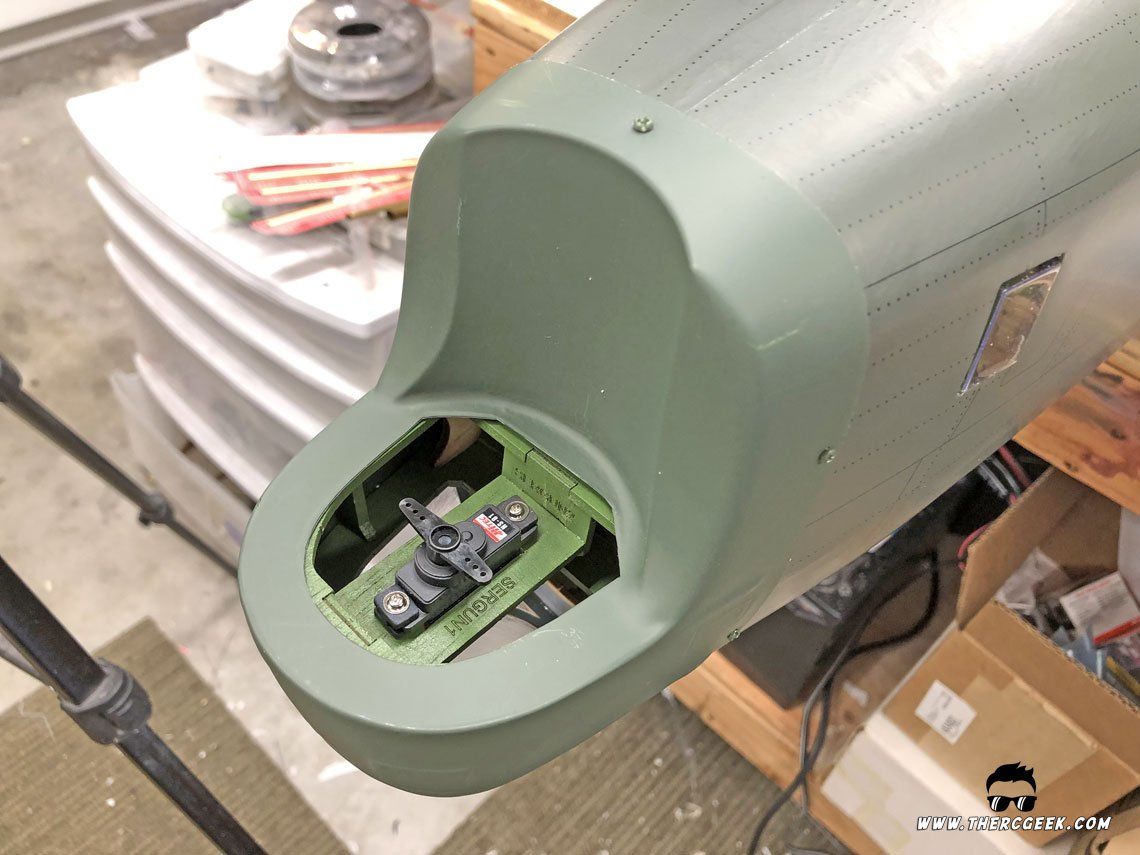
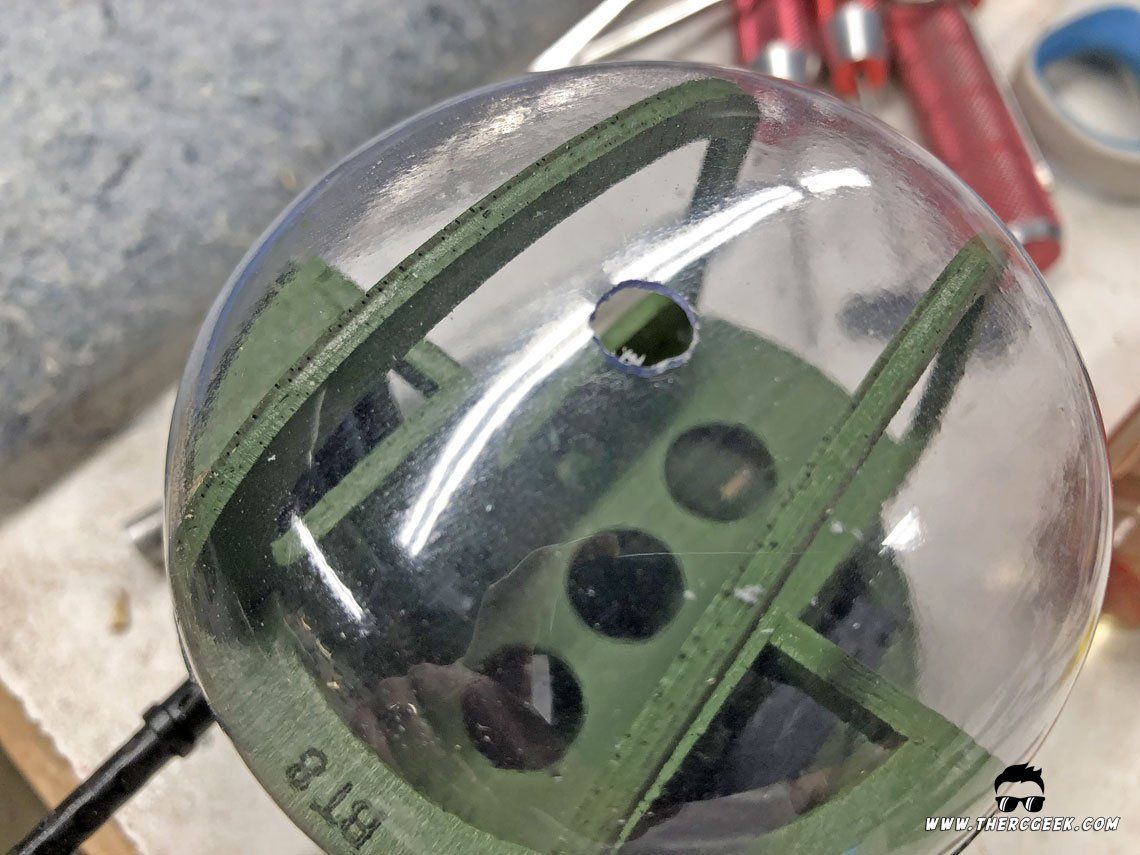
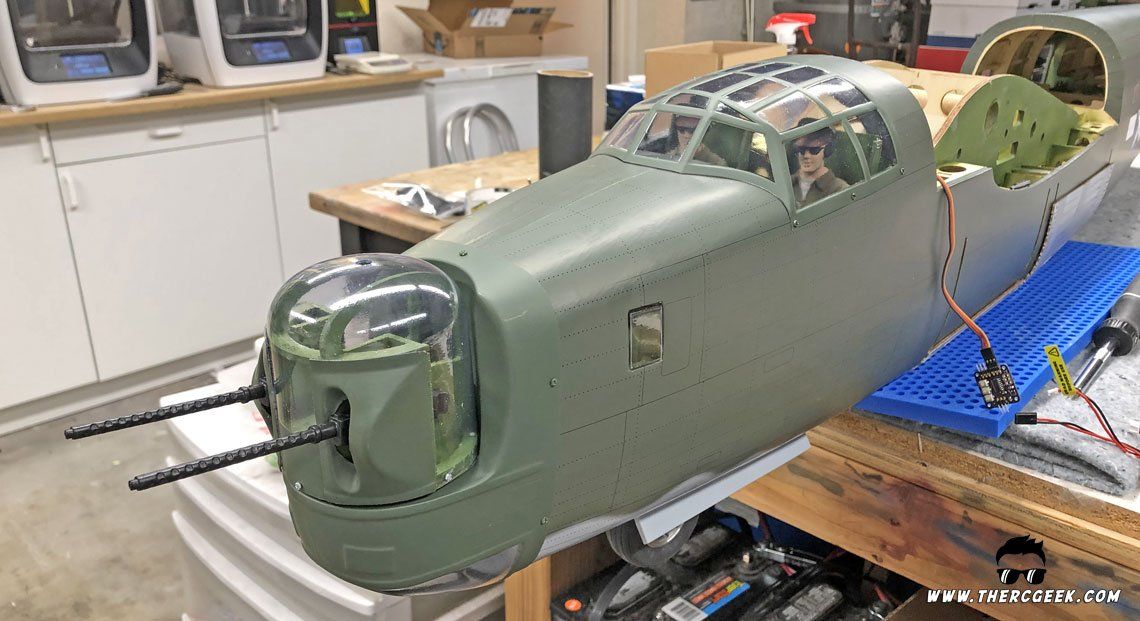
With the bomb bay doors in place, the 4 characteristic B-24 Liberator gun turrets were built per the instructions. They are all servo operated which is shown in the instructions and a great feature! The wood is laser cut to allow for servo actuation, so it's really quite simple. Now, to get them all working independently and randomly, with the help of a friend, I developed a Random Servo Motion Generator (RSMG) servo control board that moves two servos randomly independent of each other. It allows the option to be used passively (ideal for an articulated pilot) or actively by a switch which is ideal for the turrets since they would really only be operated in flight and not on the ground (works great operating in conjunction with the retract switch). The effect is pretty cool I have to say. Note that for the turrets where the servo arm could be accessed from inside, the servo arms were fastened to the servo and then the turret fastened from inside the model. Where there was no internal access (nose turret and belly turret), the servo arm was fastened to the turret and then a small hole was dremeled at the top of the turret. Then, once the turret was placed on the servo, the screw to hold the servo arm was tightened through the hole in the turret.
Nose Gear Retract
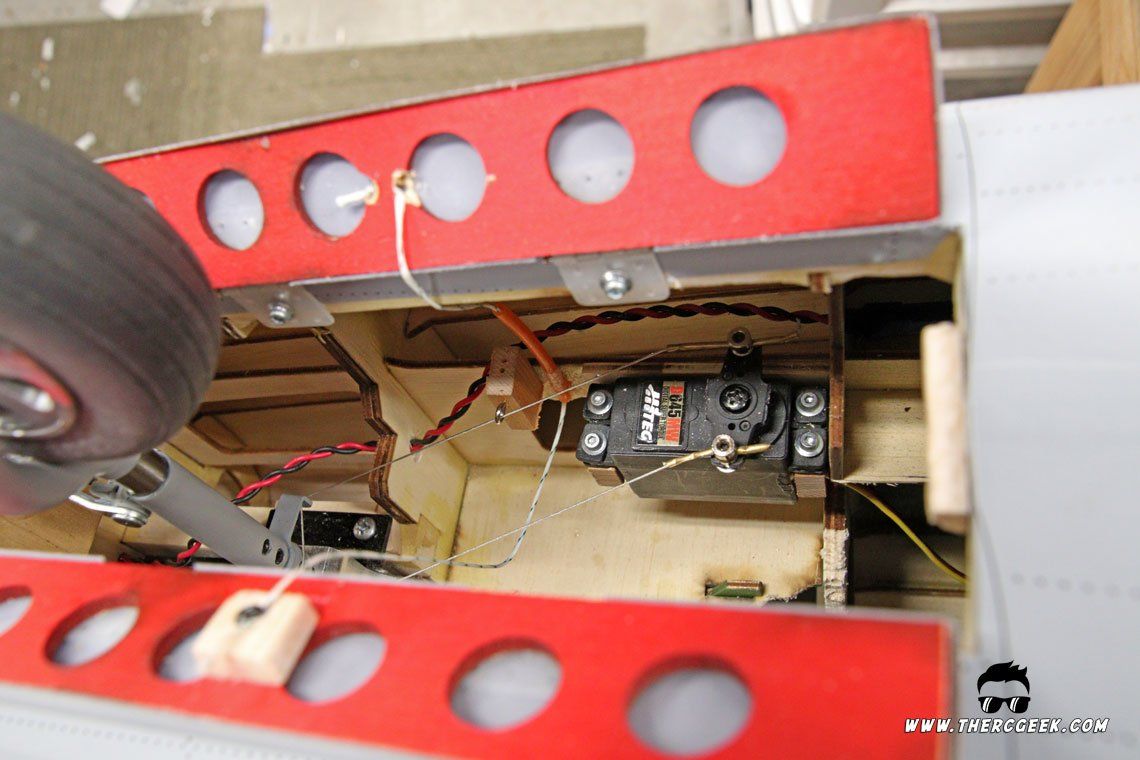
Next up, I turned to getting the nose gear retract installed and the nose gear doors working. The nose gear install was pretty straight forward as it fits right into the plywood mounts. It's electric, so that really simplifies the installation quite a bit. Note that I did actually shim the retract downward about 1/4" as the strut seemed a little short (even now with those shims the airplane still sits a little tail high).
With the nose gear in and working, the gear door hinges were installed into the doors and glued in place and then screwed in place in the wheel well. I used a spring and string setup to spring the doors open on the down side with the strut pulling the string on retraction to close the doors. The springs were bent out of .027 wire in the shape of an oblong "Z" and 50lb test fishing line was used for pulling the doors closed. A loop was wrapped around a screw and tightened on one end and then the other end was fed through the other door. With the gear retracted, the string was pulled tight to close the doors and then the string was glued in place on the loose end.
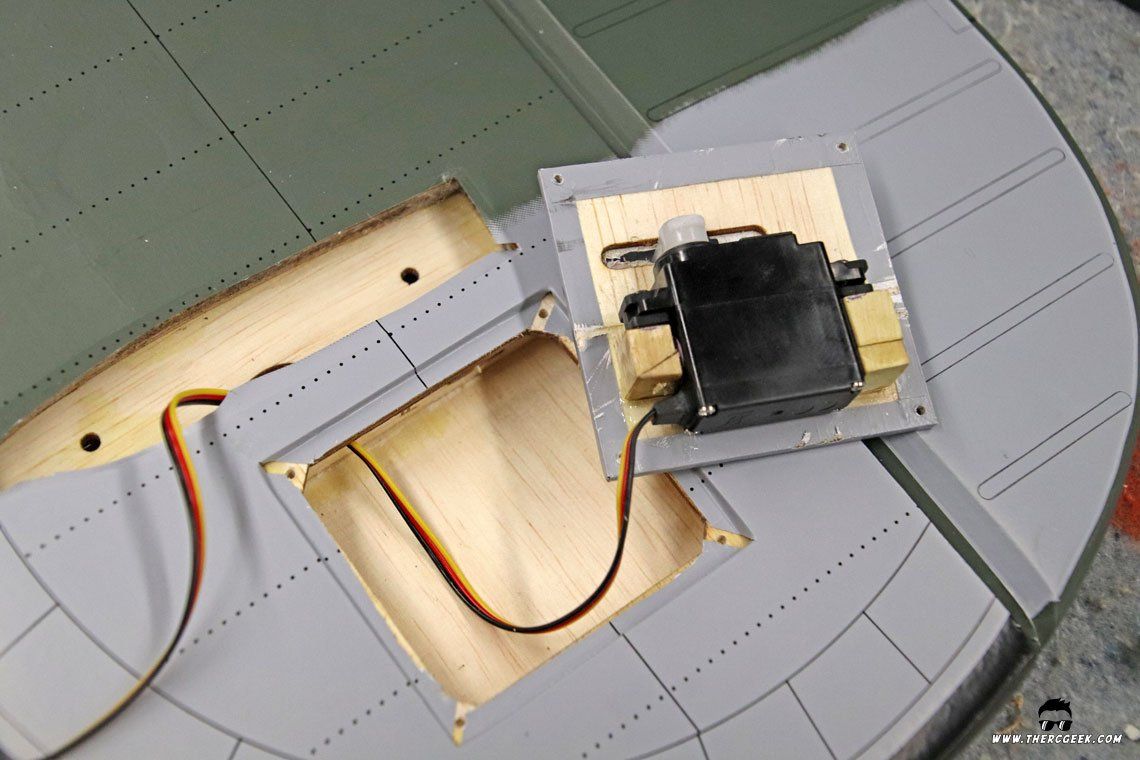
From there, the steering servo was installed and the steering setup. I built a tray so that the servo could be placed in the nose gear wheel well area and used a home made pull pull cable setup with some 1/16" brass tubing and some aircraft grade cable. The kit intent was to place the steering servo quite far back in the fuselage and knowing I was going to need weight up front, I chose to go this route instead.
PUTTING IT ALL TOGETHER
With the turrets built and the nose retract in and setup, the elevator servos were installed in the tail (Hitec D645's on each side). To finish up the assembly, the tail was fastened on per the instructions and the elevators were hooked up using Du-Bro 4-40 pushrods and qwick-links. The close it up, the top elevator cover fairing was fastened down.
From there, the turrets were all put in place on the fuselage. Some creativity had to be used to make the turrets removable based on how the servo arms are fastened to them. As noted previously, in some cases, I dremeled a hole in the top of the turret so that the servo arm screw could be fastened down while the turret was in place. In other cases, that wasn't necessary. Also, my RSMG board controls all of the turrets so that they function randomly in flight searching for targets! ;)
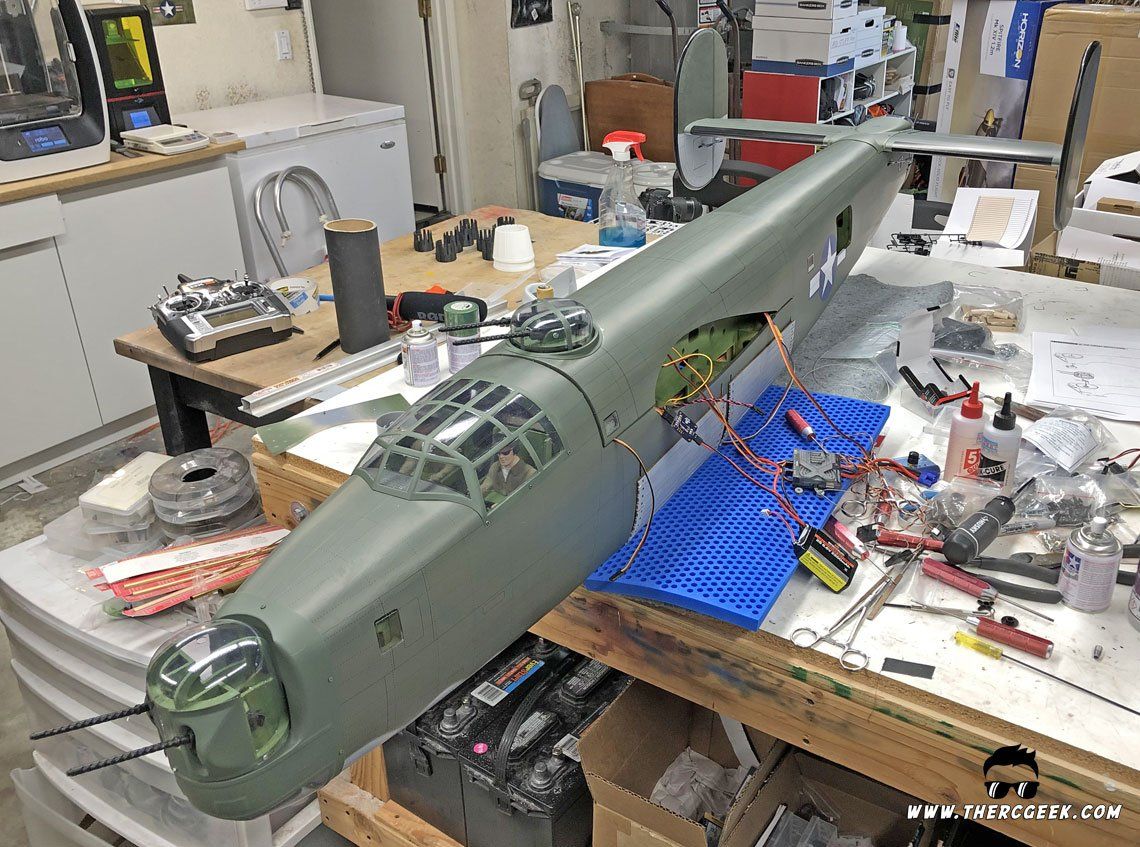
The wrap it all up, the receiver was final installed and the CG sorted out. The receiver is a 12 channel Spektrum AR12310T power safe receiver combined with 2x Spektrum 2s Life 2200mah receiver batteries. The motors are powered using 4x Roaring Top 35C 4s 4300 mah packs which when installed are all stacked in the forward fuselage area under the over-wing hatch. Lastly, the landing gear are powered with a separate 800mah 3s pack and Castle Creations BEC set at 9v. Needless to say, there's a lot that has to get packaged into the airplane and everything was placed as far forward as was practical while still accessible. This still required adding over 1lb in the nose to get the recommended CG (which ended up being perfect in flight) which was done by placing sticky back tire balance weights in the nose.
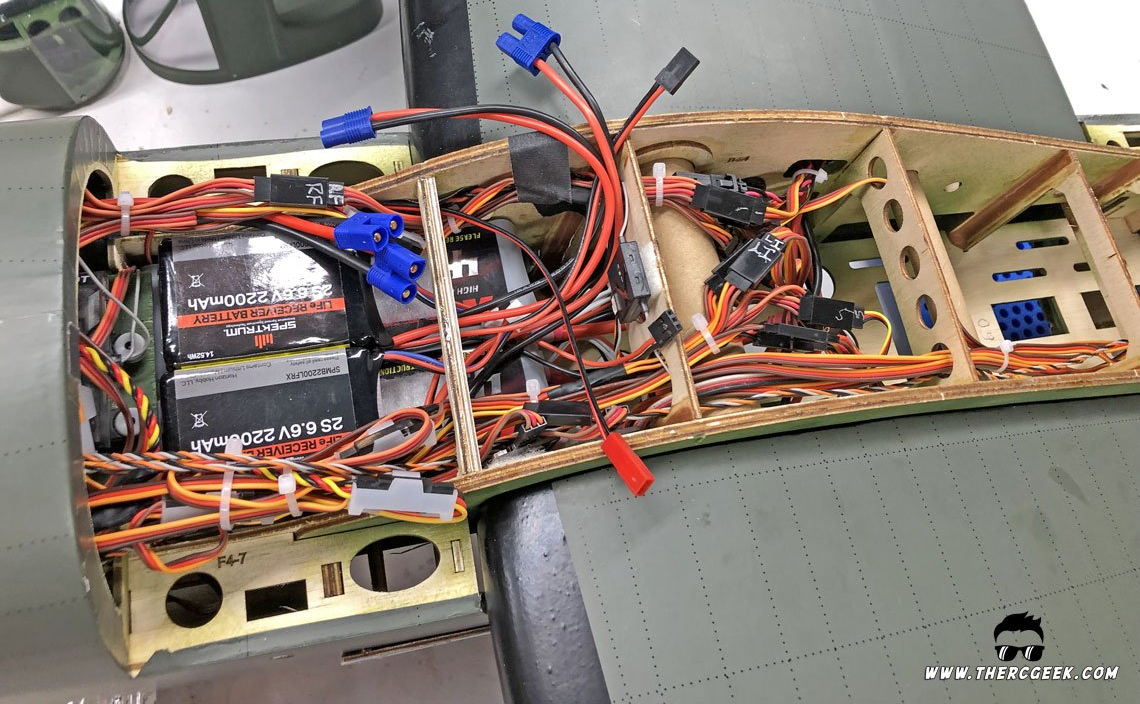
I will discuss this in full detail in my full flight review, but note that the model was completely setup per the instructions and the rates and as noted the CG felt about perfect as well. So I highly recommend starting there if you are setting up one of these awesome B-24 Liberators. I did end up adding a 25% rudder to aileron mix as the airplane does visibly show adverse yaw without it quite a bit.
EXTRA DETAILS & MARKINGS
The nice thing with this B-24 Liberator is that it comes as a blank canvas to which you can apply any type of markings. The model comes with "Witchcraft II" markings included, but I wanted something a little different and so opted for a paint scheme from the 834th Bombardment Squadron, also known as the “Zodiacs Squadron,” dawning the nose art of “Scorpio” as noted at the beginning of this article. The markings themselves came from Callie-Graphics and she did a fantastic job! I like to have her send a proof image so I can test the size of everything and she got it really close on the first shot. Just a couple small things required some scaling adjustments. Oh, and the kit Stars and Bars are a bit too royal blue in color, so I refreshed those in the process as well.
FINAL THOUGHTS
VQ Warbirds has put together a very nice representation of the B-24 Liberator. As complex as this airplane could be, they have done a great job at simplifying the assembly for the modeler keeping it straight forward and easy to manage. The parts fit is good and the scale details that are provided are really great and thought out. It is best to the take time to ensure everything is installed and operates well and reliably for best success on the maiden. As a whole, the assembly on this B-24 Liberator took me a couple months to get it fully completed working on it in the evenings a few hours at a time. I do wish that the bomb bay doors were functional out of the box, but I do understand the reasons that was left up to the modeler. I do plan to on doing a full refresh on those and making them actuate in the future and so will be putting together an article/video when I do. Soon, we'll talk through the radio setup, CG, and flying on this bird. Until then, I'll see you at the field!

The RC Geek Blog is your place to learn about all aspects of the RC hobby. Learn to build, design, drive or fly that RC project you’ve always wanted to build, but have been intimidated to try. This blog is here to help you on your journey and provide tips and tricks as you go! My hope is to inspire builders both experienced and new! So, welcome, please look around, it’s an exciting beginning! I’m currently documenting my latest competition scale RC jet build, a Mark Frankel F4D Skyray, along with some other fun tips and videos. If you can’t find what you’re looking for on this front page, click on any of the categories to the right and it will show just posts related to those categories. Please feel free to add comments and/or contact me directly if you have questions, I’m here to help! And don’t forget to check out my YouTube Channel, I post new videos every week!
Subscribe To Our Blog Now
